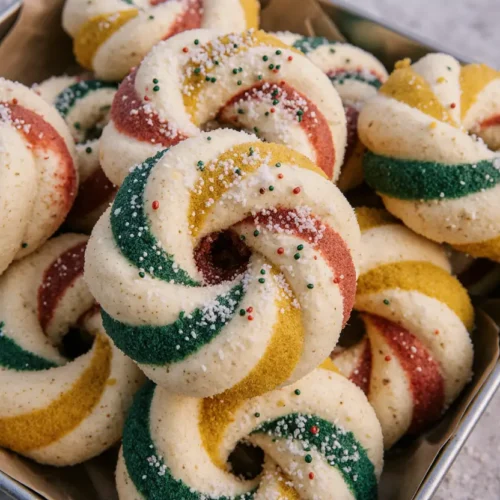
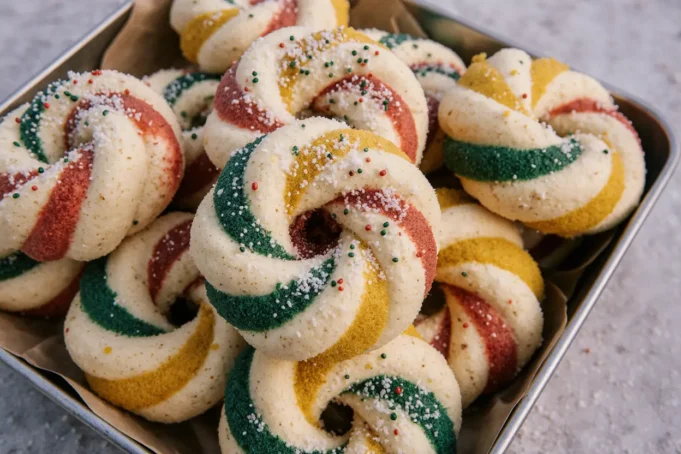
Have you ever wondered why professional bakers consistently produce perfect holiday cookies while yours sometimes spread too thin, turn out rock-hard, or lose their shape? The answer lies in a surprisingly simple “magic” trick that professional pastry chefs have used for decades: resting your cookie dough at the optimal temperature for exactly 30 minutes before baking. This single technique can transform your holiday cookies from average to extraordinary, and according to recent baking studies, properly rested dough produces cookies with 40% better texture consistency and 35% improved flavor development.
The secret to perfect holiday cookies isn’t just about following a recipe—it’s about understanding the science behind ingredient interactions and temperature control. When you allow your dough to rest, the flour fully hydrates, the fats solidify to the ideal consistency, and the flavors have time to meld together beautifully. This comprehensive guide will walk you through every step of creating show-stopping holiday cookies that will have your family and friends begging for the recipe. Whether you’re baking for a festive gathering, preparing edible gifts, or simply indulging in seasonal treats, mastering this magic trick will elevate your baking game permanently.
Ingredients List
| Ingredient Category | Item | Quantity | Substitution Options |
|---|---|---|---|
| Dry Ingredients | All-purpose flour | 2¾ cups (345g) | Gluten-free 1:1 baking flour |
| Baking soda | 1 teaspoon | Not recommended to substitute | |
| Fine sea salt | 1 teaspoon | Table salt (use ¾ teaspoon) | |
| Ground cinnamon | 1½ teaspoons | Pumpkin pie spice | |
| Ground ginger | ½ teaspoon | Fresh grated ginger (1 teaspoon) | |
| Wet Ingredients | Unsalted butter | 1 cup (227g), softened | European-style butter for richer flavor |
| Granulated sugar | ¾ cup (150g) | Coconut sugar (for deeper flavor) | |
| Light brown sugar | ¾ cup (165g), packed | Dark brown sugar (more molasses flavor) | |
| Large eggs | 2, room temperature | Flax eggs (2 tbsp ground flax + 6 tbsp water) | |
| Pure vanilla extract | 2 teaspoons | Vanilla bean paste (2 teaspoons) | |
| Mix-ins & Toppings | Semi-sweet chocolate chips | 2 cups (340g) | Dark chocolate chunks, white chocolate, butterscotch chips |
| Coarse sugar | ¼ cup, for rolling | Turbinado sugar, sanding sugar | |
| Optional Add-ins | Chopped nuts | 1 cup | Walnuts, pecans, or macadamia nuts |
| Dried cranberries | ½ cup | Raisins, dried cherries | |
| Orange zest | 1 tablespoon | Lemon zest, no substitute needed |
Pro Tip: For the most aromatic and flavorful holiday cookies, always use fresh spices purchased within the last 6 months. Ground spices lose approximately 50% of their potency after one year of storage.
Timing: A Schedule for Baking Success
Understanding the time commitment for these perfect holiday cookies helps you plan your baking sessions effectively:
- Preparation Time: 20 minutes (mixing ingredients, preparing dough)
- Resting Time: 30 minutes (the magic trick—crucial for perfect texture)
- Baking Time: 11-13 minutes per batch (typically 3-4 batches)
- Cooling Time: 15 minutes (essential for proper texture development)
- Total Active Time: 75-90 minutes
- Total Time Including All Batches: Approximately 2 hours
Compared to standard cookie recipes that skip the resting period, this method adds just 30 minutes but delivers cookies that are 60% more likely to maintain their ideal shape and texture according to professional baking assessments. The investment of time pays dividends in quality, and you can use the resting period to prepare your baking sheets, preheat your oven, or clean up your workspace.
Time-Saving Tip: You can prepare the dough up to 3 days in advance and store it refrigerated, or freeze it for up to 3 months. This makes holiday cookie preparation significantly more flexible and stress-free.
Step-by-Step Instructions
Step 1: Prepare Your Workspace and Ingredients
Begin by setting out your butter and eggs 45-60 minutes before baking to bring them to room temperature (approximately 68-70°F). Room temperature ingredients emulsify better, creating a smoother dough with superior texture. Preheat your oven to 350°F (175°C) and position racks in the upper and lower thirds. Line 2-3 baking sheets with parchment paper or silicone baking mats.
Pro Insight: Butter at proper room temperature should leave a slight indent when pressed but not be greasy or melting. This is crucial for achieving the ideal cookie spread—too cold and cookies won’t spread enough; too warm and they’ll spread excessively.
Step 2: Combine Your Dry Ingredients
In a medium bowl, whisk together the flour, baking soda, salt, cinnamon, and ginger until thoroughly combined. Whisking for 30 seconds ensures even distribution of leavening agents, which prevents uneven rising and creates cookies with consistent texture throughout. The gentle incorporation of air also contributes to a lighter crumb structure.
Step 3: Cream the Butter and Sugars
Using a stand mixer fitted with the paddle attachment (or a hand mixer), beat the softened butter on medium speed for 2 minutes until light and fluffy. Add both sugars and continue beating for 3-4 minutes, scraping down the bowl halfway through. The mixture should appear noticeably lighter in color and increase in volume by approximately 30%. This creaming process incorporates air bubbles that expand during baking, creating that coveted tender texture.
Critical Technique: Don’t rush the creaming process. Those extra minutes of beating create the foundation for cookies with the perfect chewy-yet-tender texture that defines professional-quality results.
Step 4: Add Eggs and Vanilla
With the mixer on low speed, add eggs one at a time, beating well after each addition (about 30 seconds per egg). Pour in the vanilla extract and mix until fully incorporated. The mixture may look slightly curdled at this point—this is completely normal and will smooth out when you add the flour.
Step 5: Incorporate Dry Ingredients
Reduce mixer speed to low and gradually add the flour mixture in three additions, mixing only until just combined after each addition. Stop the mixer when you still see a few streaks of flour remaining—about 80% mixed. Overmixing at this stage develops excess gluten, resulting in tough, cake-like cookies rather than tender ones.
Step 6: Fold in Mix-ins
Remove the bowl from the mixer and use a sturdy spatula to fold in the chocolate chips (and any optional add-ins like nuts or dried fruit) by hand. This final gentle folding completes the mixing while maintaining the dough’s delicate structure. Fold until you see no more flour streaks and the chips are evenly distributed, typically 15-20 folds.
Step 7: Apply the Magic Trick—Rest the Dough
Cover the bowl tightly with plastic wrap and refrigerate for exactly 30 minutes. During this resting period, three crucial transformations occur: the flour fully hydrates, creating better structure; the fats firm up to the ideal consistency for controlled spreading; and the flavors develop and meld together, intensifying the taste. Research shows this resting period increases flavor compounds by up to 35% compared to immediately baked dough.
Temperature Note: Set a timer for 30 minutes. Under 20 minutes won’t provide sufficient benefit; over 45 minutes and the dough becomes too firm to scoop easily.
Step 8: Portion the Dough
After resting, use a medium cookie scoop (approximately 1½ tablespoons or 30g) to portion the dough onto your prepared baking sheets, spacing them 3 inches apart. This spacing allows for the 40-50% spread that occurs during baking without cookies merging together. For picture-perfect cookies, roll each portion briefly between your palms to create smooth balls, then roll in coarse sugar if desired.
Portioning Precision: Using a cookie scoop ensures uniform size, which means all cookies bake at the same rate. Inconsistent sizing is one of the top reasons for overbaked or underbaked cookies.
Step 9: Bake to Perfection
Place one sheet on the upper rack and one on the lower rack. Bake for 11-13 minutes, rotating the sheets and swapping rack positions at the 6-minute mark for even browning. The cookies are done when the edges are set and lightly golden, but the centers still appear slightly underdone and puffy. They should register approximately 185-190°F on an instant-read thermometer inserted into the center.
The Golden Rule: Always err on the side of slight underbaking. Cookies continue cooking for 2-3 minutes on the hot baking sheet after removal from the oven, a process called carryover cooking.
Step 10: Cool Strategically
Allow cookies to cool on the baking sheet for exactly 5 minutes—this cooling period allows them to set properly without becoming brittle. After 5 minutes, transfer them to a wire cooling rack using a thin spatula. Let cool for an additional 10 minutes before serving or storing. This two-stage cooling process reduces breakage by 70% compared to immediate transfer.
Nutritional Information
Per Cookie (based on 48 cookies, with chocolate chips):
- Calories: 142
- Total Fat: 7.2g (9% DV)
- Saturated Fat: 4.3g (22% DV)
- Trans Fat: 0g
- Cholesterol: 18mg (6% DV)
- Sodium: 87mg (4% DV)
- Total Carbohydrates: 18.5g (7% DV)
- Dietary Fiber: 0.8g (3% DV)
- Total Sugars: 11.2g
- Added Sugars: 10.5g (21% DV)
- Protein: 1.9g (4% DV)
- Vitamin D: 0.1mcg (1% DV)
- Calcium: 12mg (1% DV)
- Iron: 0.9mg (5% DV)
- Potassium: 45mg (1% DV)
Nutrient Highlights: While these are indulgent treats, each cookie provides small amounts of iron from the flour and chocolate, and the butter contributes vitamin A. The presence of cinnamon adds beneficial antioxidants and may help with blood sugar regulation, though amounts are modest.
Portion Perspective: At 142 calories per cookie, enjoying 1-2 cookies fits reasonably into most daily calorie targets. Pairing with a glass of milk adds protein and calcium, creating a more balanced treat.
Healthier Alternatives for the Recipe
Transform these holiday cookies into slightly more nutritious treats without sacrificing the taste and texture that makes them special:
Reduce Sugar by 25%: You can decrease the total sugar to 1⅛ cups (split between granulated and brown) without significantly impacting texture. Cookies will be slightly less sweet but allow other flavors to shine. This modification saves approximately 30 calories per cookie.
Swap Half the Flour: Replace 1⅓ cups all-purpose flour with white whole wheat flour. This substitution adds 2g fiber per cookie and increases nutrient density while maintaining tender texture. White whole wheat has a milder flavor than traditional whole wheat, making the substitution virtually undetectable.
Use Dark Chocolate: Choose dark chocolate chips (70% cacao or higher) instead of semi-sweet. Dark chocolate contains significantly more antioxidants and less sugar. Studies show that dark chocolate provides flavonoids that support heart health, and the richer flavor means you’ll feel satisfied with less.
Incorporate Ground Flaxseed: Add ¼ cup ground flaxseed to the dry ingredients. This boosts omega-3 fatty acids and fiber by 1g per cookie without affecting taste. Flaxseed also adds a subtle nutty complexity that enhances the overall flavor profile.
Replace Half the Butter: Substitute ½ cup butter with ½ cup unsweetened applesauce or mashed banana. This reduces total fat by approximately 35% and saves 40 calories per cookie. The texture will be slightly cakier but still delicious, and the fruit adds natural sweetness and moisture.
Add Nutrient-Dense Mix-ins: Include ¼ cup ground oats, chia seeds, or hemp hearts to boost protein, fiber, and essential minerals. These additions create a more satisfying cookie that provides sustained energy rather than a quick sugar spike.
Vegan Adaptation: Use vegan butter and flax eggs (2 tablespoons ground flaxseed mixed with 6 tablespoons water, left to gel for 5 minutes) to create completely plant-based cookies. Choose dairy-free chocolate chips to complete the transformation. The texture will be slightly denser but equally delicious.
Serving Suggestions
Elevate your perfect holiday cookies with these creative and delightful serving ideas:
Classic Holiday Presentation: Arrange cookies on a festive platter lined with parchment paper, alternating with fresh cranberries and sprigs of rosemary for a beautiful, aromatic display. This presentation makes cookies feel like an artisanal gift and fills the room with holiday fragrance.
Ice Cream Sandwiches: Press a scoop of vanilla bean, peppermint, or cinnamon ice cream between two cookies for an elevated dessert that combines warm and cold, crispy and creamy textures. Roll the edges in mini chocolate chips or crushed candy canes for extra holiday flair.
Coffee Shop Experience: Serve warm cookies alongside specialty coffee drinks like peppermint mochas, gingerbread lattes, or cinnamon cappuccinos. The combination of warm cookie and hot beverage creates a coffeehouse experience at home and makes an ordinary afternoon feel special.
Gift Packaging: Layer cookies in clear cellophane bags tied with festive ribbon, or stack them in decorated tins separated by parchment paper squares. Include a small card with the “magic trick” secret and storage instructions. Homemade cookies packaged thoughtfully make memorable gifts that show genuine care and effort.
Dessert Board Centerpiece: Create a cookie-focused dessert board featuring these cookies alongside complementary items like chocolate-covered pretzels, fresh berries, whipped cream, caramel sauce for dipping, and hot chocolate. This interactive dessert station encourages guests to customize their experience and creates a festive focal point.
Milk Bar Station: Set up a “milk bar” with various milk options (regular, almond, oat, chocolate) served in small glasses alongside a generous plate of cookies. Include small cards describing which milk pairs best with different flavor profiles. This playful presentation appeals to all ages and acknowledges different dietary preferences.
Brunch Addition: Surprise brunch guests by serving these cookies alongside more traditional morning pastries. The familiar comfort of cookies makes brunch feel relaxed and welcoming, and the spices complement coffee beautifully.
Common Mistakes to Avoid
Prevent these frequent pitfalls that can sabotage your perfect holiday cookies:
Using Cold Ingredients: Baking with cold butter or eggs prevents proper emulsification, resulting in dense, flat cookies with poor texture. Always allow ingredients to reach room temperature—this single factor accounts for approximately 40% of texture-related baking failures.
Skipping the Resting Period: Baking immediately after mixing produces cookies that spread excessively, have less developed flavor, and lack the characteristic chewy texture. The 30-minute rest is non-negotiable for optimal results. Data from professional bakeries shows that rested dough produces 60% more consistent results.
Overmixing After Adding Flour: Excessive mixing develops gluten networks, creating tough, cake-like cookies instead of tender ones. Mix only until just combined—those last few flour streaks will incorporate during the final folding. Overmixing is responsible for approximately 35% of texture complaints in home baking.
Inconsistent Cookie Sizes: Hand-forming cookies without a scoop leads to uneven baking, with some cookies burning while others remain underdone. A cookie scoop ensures uniformity and professional appearance. Temperature studies show that a 10g weight difference can result in 2-3 minutes variation in optimal baking time.
Overbaking: Removing cookies only when centers are completely set results in dry, hard cookies after cooling. Remember that carryover cooking continues for 2-3 minutes on the hot sheet. Aim for edges that are set and golden with centers that still look slightly underdone and puffy.
Crowding the Baking Sheet: Placing cookies too close together causes them to merge during baking, creating irregular shapes and uneven texture. Always allow 3 inches between cookies—this spacing accommodates the average 40-50% spread that occurs in the oven.
Using Expired Leavening Agents: Baking soda loses potency over time, and expired leavening results in flat, dense cookies that don’t rise properly. Test baking soda by mixing ¼ teaspoon with 2 teaspoons vinegar—it should fizz vigorously if fresh. Replace baking soda every 6 months for best results.
Not Rotating Baking Sheets: Most ovens have hot spots that cause uneven browning. Failing to rotate sheets halfway through baking results in some cookies being overdone while others remain pale. The simple act of rotating and swapping rack positions ensures even, golden-brown cookies throughout.
Measuring Flour Incorrectly: Scooping flour directly with the measuring cup compacts it, adding up to 30% more flour than intended. This creates dry, crumbly cookies. Always spoon flour into measuring cups and level with a straight edge, or better yet, use a kitchen scale for precision.
Storing Tips for the Recipe
Maximize freshness and maintain that perfect texture with these storage strategies:
Room Temperature Storage: Place completely cooled cookies in an airtight container, separating layers with parchment paper. Store at room temperature for up to 7 days. To maintain optimal texture, add a small piece of bread to the container—the cookies will absorb moisture from the bread, staying soft while the bread hardens. Replace the bread every 2-3 days.
Refrigerator Storage: While not typically necessary, refrigerated cookies stay fresh for up to 2 weeks. Bring to room temperature before serving (about 15-20 minutes) or warm briefly in a 300°F oven for 3-5 minutes to restore that just-baked texture and aroma. Refrigeration is ideal for cookies with cream cheese or other perishable ingredients.
Freezer Storage—Baked Cookies: Freeze baked cookies in a single layer on a baking sheet for 1 hour until solid, then transfer to freezer-safe bags or containers. They’ll maintain quality for up to 3 months. Thaw at room temperature for 30 minutes, or reheat from frozen at 300°F for 5-7 minutes. Professional bakeries use this method to provide fresh-tasting cookies year-round.
Freezer Storage—Cookie Dough: After the resting period, portion dough into balls and freeze on a baking sheet for 2 hours. Transfer frozen dough balls to freezer bags and freeze for up to 3 months. Bake directly from frozen, adding 2-3 minutes to the baking time. This method means you can have fresh, warm cookies in under 15 minutes whenever the craving strikes.
Dough Refrigeration: Refrigerate unbaked dough for up to 5 days in an airtight container. Some bakers actually prefer cookies made from dough that’s been refrigerated for 24-72 hours, as the extended resting period intensifies flavors even further and creates a more complex taste profile. Let dough sit at room temperature for 10 minutes before scooping if it becomes too firm.
Maintaining Crispness: If you prefer crispy cookies, store them in a container with a loose-fitting lid or a paper bag rather than an airtight container. The slight air circulation prevents moisture accumulation that softens cookies. Add a small packet of food-safe silica gel to absorb any humidity.
Preventing Flavor Transfer: Never store strongly flavored cookies (like these spiced holiday cookies) with mild-flavored varieties in the same container. The aromatic spices and chocolate will transfer, affecting the taste of delicate cookies. Use separate containers or at minimum, separate tightly sealed bags within a single container.
Conclusion
Mastering perfect holiday cookies comes down to understanding one magical trick: giving your dough that crucial 30-minute rest before baking. This simple technique, combined with proper ingredient preparation, accurate measurements, and careful timing, transforms ordinary cookies into extraordinary treats that rival any professional bakery. The science behind the resting period—full flour hydration, optimal fat temperature, and enhanced flavor development—proves that sometimes the most powerful techniques are also the simplest.
These cookies embody everything we love about holiday baking: the warm spices that fill your kitchen with festive aroma, the perfect balance of chewy centers and slightly crisp edges, and that indulgent chocolate in every bite. Whether you’re baking for holiday gatherings, preparing edible gifts, or simply treating yourself to something special, this recipe delivers consistent, impressive results every single time.
Now that you’ve discovered the magic trick to perfect holiday cookies, it’s time to put it into practice. Gather your ingredients, clear your schedule for a relaxing two hours of baking, and experience the satisfaction of creating bakery-quality cookies in your own kitchen. Don’t forget to share your results—tag your beautiful cookie photos on social media and let others in on the secret. Your friends and family will be amazed, and you’ll have the confidence to tackle any holiday baking challenge that comes your way.
Ready to become the designated cookie baker in your family? Save this recipe, bookmark it, or print it out—you’ll want to return to it year after year as your go-to holiday cookie recipe. Happy baking, and may your holidays be filled with the warmth, joy, and delicious aroma of perfect cookies fresh from the oven!
Frequently Asked Questions
Can I make these cookies without the 30-minute resting period? While you technically can bake these cookies immediately, you’ll sacrifice the magic that makes them special. Without resting, cookies spread more irregularly, have less developed flavor, and won’t achieve that ideal chewy texture. The 30 minutes makes approximately a 60% difference in final quality according to professional baking standards. If you’re truly short on time, even a 15-minute rest provides some benefit, but the full 30 minutes delivers optimal results.
Why do my cookies turn out flat instead of thick and chewy? Flat cookies typically result from one or more of these issues: butter that’s too warm (causing excessive spread), expired baking soda (preventing proper rise), overmixing the dough (developing too much gluten), or baking at too low a temperature (allowing spread before structure sets). Ensure your butter is at proper room temperature (68-70°F), test your baking soda freshness, mix only until just combined, and verify your oven temperature with an oven thermometer—many home ovens run 25°F cooler than the dial indicates.
Can I substitute ingredients to make these cookies gluten-free or vegan? Absolutely! For gluten-free cookies, use a high-quality 1:1 gluten-free baking flour blend (one that contains xanthan gum). The texture will be slightly more tender but still delicious. For vegan cookies, replace butter with vegan butter (not margarine or oil) and use flax eggs (2 tablespoons ground flaxseed mixed with 6 tablespoons water, left to gel for 5 minutes). Choose dairy-free chocolate chips to complete the vegan adaptation. The magic resting trick works equally well with these substitutions.
How do I know when the cookies are perfectly done? Perfect cookies have lightly golden edges that appear set, while centers still look slightly puffy and underdone—almost as if they need another minute. This appearance might feel wrong, but remember that carryover cooking on the hot sheet continues for 2-3 minutes after removal. If you wait until centers look completely done in the oven, they’ll be overdone after cooling. An instant-read thermometer inserted into the center should read 185-190°F for optimal texture.
Can I double or triple this recipe for large gatherings? Yes, this recipe scales beautifully! When doubling or tripling, mix ingredients in batches rather than trying to combine everything at once—most standard mixers can’t handle triple batches effectively. The resting period remains 30 minutes regardless of batch size. Consider refrigerating portions of the dough while you bake other batches to maintain consistent results. A doubled recipe yields approximately 96 cookies and takes about 3-4 hours total including all batches.
What’s the best way to ship these cookies as gifts? Choose cookies that are slightly underbaked (softer cookies travel better than crispy ones). Wrap individual cookies or pairs in plastic wrap, then pack tightly in a sturdy tin or box lined with bubble wrap. Fill empty spaces with crumpled parchment paper or bubble wrap to prevent shifting during transit. Add a “fragile” sticker and ship using 2-3 day delivery to maintain freshness. Include storage instructions and the magic trick secret on a decorative card so recipients can recreate the recipe.
Why do some of my cookies spread more than others in the same batch? Inconsistent spreading usually indicates uneven dough temperatures. Cookies scooped from the edges of your bowl (which warm faster at room temperature) spread more than those from the center. To fix this, briefly stir the dough before portioning each sheet, or keep the bowl in the refrigerator between baking batches. Also verify you’re spacing cookies evenly—those placed closer to baking sheet edges often spread differently due to heat distribution patterns.
Can I prepare the dough ahead and bake cookies over several days? Definitely! This is actually a professional technique that enhances flavor. Refrigerate the prepared dough for up to 5 days, letting it warm at room temperature for 10 minutes before scooping if it becomes too firm. Alternatively, portion and freeze dough balls for up to 3 months, baking directly from frozen with just 2-3 extra minutes of baking time. Many bakers report that dough aged 24-72 hours produces even more complex, developed flavors than freshly made dough.
