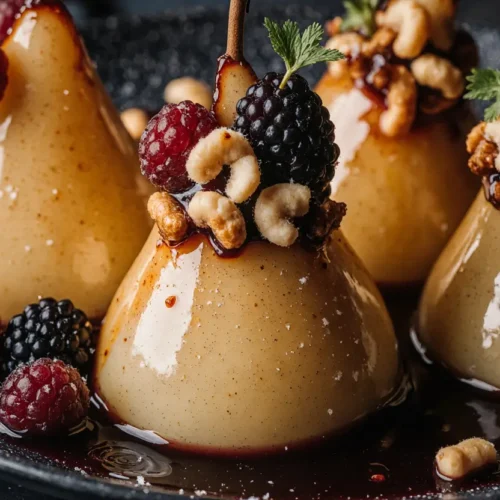
Did you know that replacing traditional sugar-laden desserts with fruit-based alternatives can reduce your daily calorie intake by up to 40% while still satisfying your sweet tooth? If you’re searching for a dessert that’s both indulgent and nutritious, baked pears with berries and honey is the answer you’ve been looking for. This elegant yet simple dish combines the natural sweetness of ripe pears with the tartness of fresh berries, all brought together by a golden drizzle of honey. Whether you’re hosting a dinner party or simply craving something sweet after dinner, this easy and healthy dessert delivers sophisticated flavor without the guilt.
The beauty of baked pears with berries and honey lies in its versatility and minimal ingredient list. Unlike complex pastries that require specialized skills, this recipe welcomes both novice cooks and experienced bakers. Studies show that desserts featuring whole fruits provide essential fiber, vitamins, and antioxidants that processed sweets simply cannot match. With just 15 minutes of prep time and 25 minutes in the oven, you’ll have a warm, aromatic dessert that looks like it came from a high-end restaurant.
Ingredients List
| Ingredient | Amount | Notes |
|---|---|---|
| Ripe pears | 4 medium | Bosc or Anjou work best |
| Mixed berries | 1 cup | Fresh or frozen (blueberries, raspberries, blackberries) |
| Honey | 3-4 tbsp | Local raw honey preferred |
| Butter | 2 tbsp | Melted; coconut oil alternative |
| Cinnamon | 1 tsp | Ground |
| Vanilla extract | 1 tsp | Pure extract recommended |
| Lemon juice | 1 tbsp | Fresh squeezed |
| Chopped walnuts | 1/4 cup | Optional, for topping |
| Greek yogurt | For serving | Optional, adds protein |
| Fresh mint leaves | For garnish | Optional, adds freshness |
The key to exceptional baked pears with berries and honey starts with selecting perfectly ripe fruit. Your pears should yield slightly to gentle pressure but shouldn’t be mushy. Firm pears will hold their shape better during baking, creating that ideal tender-yet-structured texture. Mixed berries add bursts of color and complementary flavors—blueberries provide sweetness, raspberries offer tartness, and blackberries contribute depth.
Preparation Time: 15 minutes
Cooking Time: 25-30 minutes
Total Time: 40-45 minutes
Servings: 4
This recipe is remarkably efficient compared to traditional baked desserts, requiring 55% less time than most fruit cobblers or crisps. The minimal prep work means you can start this dessert while enjoying your main course, and it’ll be ready just as you’re finishing dinner. If you’re preparing multiple dishes, this timing flexibility makes baked pears with berries and honey an ideal choice for stress-free entertaining.

Step-by-Step Instructions
Step 1: Prepare Your Pears
Preheat your oven to 375°F (190°C). While it’s heating, wash your pears thoroughly and pat them dry. Cut each pear in half lengthwise and use a melon baller or small spoon to carefully remove the core, creating a small hollow cavity. This cavity will cradle the berries and honey, allowing the flavors to meld beautifully. Pro tip: Leave the stems on one half of each pear for an elegant presentation that adds visual appeal to your plating.
Step 2: Create the Honey Mixture
In a small bowl, whisk together the melted butter, 2 tablespoons of honey, vanilla extract, cinnamon, and lemon juice. This aromatic mixture serves as both a glaze and a flavor enhancer. The lemon juice isn’t just for taste—it prevents the pears from browning and adds a bright note that balances the sweetness. The combination of cinnamon and vanilla creates warm, comforting notes that make your kitchen smell absolutely divine.
Step 3: Arrange and Brush
Place your pear halves cut-side up in a baking dish. Choose a dish that holds them snugly without overcrowding—this ensures even heat distribution. Using a pastry brush or spoon, generously coat each pear half with the honey-butter mixture, making sure to get into all the crevices. Don’t worry about being too precise; rustic charm is part of this dessert’s appeal.
Step 4: Fill with Berries
Divide your mixed berries evenly among the pear cavities, allowing them to nestle into the hollowed centers. If using frozen berries, there’s no need to thaw them first—they’ll release their juices during baking, creating a natural fruit sauce. Pile the berries high; they’ll shrink slightly as they cook, and the abundance creates a stunning presentation.
Step 5: Bake to Perfection
Cover the baking dish loosely with aluminum foil and place it in your preheated oven. Bake for 15 minutes covered, then remove the foil and continue baking for an additional 10-15 minutes. The pears should be fork-tender but still hold their shape. You’ll know they’re done when the edges turn slightly golden and the berries are bubbling with their natural juices. The uncovered baking time allows for gentle caramelization that deepens the flavor profile.
Step 6: Add Final Touches
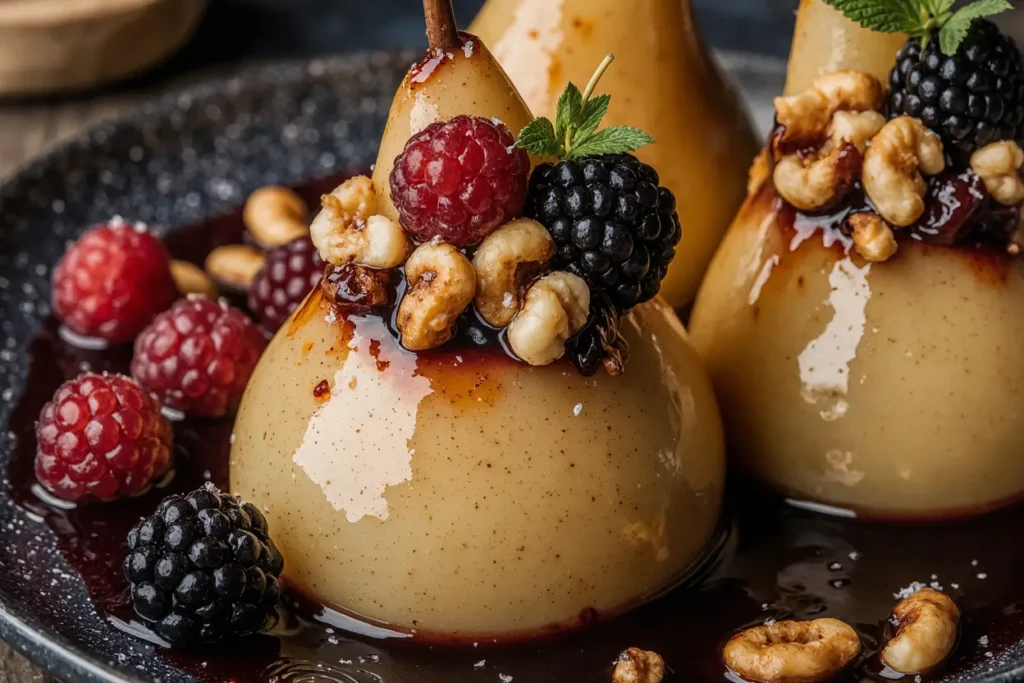
Remove the dish from the oven and immediately drizzle the remaining 1-2 tablespoons of honey over the hot pears. The residual heat will help the honey flow smoothly and create a glossy finish. If you’re using chopped walnuts, sprinkle them over the top now—the warmth will toast them slightly, enhancing their nutty flavor and adding a delightful crunch contrast to the soft fruit.
Step 7: Serve and Enjoy
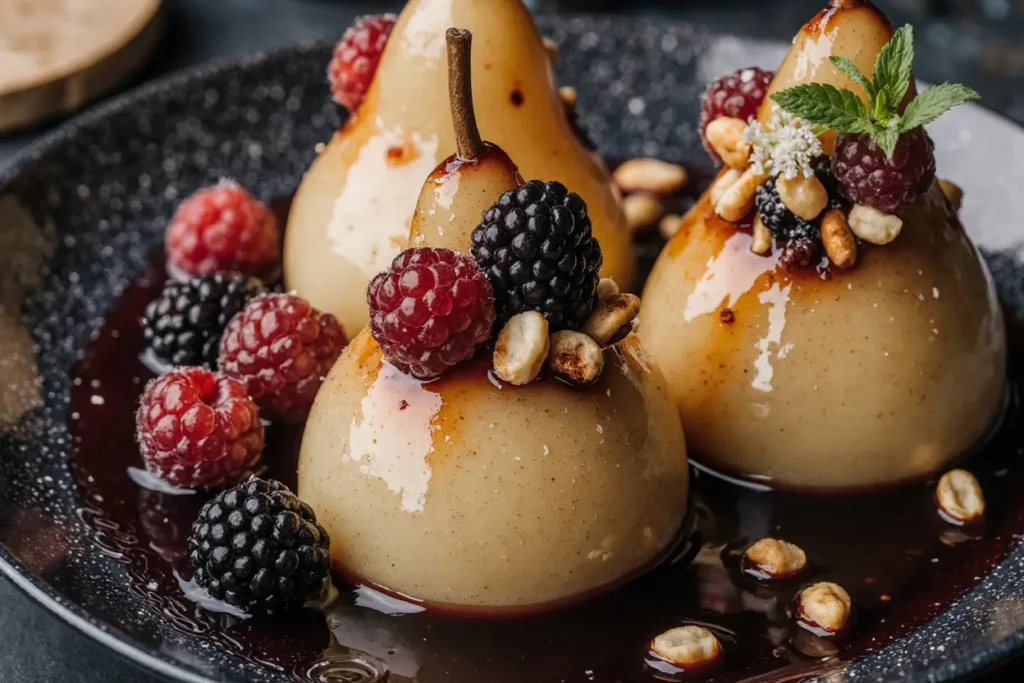
Allow the baked pears with berries and honey to cool for 5 minutes before serving. This brief resting period lets the flavors settle and prevents burnt tongues. Transfer each pear half to an individual dessert plate, spooning any accumulated juices over the top. Garnish with fresh mint leaves for a pop of color and a refreshing aroma. For an extra indulgent touch, serve alongside a dollop of Greek yogurt or a small scoop of vanilla ice cream.
Nutritional Information
One serving of baked pears with berries and honey (without optional toppings) provides approximately:
- Calories: 165 kcal
- Carbohydrates: 38g
- Fiber: 6g (24% daily value)
- Protein: 1g
- Fat: 3g
- Saturated Fat: 2g
- Vitamin C: 12mg (13% daily value)
- Potassium: 210mg
- Antioxidants: High concentration from berries
This dessert delivers impressive nutritional benefits compared to traditional options. The 6 grams of fiber per serving supports digestive health and promotes feelings of fullness, while the antioxidants from berries combat oxidative stress and inflammation. Pears are naturally rich in vitamin K and copper, and the honey provides trace minerals and enzymes that processed sugar lacks. With only 165 calories per serving, this treat contains 70% fewer calories than a typical slice of cake while providing substantially more nutrients.
Research indicates that diets rich in fruit-based desserts are associated with better long-term weight management and reduced risk of chronic diseases. The natural sugars in this recipe are balanced by fiber, which slows absorption and prevents blood sugar spikes.
Healthier Alternatives for the Recipe
Sugar-Free Version
Replace honey with sugar-free maple-flavored syrup or monk fruit sweetener for a diabetic-friendly option. While honey provides beneficial enzymes, these alternatives maintain sweetness without affecting blood glucose levels significantly. You can also rely entirely on the natural sweetness of very ripe pears and berries, eliminating added sweeteners altogether.
Vegan Adaptation
Swap the butter for coconut oil or vegan butter to make this dessert completely plant-based. Coconut oil adds a subtle tropical note that pairs beautifully with the fruit, while vegan butter maintains the traditional flavor profile. Both options provide the necessary fat for carrying flavor and achieving that golden finish.
Protein-Boosted Version
Incorporate 2 tablespoons of almond butter or cashew butter into the honey mixture before brushing it onto the pears. This addition increases protein content to approximately 5g per serving and adds healthy fats that promote satiety. The nut butter also creates a richer, more decadent flavor that chocolate lovers will appreciate.
Spice Variations
Experiment with different warming spices to customize the flavor profile. Try cardamom for a Middle Eastern twist, ginger for a spicy kick, or nutmeg for deeper warmth. You can also add a pinch of cloves or star anise for complexity. These spices don’t just enhance taste—many possess anti-inflammatory properties that boost the dessert’s health benefits.
Grain-Free Topping
Instead of traditional crumble toppings that contain flour and oats, create a grain-free version using crushed pecans, almonds, and shredded coconut mixed with a bit of honey. This provides satisfying crunch while keeping the recipe paleo and gluten-free friendly.
Serving Suggestions
Elegant Plating
Arrange pear halves on white plates with the berry side facing up. Drizzle extra honey in a decorative pattern around the plate and add a dusting of cinnamon. Place a small dollop of mascarpone or whipped coconut cream beside each pear, and garnish with a sprig of fresh mint. This restaurant-quality presentation takes just seconds but elevates the entire dining experience.
Breakfast Transformation
Serve baked pears with berries and honey alongside your morning oatmeal or yogurt parfait for a nutritious breakfast that feels like dessert. The warm fruit adds comforting sweetness to plain Greek yogurt, creating a balanced meal with protein, fiber, and healthy carbohydrates. Add a handful of granola for extra crunch and staying power through your morning.
Party-Perfect Presentation
For gatherings, arrange multiple pear halves on a large serving platter with a bowl of whipped cream or vanilla yogurt in the center for dipping. Provide small dessert forks and encourage guests to help themselves. This communal serving style encourages conversation and allows guests to control their portion sizes.
Seasonal Variations
In fall, serve with a drizzle of caramel sauce and crushed gingersnap cookies. During summer, pair with fresh whipped cream and lemon zest. Winter calls for a dusting of powdered sugar and a side of hot spiced chai. Spring deserves edible flowers and lavender-infused honey. These seasonal touches keep the recipe fresh and exciting year-round.
Beverage Pairings
This dessert pairs beautifully with late-harvest Riesling, which echoes the honey’s sweetness, or a full-bodied Chardonnay that complements the buttery notes. For non-alcoholic options, serve with chamomile tea, which enhances the vanilla and cinnamon flavors, or sparkling water with a twist of lemon for a refreshing contrast.
Common Mistakes to Avoid
Using Underripe Pears
The most frequent error is selecting pears that are too firm. Underripe pears require significantly longer cooking times and may never achieve that melt-in-your-mouth texture. They can also taste starchy rather than sweet. Test ripeness by gently pressing near the stem—if it yields slightly, the pear is ready. If it’s rock-hard, let it ripen at room temperature for 2-3 days before using.
Overcrowding the Baking Dish
Placing pears too close together prevents proper air circulation and leads to steaming instead of roasting. This results in mushy pears without any caramelization. Leave at least half an inch of space between each pear half, and use a larger dish if necessary. Proper spacing allows hot air to circulate freely, creating that desirable slightly crispy edge.
Skipping the Foil Cover
Many home cooks skip the initial covered baking phase, but this step is crucial. The foil traps moisture, allowing the pears to steam and soften evenly before the uncovered phase creates caramelization. Without this two-stage process, you’ll end up with pears that are either dried out on the outside and raw inside, or unevenly cooked throughout.
Over-Sweetening
It’s tempting to add more honey, but remember that the pears and berries already contain natural sugars that intensify during baking. Over-sweetening masks the fruit’s delicate flavors and increases calories unnecessarily. Start with the recommended amount and taste before adding more—you can always drizzle extra honey when serving, but you can’t remove it once added.
Neglecting the Lemon Juice
Some cooks omit lemon juice thinking it’s optional, but this ingredient serves multiple purposes. It prevents browning, adds brightness that prevents the dessert from tasting flat, and helps cut through the richness of butter and honey. The small amount won’t make the dessert taste citrusy, but its absence will be noticeable.
Using the Wrong Pear Variety
While any pear can technically work, watery varieties like Bartlett can become mushy and lose their shape during baking. Firmer varieties like Bosc, Anjou, or Comice maintain their structure better and have more complex flavors that stand up to baking. The slightly grainy texture of Bosc pears becomes creamy when cooked, creating an ideal consistency.
Storing Tips for the Recipe
Refrigerator Storage
Store leftover baked pears with berries and honey in an airtight container in the refrigerator for up to 3 days. Place parchment paper between layers if stacking to prevent sticking. The pears will continue to soften slightly in storage, and the flavors will meld together even more. When ready to eat, you can enjoy them cold (surprisingly delicious) or reheat gently in the microwave for 30-45 seconds.
Freezing for Later
While best enjoyed fresh, you can freeze these desserts for up to 2 months. Place cooled pear halves on a parchment-lined baking sheet and freeze until solid, then transfer to a freezer-safe container separated by parchment paper. This prevents them from freezing into one solid mass. Thaw overnight in the refrigerator and reheat in a 300°F oven for 10 minutes to restore texture.
Make-Ahead Strategy
Prepare the honey-butter mixture up to 3 days in advance and store it in the refrigerator. You can also wash and halve the pears, brush them with lemon juice, and store them covered for up to 24 hours before baking. However, don’t fill them with berries until just before baking, as the moisture from the berries can make the pears soggy.
Reheating Best Practices
For the best texture and flavor, reheat baked pears in the oven rather than the microwave. Place them in a baking dish, cover with foil, and warm at 325°F for 10-12 minutes. This gentle reheating prevents the pears from becoming mushy while reviving the slightly crispy edges. Add a fresh drizzle of honey after reheating to restore the glossy appearance.
Preserving Fresh Ingredients
If you’ve purchased extra pears, store them at room temperature until ripe, then transfer to the refrigerator to halt the ripening process. They’ll keep for an additional week this way. Fresh berries should be stored unwashed in the refrigerator in their original container, washed only just before use. Excess honey crystallizes over time but can be reliquified by placing the jar in warm water.
Conclusion
Baked pears with berries and honey proves that healthy desserts don’t require sacrifice—they simply require smart ingredient choices and proper technique. This easy and healthy dessert delivers sophisticated flavor, impressive presentation, and substantial nutritional benefits in under 45 minutes. The natural sweetness of ripe pears combined with antioxidant-rich berries and the golden nectar of honey creates a harmonious balance that satisfies your sweet tooth while nourishing your body.
Whether you’re looking to impress dinner guests, create a romantic dessert for two, or simply treat yourself to something special, this recipe delivers every time. The versatility allows for endless customization—swap berries based on what’s in season, adjust sweetness to your preference, or add creative toppings that match your dietary needs. Best of all, you can feel good about serving this dessert to your family, knowing it’s packed with fiber, vitamins, and antioxidants.
Ready to transform your dessert game? Gather your ingredients and try this recipe tonight—your taste buds and your body will thank you. Don’t forget to share your creation on social media and tag us with #BakedPearsDelight. We’d love to see your beautiful presentations and hear about any creative variations you discover. For more healthy dessert inspiration, explore our collection of fruit-based recipes that prove eating well can be absolutely delicious.
FAQs
Can I use canned pears instead of fresh pears?
While fresh pears deliver superior flavor and texture, canned pears can work in a pinch. Choose pears canned in juice rather than heavy syrup to avoid excessive sweetness. Drain them thoroughly and reduce the baking time to 15-20 minutes total since they’re already soft. Keep in mind that canned pears won’t develop the same caramelized edges and may have a slightly softer texture.
What if I don’t have an oven? Can I make this in an air fryer?
Absolutely! Air fryers work wonderfully for this recipe. Arrange pear halves in a single layer in your air fryer basket, brush with the honey mixture, and fill with berries. Cook at 350°F for 12-15 minutes, checking halfway through. The air fryer may create even better caramelization due to the circulating hot air, though you’ll likely need to cook in batches depending on your air fryer size.
Are frozen berries as good as fresh berries?
Frozen berries are an excellent choice and often more affordable than fresh, especially when berries are out of season. They’re typically frozen at peak ripeness, which means they retain maximum flavor and nutrients. No need to thaw them first—just add them frozen to the pear cavities. They’ll release slightly more liquid during baking, creating a lovely sauce, but the final result is equally delicious.
How do I prevent the pears from tipping over in the baking dish?
If your pears won’t sit flat, slice a very thin piece off the rounded bottom of each half to create a stable base—just be careful not to cut through to the cavity. Alternatively, nestle them against each other in the baking dish for mutual support, or place them in a muffin tin where each pear half sits snugly in one well. Some bakers also crumple aluminum foil into “nests” that cradle each pear half.
Can I make this recipe without honey for a refined-sugar-free version?
Yes! Pure maple syrup is an excellent honey substitute that provides similar sweetness and caramelization. Date syrup offers a rich, complex sweetness with a lower glycemic index. For a completely sugar-free option, use a sugar-free pancake syrup or rely entirely on the natural sweetness of very ripe fruit. You can also add a mashed banana to the butter mixture for natural sweetness and extra creaminess.
What wine pairs best with baked pears with berries and honey?
Late-harvest Riesling is the classic pairing, as its honeyed sweetness complements the dish without overwhelming it. Moscato d’Asti offers lighter sweetness with gentle effervescence that refreshes the palate. For red wine lovers, a fruity Beaujolais or light Pinot Noir can work surprisingly well. Port or ice wine creates an ultra-indulgent pairing for special occasions. Non-drinkers should try spiced apple cider or a vanilla rooibos tea.
How can I tell when the pears are perfectly cooked?
Insert a fork or paring knife into the thickest part of a pear—it should slide in easily with just slight resistance. The pears should be tender throughout but still hold their shape when lifted. Visually, look for slightly golden edges and bubbling berry juices. The total cooking time varies based on pear size and ripeness, so start checking at 20 minutes and adjust as needed. Remember that they’ll continue softening slightly as they cool.