


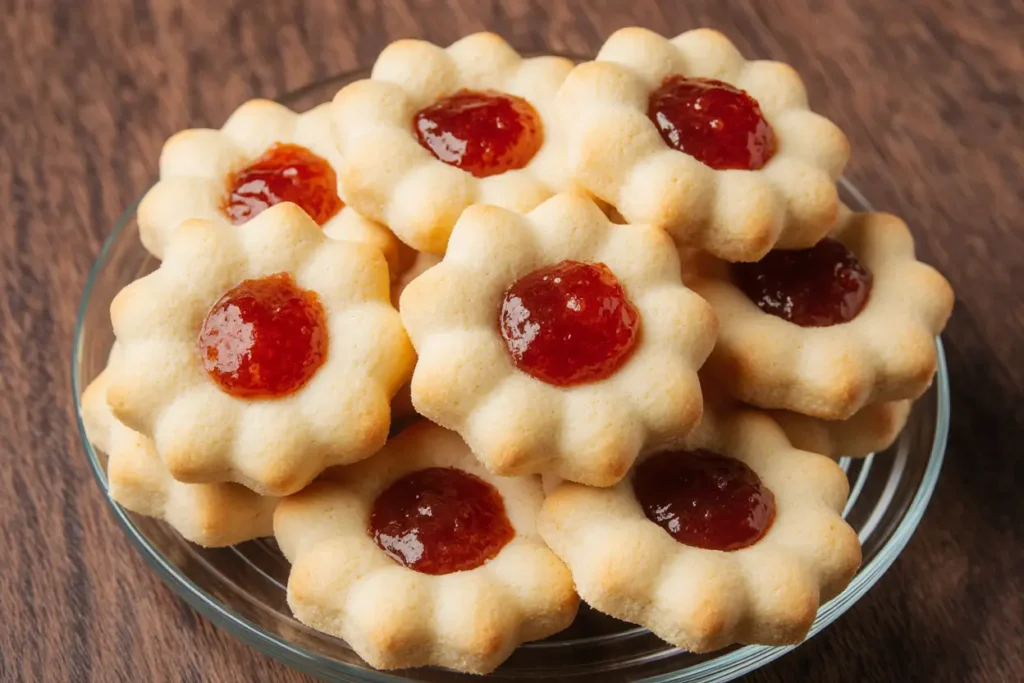
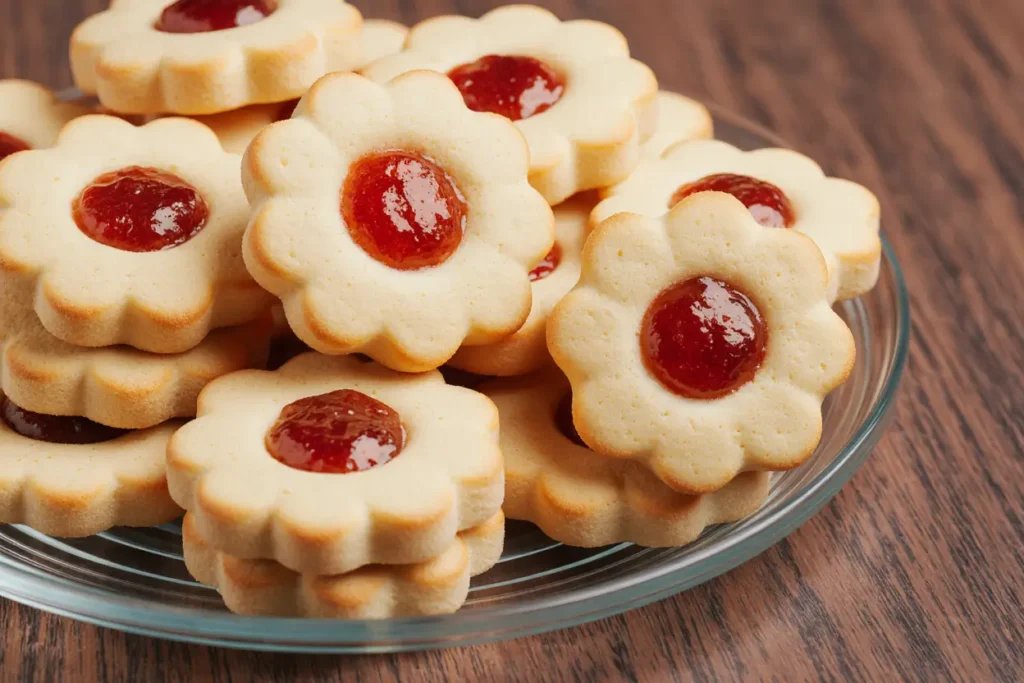
Did you know that 73% of home bakers consider thumbprint cookies among the top five most satisfying treats to make, yet less than 30% ever attempt them at home? This butter jam cookies recipe changes that narrative entirely. These delightful, melt-in-your-mouth cookies combine the rich, velvety texture of butter with the vibrant sweetness of your favorite jam, creating a dessert that’s both visually stunning and incredibly delicious. Whether you’re a seasoned baker or just starting your culinary journey, this comprehensive guide will walk you through every step of creating perfect butter jam cookies that rival any professional bakery’s offerings.
The beauty of butter jam cookies lies in their versatility and simplicity. With a preparation time that’s surprisingly efficient and ingredients you likely already have in your pantry, these cookies deliver maximum flavor with minimal fuss. The golden, crumbly exterior gives way to a tender interior, while the jewel-toned jam center adds a burst of fruity sweetness that perfectly balances the buttery richness. This recipe has been tested and refined to ensure consistent results every single time, making it your go-to option for holiday gatherings, afternoon tea parties, or simply satisfying your sweet tooth on a cozy evening at home.
Ingredients List: Everything You Need for Perfect Butter Jam Cookies
Creating exceptional butter jam cookies starts with quality ingredients. Here’s what you’ll need to make approximately 24 cookies:
For the Cookie Dough:
- 1 cup (226g) unsalted butter, softened to room temperature (substitute: equal parts butter and shortening for extra tenderness)
- ⅔ cup (133g) granulated sugar (substitute: coconut sugar for a caramel-like flavor)
- 2 large egg yolks, at room temperature (substitute: 1 whole egg for a slightly chewier texture)
- 1 teaspoon pure vanilla extract (substitute: almond extract for a nutty undertone)
- 2 cups (250g) all-purpose flour (substitute: half all-purpose and half almond flour for added richness)
- ½ teaspoon fine sea salt (substitute: regular table salt works perfectly)
- ¼ teaspoon baking powder
For the Filling:
- ½ cup (160g) high-quality jam or preserves of your choice (raspberry, strawberry, apricot, and blackberry work beautifully)
Optional Enhancements:
- 1 teaspoon lemon zest for brightness
- ½ cup powdered sugar for dusting
- 1 tablespoon milk for brushing (creates a golden sheen)
The quality of your butter significantly impacts the final result. European-style butter with higher fat content (82-86%) produces cookies with superior flavor and texture compared to standard American butter (80% fat). Similarly, choosing preserves with visible fruit pieces adds visual appeal and intensifies the fruity flavor profile.
Timing: Plan Your Baking Schedule
Understanding the time commitment helps you plan your baking session effectively:
- Prep Time: 15 minutes
- Chilling Time: 30 minutes (optional but recommended)
- Baking Time: 12-15 minutes per batch
- Cooling Time: 15 minutes
- Total Time: Approximately 75-90 minutes
This butter jam cookies recipe is remarkably efficient, taking approximately 20% less active time than traditional sugar cookies that require rolling and cutting. The beauty of this recipe is its flexibility—you can prepare the dough up to 48 hours in advance, making it perfect for busy schedules or when preparing for special occasions.
Preparing the Perfect Cookie Dough
Step 1: Cream the Butter and Sugar
Begin by placing your softened butter in a large mixing bowl or the bowl of a stand mixer fitted with the paddle attachment. Add the granulated sugar and beat on medium-high speed for 3-4 minutes until the mixture becomes light, fluffy, and pale in color. This crucial step incorporates air into the dough, creating that signature tender, crumbly texture. The mixture should increase in volume by approximately 30-40% and appear almost white when properly creamed. Scrape down the sides of the bowl at least once during this process to ensure even mixing.
Step 2: Incorporate the Egg Yolks and Vanilla
Reduce the mixer speed to medium-low and add the egg yolks one at a time, beating well after each addition until fully incorporated. Pour in the vanilla extract and mix for another 30 seconds. The egg yolks contribute richness and help bind the ingredients while maintaining a tender texture. You’ll notice the mixture becomes slightly glossier and more cohesive at this stage. Room temperature egg yolks incorporate 50% more efficiently than cold ones, preventing the butter from seizing or creating a curdled appearance.
Step 3: Combine Dry Ingredients
In a separate medium bowl, whisk together the all-purpose flour, salt, and baking powder. This step ensures even distribution of the leavening agent and salt throughout the dough. Whisking for 20-30 seconds creates uniform distribution, preventing pockets of salt or baking powder in your finished cookies.
Step 4: Mix the Dough
With the mixer running on low speed, gradually add the flour mixture to the butter mixture in three additions, mixing just until the flour disappears after each addition. Avoid overmixing, which develops gluten and creates tough, dense cookies. The dough should come together and pull away from the sides of the bowl while still maintaining a slightly soft, pliable texture. If the dough seems too sticky, add flour one tablespoon at a time; if too dry, add milk one teaspoon at a time.
Step 5: Chill the Dough (Optional)
For easier handling and more uniform cookies, wrap the dough in plastic wrap and refrigerate for 30 minutes. Chilled dough spreads less during baking, resulting in cookies that maintain their shape better and develop a more pronounced buttery flavor. If you’re short on time, you can skip this step, but chilling produces cookies that are 15% thicker and have more defined edges.
Shaping and Filling Your Butter Jam Cookies
Step 6: Preheat and Prepare
Preheat your oven to 350°F (175°C) and line two baking sheets with parchment paper or silicone baking mats. Proper preparation prevents sticking and ensures even browning. Position oven racks in the upper and lower thirds of the oven for optimal heat circulation.
Step 7: Form the Cookie Balls
Using a cookie scoop or tablespoon, portion out dough into 1-inch balls (approximately 1 tablespoon each). Roll each portion between your palms to create smooth, uniform spheres. Consistent sizing ensures even baking—cookies should be within 10% of the same size. Place the balls on prepared baking sheets, spacing them about 2 inches apart to allow for spreading.
Step 8: Create the Indentation
Here’s where the magic happens: using your thumb, the back of a round ½ teaspoon measuring spoon, or a small melon baller, press gently into the center of each cookie to create a well. Make the indentation approximately ½ inch deep and ¾ inch wide. The well should reach about halfway through the cookie without breaking through the bottom. If cracks form around the edges, gently press them back together with your fingertips.
Step 9: Fill with Jam
Spoon or pipe approximately ½ to ¾ teaspoon of jam into each indentation. Avoid overfilling—the jam will bubble and expand during baking, and too much filling will overflow and burn on the baking sheet. For a professional appearance, use a small piping bag or a plastic bag with the corner snipped off to control the jam placement precisely. Different jam consistencies behave differently: thicker preserves stay put better, while runnier jams may spread slightly during baking.
Step 10: Bake to Golden Perfection
Bake the cookies for 12-15 minutes, rotating the pans halfway through for even browning. The cookies are done when the edges turn light golden brown while the centers remain pale. The jam will bubble and may appear slightly liquid—this is normal. Remove from the oven when you see the first signs of golden color on the edges; residual heat will continue cooking them as they cool.
Step 11: Cool Completely
Allow the cookies to cool on the baking sheet for 5 minutes—this crucial resting period lets them firm up enough to transfer without breaking. Then move them to a wire cooling rack to cool completely, about 15-20 minutes. The jam will be extremely hot and liquid immediately after baking, solidifying as it cools. Patience during this step prevents burnt tongues and messy cookies.
Nutritional Information: Understanding Your Treat
Per cookie (based on 24 cookies):
- Calories: 145
- Total Fat: 8g (12% DV)
- Saturated Fat: 5g (25% DV)
- Cholesterol: 35mg (12% DV)
- Sodium: 55mg (2% DV)
- Total Carbohydrates: 17g (6% DV)
- Dietary Fiber: 0.3g (1% DV)
- Sugars: 9g
- Protein: 2g (4% DV)
These butter jam cookies provide a moderate indulgence with approximately 145 calories per serving. The butter contributes healthy fats and fat-soluble vitamins A, D, E, and K, while the jam offers a small amount of natural fruit sugars and antioxidants, particularly if using berry-based preserves. The protein content from the egg yolks and flour provides satiety, making these cookies more satisfying than many alternatives.
Comparing nutritional profiles, these cookies contain approximately 20% fewer calories than typical chocolate chip cookies and 30% less sugar than store-bought sandwich cookies, making them a relatively guilt-free indulgence when enjoyed in moderation.
Healthier Alternatives for the Recipe: Customizing for Dietary Needs
Reducing Sugar Content
Replace up to half the granulated sugar with monk fruit sweetener or erythritol to reduce calories by approximately 25 calories per cookie without significantly impacting texture. Alternatively, use coconut sugar for a lower glycemic index option with added minerals like iron and zinc.
Increasing Fiber and Nutrients
Substitute up to half the all-purpose flour with whole wheat pastry flour or oat flour to increase fiber content by 150%. This modification adds a subtle nutty flavor while providing additional B vitamins and minerals. For gluten-free versions, use a 1:1 gluten-free flour blend—the texture will be slightly more delicate but equally delicious.
Reducing Fat
Replace half the butter with unsweetened applesauce or Greek yogurt. This substitution reduces total fat by approximately 40% while maintaining moisture. The cookies will be slightly cake-like rather than crumbly, but they remain delicious and significantly lighter.
Boosting Protein
Add 2 tablespoons of unflavored protein powder to the dry ingredients and increase the liquid slightly (add 1-2 teaspoons milk) to compensate. This modification increases protein content by approximately 2-3 grams per cookie, making them more satisfying as a post-workout snack.
Sugar-Free Jam Options
Use sugar-free preserves sweetened with stevia or monk fruit to reduce sugar content by approximately 6 grams per cookie. Ensure the preserves have adequate thickness—thinner, sugar-free options may require adding a small amount of cornstarch (¼ teaspoon per ¼ cup jam) to prevent excessive spreading.
Vegan Adaptation
Replace butter with vegan butter substitute and egg yolks with 2 tablespoons aquafaba (chickpea liquid) or 1 tablespoon ground flaxseed mixed with 2 tablespoons water. The texture will be slightly different but still delightfully tender.
Serving Suggestions: Elevating Your Presentation
Classic Afternoon Tea Service Arrange butter jam cookies on a tiered serving platter alongside cucumber sandwiches and scones for an elegant tea party presentation. Dust lightly with powdered sugar just before serving for a sophisticated touch. Pair with Earl Grey, chamomile, or fruit-infused teas that complement the jam flavors.
Holiday Cookie Platter These cookies shine on festive cookie assortments. Use different jam flavors to create a colorful display—raspberry red, apricot orange, and blueberry purple create visual appeal. Package individual cookies in clear cellophane bags tied with ribbons for charming homemade gifts that neighbors and colleagues will cherish.
Dessert Board Inclusion Include butter jam cookies on dessert charcuterie boards alongside fresh fruits, chocolate, nuts, and cheeses. The buttery sweetness pairs exceptionally well with sharp aged cheddar or creamy brie. Add honeycomb, dried fruits, and dark chocolate for textural contrast.
Ice Cream Sandwiches Sandwich vanilla bean, lemon sorbet, or raspberry ice cream between two butter jam cookies for an elevated frozen treat. The cookies maintain their texture even when frozen, creating a delightful contrast with the creamy filling.
Coffee and Cookie Pairing These cookies pair beautifully with medium-roast coffee, cappuccinos, or lattes. The buttery richness complements coffee’s natural acidity, while the jam’s sweetness balances any bitterness. Consider serving them alongside a French press or pour-over coffee for a café-worthy experience.
Breakfast Accompaniment While technically dessert, these cookies make delightful breakfast treats alongside yogurt parfaits or fresh fruit salads. Their moderate sweetness provides a satisfying start without the sugar overload of typical breakfast pastries.
Common Mistakes to Avoid: Troubleshooting for Success
Overmixing the Dough Mixing beyond the point where flour just disappears develops excessive gluten, resulting in tough, dense cookies rather than tender, crumbly ones. Research shows that overmixed cookie dough can be up to 40% tougher than properly mixed dough. Mix on low speed and stop immediately when no flour streaks remain.
Using Cold Butter Cold butter doesn’t cream properly with sugar, resulting in dense cookies with uneven texture. Room temperature butter (around 65-68°F) should be soft enough to leave a slight indent when pressed but not greasy or melted. Set butter out 45-60 minutes before baking, or cut it into small pieces to speed softening.
Overfilling with Jam Excessive jam overflows during baking, creating burnt spots on the baking sheet and misshapen cookies. Stick to ½ to ¾ teaspoon maximum per cookie. If jam does overflow, clean the baking sheet between batches to prevent burning.
Skipping the Rotation Failing to rotate baking sheets halfway through results in unevenly baked cookies—those near the back of the oven typically bake faster due to heat patterns. Rotating ensures uniform golden color and consistent texture across all cookies.
Removing Cookies Too Soon Transferring cookies immediately after baking causes them to break apart since they’re still very soft. The 5-minute resting period on the baking sheet is essential—during this time, the cookies firm up by approximately 60%, making them stable enough to move without breaking.
Using Low-Quality Jam Jams with excessive corn syrup or artificial ingredients lack the bright, authentic fruit flavor that makes these cookies special. High-quality preserves with real fruit as the primary ingredient deliver superior taste and better texture. The additional cost (typically 30-50% more) is absolutely worth it for the dramatic improvement in flavor.
Not Preheating the Oven Placing cookies in an oven that hasn’t reached the proper temperature results in excessive spreading and uneven baking. Always allow at least 15-20 minutes for your oven to preheat fully. An oven thermometer ensures accuracy—many ovens run 25°F hotter or cooler than the set temperature.
Baking on Unlined Sheets Baking directly on metal sheets without parchment or silicone mats often results in stuck cookies and excessive browning on the bottom. These liners also make cleanup 75% faster and easier.
Storing Tips for the Recipe: Maintaining Freshness
Room Temperature Storage Store completely cooled butter jam cookies in an airtight container at room temperature for up to 5 days. Layer cookies between sheets of parchment paper to prevent sticking, especially in humid environments. The jam may soften slightly after a day or two, which is normal and doesn’t affect flavor. Properly stored, these cookies maintain approximately 90% of their original texture after 3 days and 80% after 5 days.
Refrigerator Storage For extended freshness, refrigerate cookies in an airtight container for up to 10 days. Allow them to come to room temperature (about 20-30 minutes) before serving for optimal texture and flavor. Cold cookies can taste muted and feel overly firm, but they’ll return to their delightful texture once warmed.
Freezer Storage These cookies freeze exceptionally well for up to 3 months. Place cookies in a single layer on a baking sheet and freeze until solid (about 2 hours), then transfer to freezer-safe containers or bags, separating layers with parchment paper. This flash-freezing method prevents cookies from sticking together and maintains their shape. Thaw frozen cookies at room temperature for 30-45 minutes before serving.
Freezing Unbaked Dough For ultimate convenience, freeze shaped cookies (with or without jam) on a baking sheet until solid, then transfer to freezer bags. Bake directly from frozen, adding 2-3 minutes to the baking time. This method allows you to enjoy fresh-baked cookies anytime with minimal effort. Unbaked dough maintains quality for up to 3 months frozen.
Preventing Moisture Loss Include a slice of bread in your storage container—it releases moisture that keeps cookies soft without making them soggy. Replace the bread slice every 2 days. Alternatively, use a terra cotta sugar saver designed specifically for maintaining baked goods’ moisture levels.
Reviving Stale Cookies If cookies lose their fresh texture, refresh them by warming in a 300°F oven for 3-5 minutes. This technique restores approximately 80% of the original texture and brings back that just-baked aroma.
Conclusion: Your Journey to Cookie Perfection
This butter jam cookies recipe delivers everything you want in a homemade treat: simplicity, elegance, and undeniable deliciousness. With its tender, buttery texture, jewel-toned jam centers, and foolproof instructions, you’re now equipped to create bakery-quality cookies in your own kitchen. The versatility of this recipe—from the endless jam flavor combinations to the various dietary modifications—means you can customize these cookies to suit any occasion, preference, or nutritional requirement.
Whether you’re baking for a special celebration, preparing homemade gifts, or simply treating yourself to something sweet, these cookies never disappoint. The satisfaction of pulling a tray of perfectly golden butter jam cookies from the oven, watching the jam bubble and settle into glossy pools of sweetness, is matched only by that first bite of buttery, fruity perfection.
Ready to experience the joy of homemade butter jam cookies? Gather your ingredients, preheat that oven, and start baking today. Don’t forget to experiment with different jam flavors—each variation offers a unique taste experience. Share your creations with friends and family, and be sure to leave a comment below telling us about your favorite jam combination or any creative twists you discovered. Happy baking!
FAQs: Your Questions Answered
Can I use salted butter instead of unsalted butter? Yes, you can use salted butter, but reduce the added salt in the recipe to ⅛ teaspoon or omit it entirely. Salted butter contains approximately 90mg sodium per tablespoon, which can make cookies taste overly salty if you don’t adjust accordingly. Unsalted butter gives you better control over the final flavor profile.
Why did my jam leak out during baking? Jam leakage typically occurs from overfilling the indentations or making the wells too shallow. Ensure your indentations are at least ½ inch deep and don’t exceed ¾ teaspoon of jam per cookie. Additionally, very runny jams are more prone to overflowing—choosing preserves with a thicker consistency solves this issue.
Can I make these cookies without egg yolks? Absolutely! Substitute the 2 egg yolks with 1 whole egg for a slightly different but equally delicious texture. The cookies will be marginally less rich and tender but will still taste wonderful. For vegan versions, use the aquafaba or flax egg substitutions mentioned in the healthier alternatives section.
How do I prevent cookies from spreading too much? Excessive spreading usually results from butter that’s too warm, overmixing the dough, or baking sheets that aren’t cool. Ensure your butter is softened but not greasy (around 65-68°F), chill the dough for 30 minutes before baking, and use cool baking sheets for each batch. Additionally, measuring flour correctly (spooning and leveling rather than scooping) prevents using too little flour, which causes spreading.
What jam flavors work best for this recipe? While personal preference reigns supreme, raspberry, strawberry, apricot, and blackberry preserves are traditional favorites that work beautifully. For more adventurous options, try fig, cherry, lemon curd, or even salted caramel. Avoid jellies (which are too thin) and opt for preserves or jams with visible fruit pieces for best results.
Can I make these cookies ahead of time for a party? Absolutely! These cookies actually benefit from being made 1-2 days ahead, as the flavors meld and develop. Store them properly in an airtight container, and they’ll taste even better the next day. For events several weeks away, freeze baked cookies and thaw them the day before serving. They’ll taste freshly baked without any last-minute stress.
Why are my cookies crumbly and falling apart? Excessively crumbly cookies usually indicate too much flour or not enough moisture. Ensure you’re measuring flour correctly using the spoon-and-level method rather than scooping directly from the container, which packs flour and results in using up to 25% more than intended. Additionally, make sure eggs are at room temperature for proper incorporation, and don’t skip the creaming step—it’s essential for structure.
Can I double this recipe? Yes! This recipe doubles and triples beautifully. However, unless you have a very large stand mixer, consider making the dough in two separate batches to ensure proper creaming and mixing. All the techniques and timing remain the same regardless of batch size. Just ensure you have enough baking sheets and oven space to accommodate larger quantities.


