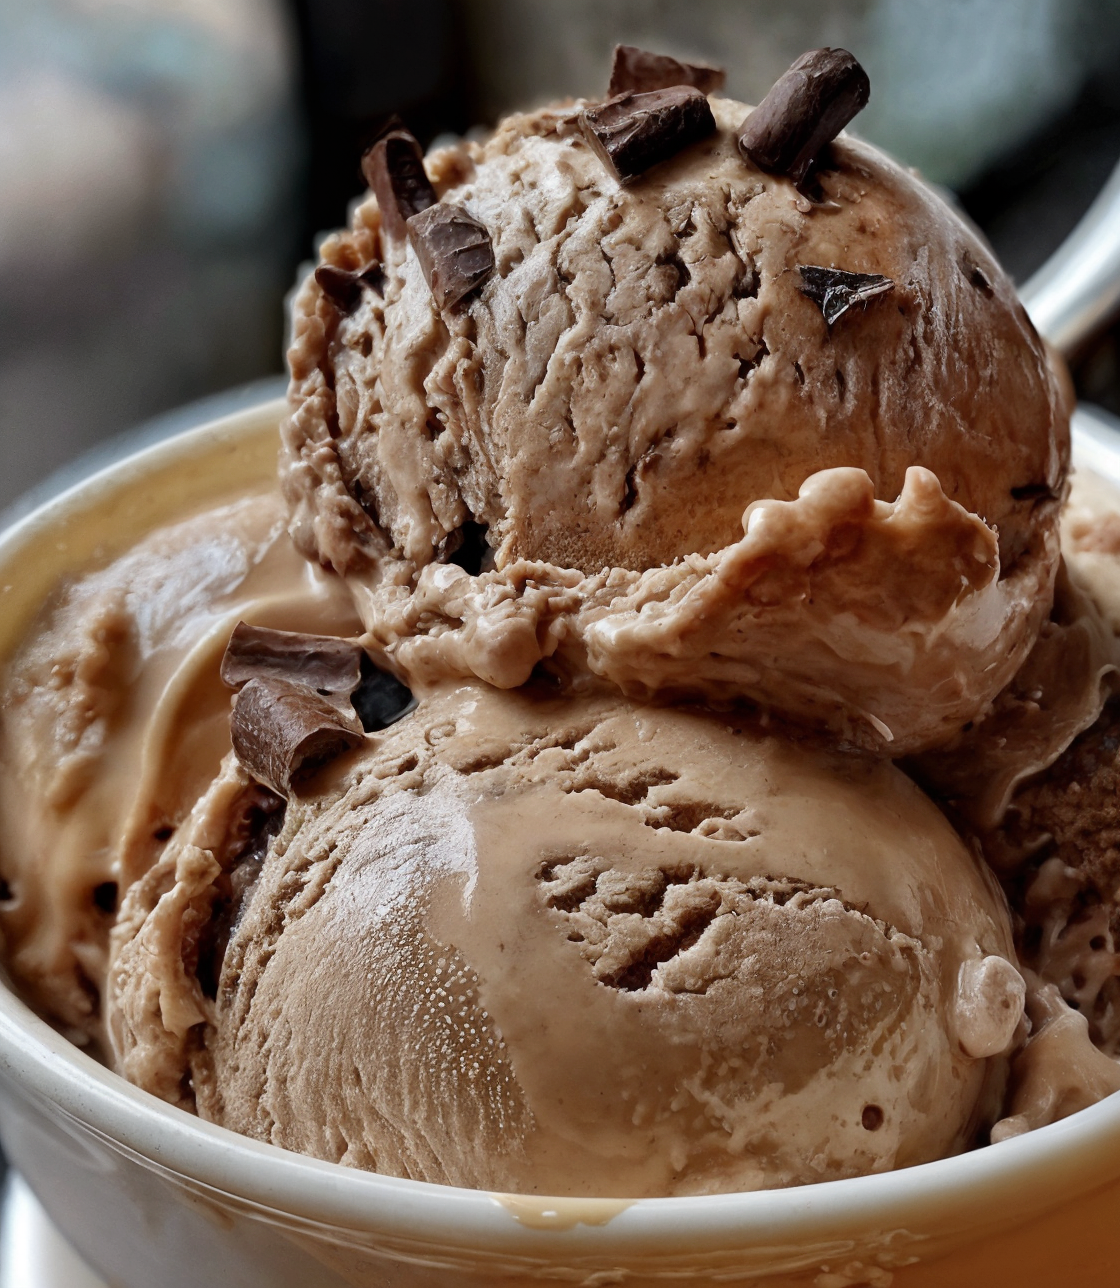
If you’re looking for a dessert that strikes the perfect balance between indulgent and refreshing, this Coffee Ice Cream with Dark Chocolate is a culinary masterpiece that deserves a spot in your freezer. Made with rich brewed coffee, luscious heavy cream, and studded with deep, decadent dark chocolate, this ice cream is an elevated treat perfect for coffee lovers and chocoholics alike.
Whether you’re planning a summer barbecue, hosting a dinner party, or simply in need of a sweet caffeine fix, this homemade ice cream brings gourmet flavor right into your kitchen without any artificial additives or preservatives. It’s a simple yet luxurious dessert, perfect for anyone craving that café-style flavor with a rich, creamy texture.
Why You’ll Love This Coffee and Chocolate Ice Cream
This recipe is designed for both beginners and seasoned home chefs alike. With minimal ingredients and easy-to-follow steps, it delivers maximum flavor with minimal fuss. The brewed coffee gives it a bold, aromatic profile while the dark chocolate adds satisfying texture and richness.
Here’s why this ice cream recipe should be your next go-to:
-
No eggs or cooking required – No custard base here! This simplifies prep and saves time.
-
Perfect texture – The ratio of heavy cream to milk creates a scoopable, creamy consistency.
-
Customizable – Swap, add, or tweak ingredients to make it your own.
-
Great for entertaining – Impress guests with a homemade frozen dessert that tastes like it came from a high-end gelato shop.
Ingredients You’ll Need
-
2 1/2 cups heavy cream
-
1 cup whole milk
-
1 cup brewed coffee, chilled
-
3/4 cup granulated sugar
-
1 teaspoon vanilla extract
-
1/2 cup dark chocolate, finely chopped
Pro Tip: Use a bold, freshly brewed coffee for the deepest flavor. Espresso works wonders if you like strong notes.
Step-by-Step Instructions
1. Mix the Base
In a large mixing bowl, combine the heavy cream, whole milk, chilled brewed coffee, sugar, and vanilla extract. Stir thoroughly until the sugar is completely dissolved. This step is crucial to ensure a smooth, creamy finish without any gritty texture.
2. Churn the Ice Cream
Pour the liquid base into your ice cream maker. Churn according to your manufacturer’s instructions — this usually takes about 20–25 minutes.
3. Add the Chocolate
When the mixture is nearly finished churning, gently add the chopped dark chocolate. This ensures it distributes evenly without sinking or clumping.
4. Freeze to Set
Transfer the churned ice cream to an airtight container. Place it in the freezer for at least 4 hours, or until it firms up. Overnight is ideal for the best scooping consistency.
5. Serve and Enjoy!
Once set, scoop and serve! Garnish with additional chocolate shavings, a drizzle of coffee liqueur, or a few espresso beans for flair.
Kitchen Equipment You’ll Need
-
Mixing bowl
-
Whisk or spoon
-
Ice cream maker
-
Measuring cups and spoons
-
Airtight freezer-safe container
-
Sharp knife (for chopping chocolate)
Variations and Swaps
Want to personalize this recipe? Try these easy variations:
-
Mocha Madness: Add 2 tablespoons of unsweetened cocoa powder to the base mixture.
-
Sweet and Salty: Sprinkle in a pinch of sea salt or swirl in some salted caramel before freezing.
-
Boozy Boost: Add 1 tablespoon of coffee liqueur (like Kahlúa) to enhance flavor and help with scoopability.
-
Vegan Option: Use full-fat coconut milk instead of dairy, and swap the sugar for maple syrup. Choose dairy-free chocolate for mix-ins.
-
Nutty Delight: Fold in chopped toasted hazelnuts or almonds with the chocolate.
Storage Tips
To keep your homemade coffee ice cream tasting fresh:
-
Use a high-quality airtight container. Plastic or stainless steel works well.
-
Place plastic wrap directly on the surface of the ice cream before sealing to prevent ice crystals.
-
Store in the coldest part of the freezer, not on the door.
Shelf Life: Best enjoyed within 2–3 weeks. It won’t last that long though — trust us!
Pairing Suggestions
This ice cream pairs beautifully with:
-
Warm brownies or chocolate cake – a classic combo that never fails.
-
Espresso shots – create your own affogato!
-
Crisp biscotti or almond cookies – adds crunch and contrast.
-
Red wine or port – for an adult dessert experience.
Frequently Asked Questions
Can I make this without an ice cream maker?
Yes! Pour the mixture into a shallow container, freeze, and stir vigorously every 30–45 minutes until the desired texture is reached (about 4–6 hours).
Can I use decaf coffee?
Absolutely. You’ll get the coffee flavor without the caffeine buzz.
What type of dark chocolate is best?
Look for 60–75% cacao content. Higher cacao will provide a more bitter and intense flavor, balancing the sweetness of the base.
Is this ice cream gluten-free?
Yes, all ingredients listed are naturally gluten-free. Just double-check your chocolate for any gluten-containing additives.
How strong is the coffee flavor?
It’s noticeable but smooth. You can use espresso for a bolder flavor or cut the amount in half if you prefer subtle notes.
Final Thoughts
This Coffee Ice Cream with Dark Chocolate recipe is proof that dessert can be both elegant and easy. With simple ingredients and straightforward steps, you can enjoy a rich, creamy, and flavorful treat that tastes far better than store-bought alternatives.
Whether you’re new to homemade ice cream or a seasoned dessert lover, this recipe delivers every time. Try it once, and it’ll become a staple in your dessert repertoire — guaranteed.
Enjoyed This Recipe?
If you loved this Coffee Ice Cream with Dark Chocolate, don’t keep it to yourself! Share it with your friends on social media and tag us with your creations. And for more gourmet-style dessert recipes and culinary inspiration, subscribe to our blog — we’re always cooking up something special just for you.


