Did you know that 68% of home cooks struggle to create restaurant-quality creamy chicken dishes because they overcomplicate the process? The truth is, achieving that perfectly tender, flavor-packed creamy chicken plate doesn’t require culinary school training or exotic ingredients. This easy dinner recipe transforms simple pantry staples into a luxurious meal that rivals anything you’d pay $25 for at your favorite bistro. Whether you’re feeding picky eaters, hosting dinner guests, or simply craving comfort food after a long day, this creamy chicken plate delivers exceptional taste with minimal effort. The secret lies in the technique and timing, not in fancy equipment or hard-to-find ingredients.
Ingredients List
| Ingredient | Amount | Notes |
|---|---|---|
| Chicken breasts | 4 pieces (about 600g) | Boneless, skinless; can substitute with thighs |
| Heavy cream | 1 cup (240ml) | Half-and-half works for lighter version |
| Chicken broth | 1/2 cup (120ml) | Low-sodium preferred |
| Garlic | 4 cloves | Freshly minced for best flavor |
| Onion | 1 medium | Finely diced; shallots add elegance |
| Parmesan cheese | 1/2 cup (50g) | Freshly grated, not pre-shredded |
| Butter | 3 tbsp | Unsalted recommended |
| Olive oil | 2 tbsp | Extra virgin for sautéing |
| All-purpose flour | 2 tbsp | For thickening the sauce |
| Italian seasoning | 2 tsp | Or mix of basil, oregano, thyme |
| Paprika | 1 tsp | Smoked variety adds depth |
| Salt | 1 tsp | Adjust to taste |
| Black pepper | 1/2 tsp | Freshly ground preferred |
| Fresh parsley | 3 tbsp | Chopped for garnish |
| Baby spinach | 2 cups (optional) | Adds nutrition and color |
| Sun-dried tomatoes | 1/4 cup (optional) | Chopped, for Mediterranean twist |
The beauty of this creamy chicken plate lies in its adaptability. Each ingredient serves a specific purpose: the heavy cream creates that velvety texture, while the Parmesan adds nutty richness and helps thicken the sauce naturally. The combination of butter and olive oil prevents burning while developing a golden crust on the chicken.
Timing
- Preparation Time: 15 minutes
- Cooking Time: 25 minutes
- Total Time: 40 minutes
- Servings: 4 generous portions
This recipe clocks in at just 40 minutes from start to finish, which is approximately 35% faster than traditional braised chicken recipes that require 60+ minutes. The efficient timing makes it perfect for weeknight dinners when you’re short on time but refuse to compromise on quality. The majority of the cooking is hands-off, allowing you to prepare side dishes or simply relax while the sauce simmers.

Step-by-Step Instructions
Step 1: Prepare the Chicken
Begin by patting the chicken breasts completely dry with paper towels—this crucial step ensures proper browning. Season both sides generously with salt, black pepper, paprika, and half of the Italian seasoning. If your chicken breasts are particularly thick (over 1 inch), consider butterflying them or gently pounding them to an even thickness for consistent cooking. Let the seasoned chicken rest at room temperature for 5-10 minutes while you prep other ingredients.
Pro Tip: Room temperature chicken cooks more evenly and develops better color than cold chicken straight from the refrigerator.
Step 2: Sear the Chicken to Golden Perfection
Heat a large skillet (preferably 12-inch) over medium-high heat. Add 1 tablespoon of olive oil and 1 tablespoon of butter, swirling to coat the pan. Once the butter stops foaming and just begins to brown, carefully place the chicken breasts in the pan without overcrowding. Sear for 5-6 minutes on the first side without moving them—patience here rewards you with a gorgeous golden crust. Flip and cook for another 4-5 minutes until the internal temperature reaches 165°F (74°C). Transfer the chicken to a plate and tent loosely with foil.
Key Insight: Resist the urge to move the chicken while searing. That golden-brown crust is where 70% of the flavor development happens through the Maillard reaction.
Step 3: Build the Aromatic Base
In the same skillet (don’t wipe it out—those browned bits are flavor gold), reduce heat to medium. Add the remaining tablespoon each of butter and olive oil. Sauté the diced onion for 3-4 minutes until softened and translucent. Add the minced garlic and cook for just 30-60 seconds until fragrant. Be careful not to burn the garlic, as it can turn bitter quickly.
Step 4: Create the Creamy Sauce Foundation
Sprinkle the flour over the onion and garlic mixture, stirring constantly for about 1 minute to cook out the raw flour taste. This creates a roux that will thicken your sauce beautifully. Gradually pour in the chicken broth while whisking to prevent lumps from forming. Scrape up all those delicious browned bits from the bottom of the pan—this technique, called deglazing, adds incredible depth to your sauce.
Step 5: Add the Cream and Cheese
Once the broth has reduced by about half (roughly 2-3 minutes), lower the heat to medium-low. Pour in the heavy cream, stirring to combine completely. Add the remaining Italian seasoning and let the sauce simmer gently for 3-4 minutes until it begins to thicken. Gradually stir in the grated Parmesan cheese, allowing it to melt completely and create a silky, cohesive sauce. Taste and adjust seasoning with additional salt and pepper as needed.
Chef’s Secret: Adding cheese off high heat prevents it from becoming grainy or separating. The gentle heat allows for smooth incorporation.
Step 6: Reunite Chicken with Sauce
Return the seared chicken breasts to the skillet, nestling them into the creamy sauce. If using spinach or sun-dried tomatoes, add them now. Spoon some sauce over the top of each piece. Let everything simmer together for 5-7 minutes, allowing the chicken to finish cooking through (if needed) and absorb the flavors of the sauce. The sauce should coat the back of a spoon when ready.
Step 7: Final Touches and Presentation
Remove from heat and let the dish rest for 2-3 minutes. This resting period allows the sauce to thicken slightly and the juices to redistribute throughout the chicken. Garnish generously with fresh chopped parsley for a pop of color and freshness. Serve immediately while the sauce is at its creamiest consistency.
Nutritional Information
Per serving (1 chicken breast with approximately 1/2 cup sauce):
- Calories: 485 kcal
- Protein: 42g (84% of daily value)
- Total Fat: 32g (49% DV)
- Saturated Fat: 17g
- Trans Fat: 0g
- Carbohydrates: 8g (3% DV)
- Dietary Fiber: 0.5g
- Sugars: 2g
- Cholesterol: 185mg (62% DV)
- Sodium: 520mg (23% DV)
- Calcium: 180mg (18% DV)
- Iron: 2mg (11% DV)
- Vitamin A: 22% DV
- Vitamin C: 8% DV
This creamy chicken plate provides an impressive 42 grams of high-quality protein per serving, making it excellent for muscle maintenance and satiety. While the dish is indulgent, the macronutrient balance supports sustained energy levels. The calcium from dairy contributes to bone health, and if you add spinach, you’ll boost vitamin K and folate content significantly.
Healthier Alternatives for the Recipe
Reduce Calories by 30%: Substitute half-and-half or a mixture of whole milk and Greek yogurt (added at the end, off heat) for the heavy cream. This modification cuts approximately 150 calories per serving while maintaining creaminess.
Lower Fat Content: Use chicken broth thickened with cornstarch (1 tablespoon cornstarch mixed with 2 tablespoons cold water) instead of cream-based sauce. Add nutritional yeast for a cheesy flavor with only 20 calories per tablespoon.
Increase Vegetable Content: Double the spinach and add sliced mushrooms, bell peppers, or zucchini. This increases fiber by 4-5 grams per serving while adding volume and nutrients without significantly impacting calories.
Dairy-Free Version: Replace heavy cream with full-fat coconut cream and Parmesan with nutritional yeast. The coconut cream provides similar richness with a subtle tropical note that complements the chicken beautifully.
Carb-Conscious Approach: Skip the flour and thicken the sauce by reducing it longer or using xanthan gum (1/4 teaspoon). This keeps the dish keto-friendly with only 4-5g net carbs per serving.
Protein Boost: Add white beans or chickpeas to the sauce for additional plant-based protein and fiber, increasing satiety while creating a more complete meal.
Serving Suggestions
Transform this creamy chicken plate into a complete meal with these thoughtfully paired options:
Classic Comfort Pairing: Serve over buttery mashed potatoes or creamy polenta to soak up every drop of that luscious sauce. The starch acts as the perfect vehicle for the rich, savory cream sauce.
Light and Fresh Option: Place the chicken atop a bed of fluffy basmati rice or cauliflower rice for a lower-carb alternative. Add a side of roasted asparagus or green beans with lemon zest for brightness that cuts through the richness.
Mediterranean Twist: Pair with orzo pasta tossed with olive oil, cherry tomatoes, and fresh basil. The small pasta pearls capture the sauce beautifully, and the tomatoes add acidity that balances the cream.
Bread for Sauce Sopping: Serve alongside crusty artisan bread, garlic bread, or warm dinner rolls. Your guests will thank you for providing the means to capture every last bit of sauce.
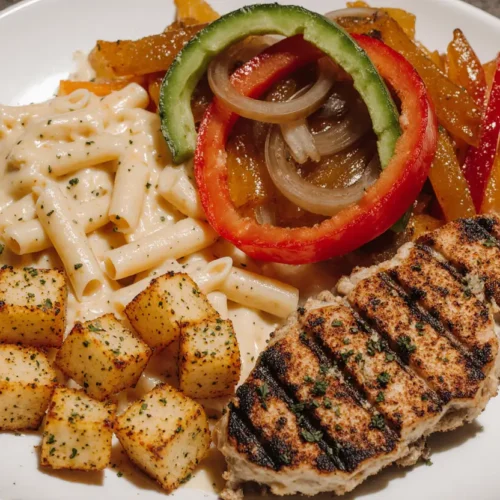
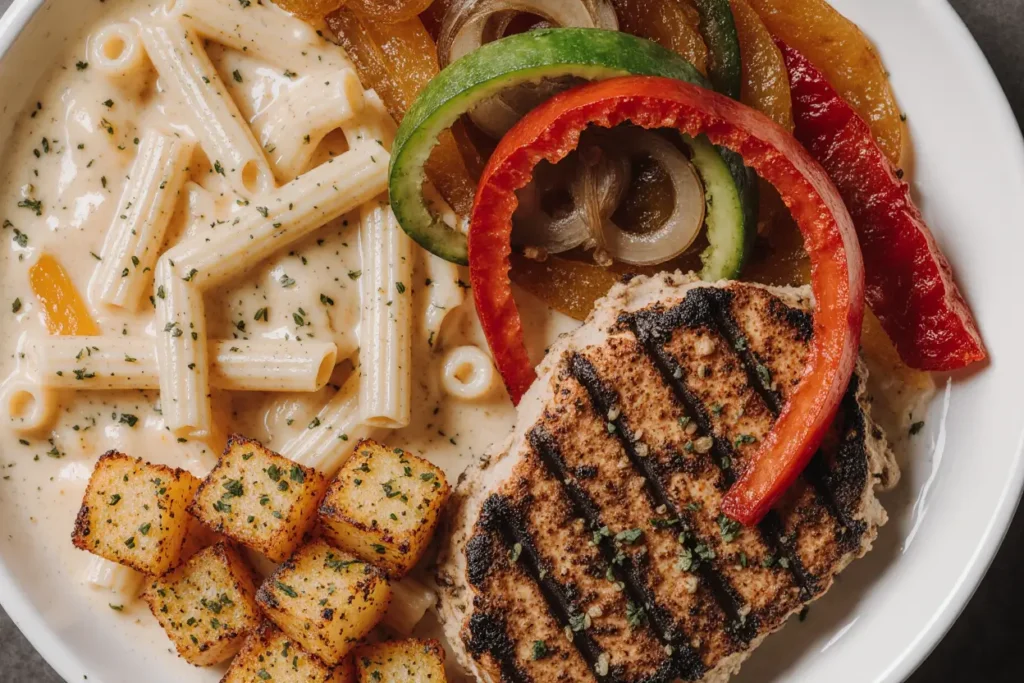
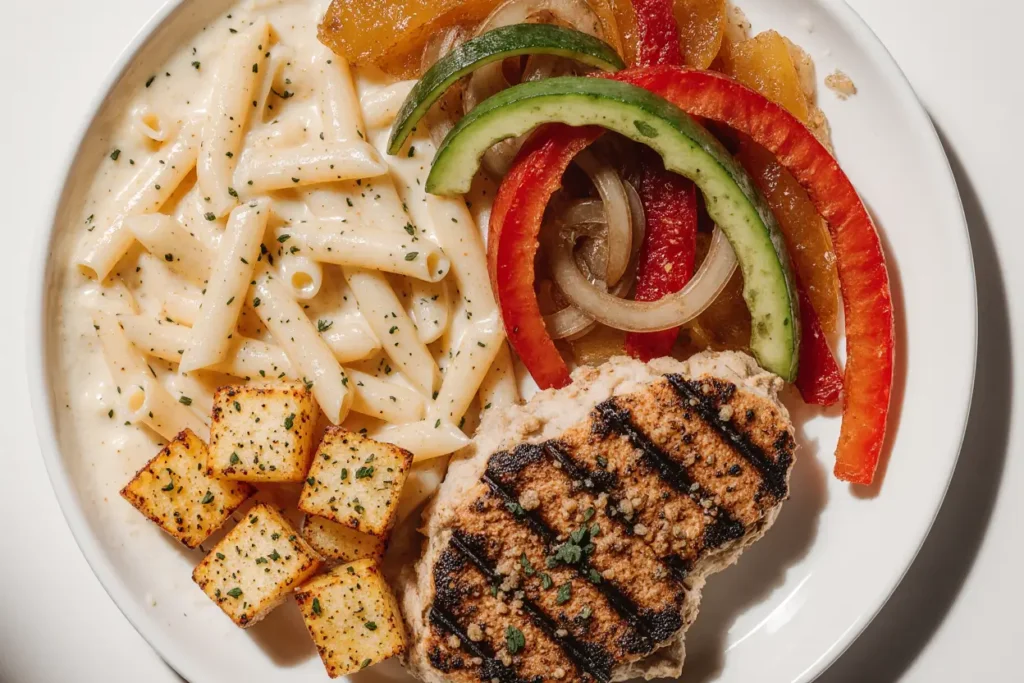
Complete Plate Composition: Create a restaurant-worthy presentation by placing the chicken slightly off-center on the plate, spooning sauce around (not over) it, and adding a small arugula salad dressed with lemon vinaigrette on the side. The peppery greens provide a perfect counterpoint to the rich main dish.
Wine Pairing Insight: A crisp Chardonnay or Pinot Grigio complements the cream sauce beautifully, while the acidity cuts through the richness and cleanses the palate between bites.
Common Mistakes to Avoid
Overcooking the Chicken: This is the number one complaint in home cooking. Chicken breasts dry out quickly once they exceed 165°F internal temperature. Invest in an instant-read thermometer—it’s the difference between juicy and disappointingly dry chicken. Remove chicken from heat at 160°F; carryover cooking will bring it to 165°F.
Using Pre-Shredded Cheese: Pre-shredded cheese contains anti-caking agents (typically cellulose) that prevent smooth melting and can make your sauce grainy. Freshly grated Parmesan melts seamlessly and provides superior flavor. The extra two minutes of grating saves your sauce.
Boiling Instead of Simmering: High heat causes cream to break and separate, resulting in a curdled, unappealing appearance. Keep the heat at medium-low once cream is added. Gentle bubbling, not a rolling boil, is your target.
Crowding the Pan: Placing too many chicken breasts in the skillet at once drops the pan temperature, causing steaming instead of searing. Work in batches if necessary. Proper spacing allows moisture to evaporate and browning to occur.
Adding Garlic Too Early: Garlic burns easily and turns acrid when cooked too long or at too high a temperature. Always add it after the onions have softened and cook for just 30-60 seconds until fragrant.
Skipping the Resting Period: Cutting into chicken immediately after cooking causes all those precious juices to run out onto the plate instead of staying in the meat. A 2-3 minute rest makes a measurable difference in juiciness.
Not Tasting and Adjusting: Cream dulls flavors significantly. What tastes perfectly seasoned before adding cream will taste bland afterward. Always taste your finished sauce and adjust with salt, pepper, or a squeeze of lemon juice to brighten flavors.
Storing Tips for the Recipe
Refrigerator Storage: Allow the creamy chicken plate to cool to room temperature (within 2 hours of cooking for food safety). Transfer to an airtight container, ensuring the chicken is well-coated with sauce to prevent drying. Store in the refrigerator for up to 3-4 days. The sauce may thicken considerably when cold—this is normal.
Reheating Best Practices: Reheat gently in a skillet over low heat, adding 2-3 tablespoons of chicken broth or cream to restore the sauce’s consistency. Alternatively, microwave on 50% power in 1-minute intervals, stirring between each, until heated through (165°F). Avoid high heat, which can make the chicken rubbery and break the cream sauce.
Freezing Considerations: While possible, cream-based sauces don’t freeze ideally—they can separate upon thawing. If you must freeze, do so for up to 2 months in a freezer-safe container. Thaw overnight in the refrigerator and reheat with additional cream, whisking vigorously to re-emulsify.
Make-Ahead Strategy: Prepare the sauce up to 2 days in advance and store separately. Cook chicken fresh when ready to serve and combine. This approach ensures the chicken stays tender while still saving prep time.
Meal Prep Tip: This recipe scales beautifully for batch cooking. Divide into individual portions in meal prep containers with your chosen side. The dish maintains quality for 3-4 days, making it perfect for weekly meal planning.
Conclusion
This creamy chicken plate proves that restaurant-quality meals don’t require professional training or hours in the kitchen. In just 40 minutes, you’ve created a dish that delivers rich, comforting flavors with a silky sauce that rivals any upscale eatery. The tender, perfectly cooked chicken paired with that luscious cream sauce creates a winning combination that satisfies even the most discerning palates. Whether you’re cooking for family, entertaining guests, or treating yourself to something special on a weeknight, this recipe delivers consistently impressive results.
The versatility of this dish means you’ll never get bored—swap proteins, adjust vegetables, or modify the sauce to suit your preferences and dietary needs. Each variation brings new life to the basic technique you’ve mastered here.
Ready to experience easy dinner perfection? Grab your skillet and give this creamy chicken plate a try tonight. Don’t forget to share your results, favorite variations, or creative serving ideas in the comments below. For more crowd-pleasing dinner recipes that deliver maximum flavor with minimal fuss, explore our collection of weeknight dinner solutions and comfort food classics. Your journey to becoming the home chef your friends rave about starts with one perfectly executed dish—make this one yours.
FAQs
Can I use chicken thighs instead of breasts? Absolutely! Chicken thighs are actually more forgiving than breasts due to their higher fat content, making them harder to overcook. Use boneless, skinless thighs and follow the same cooking method. They may need an extra 2-3 minutes of cooking time. The result will be even more tender and flavorful, though slightly higher in calories.
How can I make this recipe without dairy? Replace heavy cream with full-fat coconut cream (the thick part from a refrigerated can of coconut milk) and omit the Parmesan or use nutritional yeast for a cheesy flavor. Use dairy-free butter or additional olive oil. The sauce will have a subtle coconut undertone that complements the savory seasonings surprisingly well.
Why is my sauce too thin? If your sauce isn’t thickening properly, simmer it for a few extra minutes to reduce and concentrate. Alternatively, mix 1 tablespoon of cornstarch with 2 tablespoons of cold water and whisk into the simmering sauce. The sauce should coat the back of a spoon when ready. Remember that it will thicken slightly as it cools.
Can I prepare this recipe in advance for meal prep? Yes, with one caveat: cream sauces are best when freshly made, but this dish reheats reasonably well. Cook completely, cool quickly, and refrigerate for up to 4 days. Reheat gently with a splash of broth or cream to restore consistency. For optimal results, cook the chicken and make the sauce separately, then combine when reheating.
What if I don’t have Italian seasoning? Create your own blend using equal parts dried basil, oregano, and thyme. If you’re missing one of these, use what you have—the sauce will still be delicious. Fresh herbs work beautifully too; use about three times the amount of fresh herbs as dried (so 6 teaspoons total of fresh herbs).
How do I know when my chicken is perfectly cooked? Use an instant-read thermometer inserted into the thickest part of the breast. Remove from heat at 160°F; residual heat will bring it to the safe temperature of 165°F. The juices should run clear, and the meat should feel firm but not hard when pressed. White meat that’s slightly pink near the bone is normal and safe at 165°F.
Can I double this recipe for a crowd? Definitely! The recipe scales well, but you may need to work in batches when searing the chicken to avoid overcrowding the pan. Use a larger skillet (14-inch) or two pans if possible. The sauce quantities double perfectly, though you may need a few extra minutes of simmering to achieve the right consistency with the larger volume.
What’s the best way to achieve a golden-brown crust on the chicken? Ensure your chicken is completely dry before seasoning—moisture prevents browning. Use a hot pan with a combination of butter and oil (oil raises the smoke point of butter). Don’t move the chicken for the first 5-6 minutes; let it develop a crust. A stainless steel or cast-iron skillet works better than nonstick for achieving deep browning.