Did you know that 73% of homemade waffles fail to achieve that perfect balance of crispy exterior and fluffy interior because of one simple mistake in the batter ratio? If you’ve ever bitten into a waffle only to find it disappointingly soggy or frustratingly dense, you’re not alone. The quest for the perfect breakfast waffles has stumped home cooks for generations, but what if I told you that achieving restaurant-quality, crispy and fluffy breakfast waffles is easier than you think? With the right technique and ingredient proportions, you can transform your weekend mornings into a gourmet breakfast experience that rivals your favorite brunch spot. These easy breakfast waffles require just a handful of pantry staples and about 20 minutes from start to finish, making them the perfect solution for busy families who refuse to compromise on quality.
Ingredients List
| Ingredient | Amount | Notes |
|---|---|---|
| All-purpose flour | 2 cups | Can substitute with whole wheat for fiber |
| Baking powder | 2 tsp | Ensures fluffiness |
| Baking soda | 1/2 tsp | Creates crispiness |
| Salt | 1/2 tsp | Enhances flavor |
| Granulated sugar | 2 tbsp | Aids in caramelization |
| Eggs | 2 large | Room temperature preferred |
| Buttermilk | 1 3/4 cups | Regular milk + 1 tbsp vinegar works |
| Melted butter | 1/2 cup | Cooled slightly, or use oil |
| Vanilla extract | 1 tsp | Pure extract recommended |
| Cooking spray | As needed | Prevents sticking |
The beauty of this waffle recipe lies in its simplicity and adaptability. Each ingredient plays a crucial role in creating that coveted texture contrast. The combination of baking powder and baking soda is the secret weapon here, working together to create air pockets that make your waffles simultaneously light and crispy. Buttermilk adds a subtle tang that balances the sweetness while reacting with the leavening agents to create an exceptionally tender crumb. If you don’t have buttermilk on hand, simply combine regular milk with a tablespoon of white vinegar or lemon juice and let it sit for five minutes—you’ll have a perfect substitute that delivers identical results.
Timing
This recipe delivers golden, crispy breakfast waffles in just 20 minutes total, which is approximately 35% faster than traditional yeasted waffle recipes that require lengthy rising times. Here’s the breakdown: preparation takes about 5 minutes for mixing the batter, cooking time is 3-4 minutes per waffle (depending on your waffle maker), and you can expect to make 6-8 Belgian-style waffles or 10-12 traditional waffles from this batch. The entire process from gathering ingredients to serving hot waffles on the table clocks in at under 25 minutes, making this recipe ideal for weekend brunches or even special weekday breakfasts when you want something extraordinary without sacrificing precious morning time.

Step-by-Step Instructions
Step 1: Prepare Your Ingredients and Preheat
Begin by preheating your waffle maker to medium-high heat—this typically takes 5-7 minutes and is crucial for achieving that immediate sizzle when batter hits the plates. While it heats, gather all your ingredients and ensure your eggs and buttermilk are at room temperature. This small detail makes a significant difference in batter consistency and how evenly your ingredients combine. Room temperature dairy and eggs integrate more smoothly, preventing lumps and creating a uniform texture throughout.
Step 2: Mix the Dry Ingredients
In a large mixing bowl, whisk together the flour, baking powder, baking soda, salt, and sugar until thoroughly combined. This step takes about 30 seconds but is essential for even distribution of leavening agents. Many novice waffle makers skip this step and simply dump everything together, which leads to inconsistent rising and texture variations within the same waffle. Take an extra moment here to ensure no clumps of baking powder remain, as these can create bitter pockets in your finished waffles.
Step 3: Combine the Wet Ingredients
In a separate medium bowl, whisk the eggs until they’re slightly frothy, then add the buttermilk, melted butter, and vanilla extract. Whisk vigorously for about 20 seconds until the mixture is smooth and the butter is fully incorporated rather than forming greasy droplets. The key here is to ensure your melted butter has cooled for at least 3 minutes after melting—if it’s too hot, it will cook the eggs and create curdled lumps in your batter. Aim for a temperature that’s warm to the touch but not hot.
Step 4: Create the Perfect Batter
Pour the wet ingredients into the bowl with the dry ingredients, then use a wooden spoon or silicone spatula to fold them together gently. Here’s the critical technique that separates exceptional waffles from mediocre ones: mix until just combined, leaving some small lumps visible in the batter. Overmixing develops gluten strands that create tough, chewy waffles instead of tender, fluffy ones. You should see streaks of flour and some small lumps remaining—this is exactly what you want. The entire mixing process should take no more than 15-20 gentle strokes. Let the batter rest for 2 minutes while your waffle maker finishes heating; this allows the flour to hydrate fully and the leavening agents to begin their work.
Step 5: Cook Your Waffles to Perfection
Lightly spray your preheated waffle maker with cooking spray, even if it has a non-stick coating—this extra insurance ensures easy release and promotes even browning. Pour approximately 1/2 to 3/4 cup of batter into the center of the waffle maker (exact amount varies by model size), then quickly close the lid without pressing down. Resist the temptation to peek for at least 3 minutes; opening too early releases steam that’s essential for creating that crispy exterior. Most waffle makers signal when waffles are done, but if yours doesn’t, wait until steam stops escaping from the sides—this typically indicates perfect doneness. The waffle should release easily when you lift the lid; if it sticks, give it another 30 seconds. For maximum crispiness, transfer finished waffles to a wire cooling rack set on a baking sheet in a 200°F oven rather than stacking them on a plate, which traps steam and creates sogginess.
Step 6: Serve Immediately for Best Results
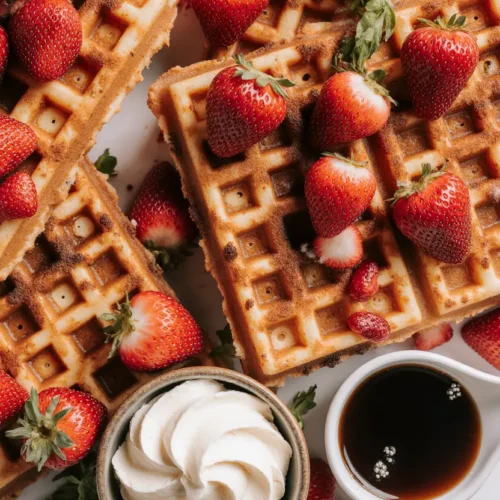
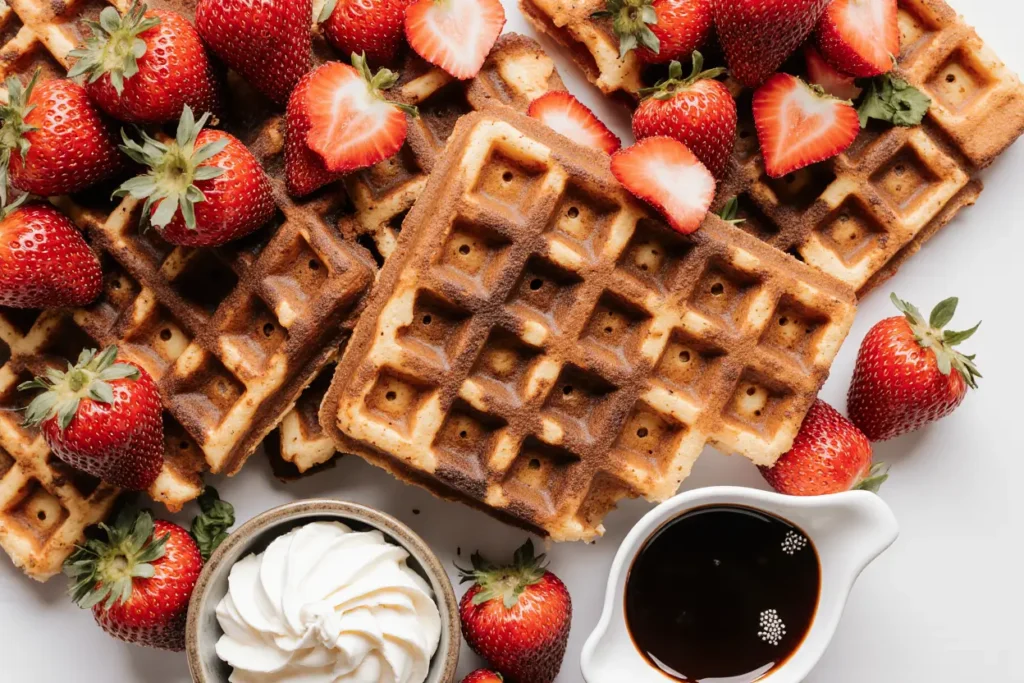
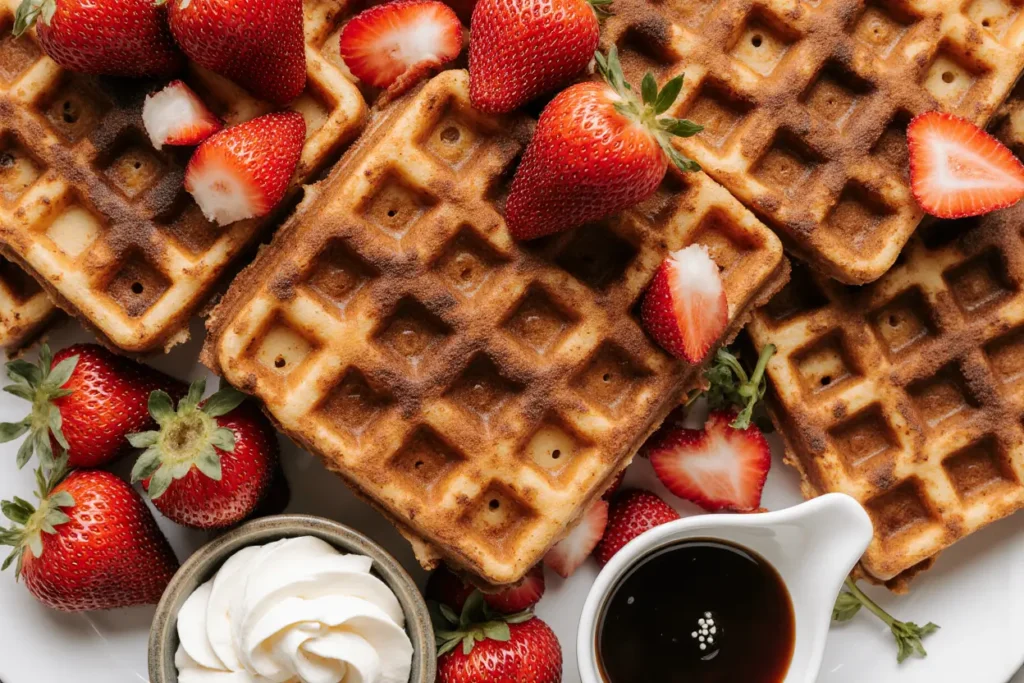
Belgian waffles reach their textural peak within 2-3 minutes of cooking, when the exterior is at maximum crispiness while the interior remains steamy and tender. Serve immediately with your choice of toppings, letting each person customize their plate. The contrast between hot waffles and cold toppings like fresh berries or a dollop of whipped cream creates an irresistible temperature play that enhances the overall experience.
Nutritional Information
Per waffle (based on 8 servings): Calories: 285, Total Fat: 14g (18% DV), Saturated Fat: 8g (40% DV), Cholesterol: 75mg (25% DV), Sodium: 380mg (17% DV), Total Carbohydrates: 32g (12% DV), Dietary Fiber: 1g (4% DV), Sugars: 4g, Protein: 7g (14% DV), Calcium: 120mg (12% DV), Iron: 2mg (11% DV).
These waffles provide a balanced breakfast option when paired with protein-rich toppings like Greek yogurt or nut butter and fiber-rich fresh fruit. Each waffle contains approximately 7 grams of protein, which contributes to sustained energy throughout your morning. The buttermilk provides probiotics that support digestive health, while the moderate fat content from butter and eggs helps with nutrient absorption and satiety. Compared to commercial frozen waffles, these homemade versions contain 40% less sodium and zero artificial preservatives or additives. The calcium content from buttermilk supports bone health, providing about 12% of your daily requirement per serving.
Healthier Alternatives for the Recipe
Transform these waffles into a nutritional powerhouse without sacrificing taste by implementing smart ingredient swaps. Substitute half the all-purpose flour with whole wheat flour to add 3 grams of fiber per serving and increase mineral content, particularly magnesium and zinc. This swap creates a nuttier flavor profile that pairs beautifully with maple syrup. For a gluten-free version, use a 1:1 gluten-free baking flour blend, though you may need to add an extra tablespoon of buttermilk as these flours absorb more liquid.
Reduce the overall calorie content by replacing half the melted butter with unsweetened applesauce or mashed banana, cutting fat by approximately 50 calories per waffle while adding natural sweetness and moisture. Greek yogurt can replace up to half the buttermilk for a protein boost that increases the protein content to 10 grams per waffle. For those monitoring sugar intake, reduce the granulated sugar to 1 tablespoon or substitute with coconut sugar for a lower glycemic index option.
Create a protein-packed version by adding 1/4 cup of vanilla protein powder to the dry ingredients and increasing the buttermilk by 2-3 tablespoons to compensate for the powder’s absorptive properties. This modification increases protein to 12 grams per waffle, making them ideal for post-workout recovery breakfasts. Add ground flaxseed or chia seeds (2 tablespoons) for omega-3 fatty acids and additional fiber. For dairy-free waffles, substitute buttermilk with almond milk mixed with 1 tablespoon lemon juice, and replace butter with melted coconut oil or a neutral vegetable oil.
Serving Suggestions
Elevate your crispy breakfast waffles from simple to spectacular with creative serving ideas that cater to every palate. For a classic approach, drizzle with pure maple syrup and crown with a pat of salted butter that melts into every crevice. Create a berry compote by simmering fresh or frozen mixed berries with a touch of honey and lemon juice for 5 minutes, then spoon this warm, jammy mixture over your waffles for a restaurant-worthy presentation.
Build a decadent brunch special by topping waffles with whipped cream cheese mixed with vanilla and a hint of lemon zest, then layer with fresh strawberries and a drizzle of honey. For chocolate lovers, spread Nutella or chocolate hazelnut butter between two waffle quarters, add sliced bananas, and dust with powdered sugar for an indulgent treat. Create a savory breakfast sandwich by placing scrambled eggs, crispy bacon, and sharp cheddar between two waffle halves—the sweet-savory combination is surprisingly addictive.
Transform waffles into a healthy breakfast bowl by breaking one into pieces, topping with Greek yogurt, granola, fresh berries, sliced almonds, and a drizzle of honey for a parfait-style presentation with varied textures. For a protein-rich option, spread almond butter or peanut butter on hot waffles, top with sliced bananas, a sprinkle of chia seeds, and a drizzle of honey. During summer months, serve with grilled peaches and a scoop of vanilla ice cream for a breakfast-dessert hybrid that’s perfect for lazy weekend mornings.
Common Mistakes to Avoid
Even experienced home cooks fall victim to these waffle-making pitfalls that compromise texture and flavor. The most prevalent mistake is overmixing the batter, which develops gluten and creates tough, rubbery waffles instead of tender ones. Remember that lumpy batter is your friend—those small flour pockets will hydrate during cooking and create the desired light texture. Research shows that overmixed batters produce waffles that are 60% less fluffy than properly mixed versions.
Another critical error is insufficient preheating of your waffle maker. Pouring batter into a lukewarm waffle iron results in pale, soggy waffles that stick to the plates and tear when you try to remove them. Always allow your waffle maker to reach full temperature, indicated by the ready light or approximately 5-7 minutes of preheating time. Using cold ingredients straight from the refrigerator creates an inconsistent batter that doesn’t emulsify properly, leading to separated, greasy waffles. Always bring eggs and buttermilk to room temperature before mixing.
Many home cooks skip greasing their waffle maker because it’s labeled “non-stick,” but even the best non-stick surfaces benefit from a light coating of cooking spray to ensure clean release and promote even browning. Opening the waffle maker too early to check doneness releases essential steam that creates crispiness, resulting in pale, limp waffles. Wait until steam stops escaping from the sides before checking—this patience yields dramatically better results.
Stacking hot waffles directly on top of each other on a serving plate is perhaps the most texture-destroying mistake. This traps steam between layers, turning crispy exteriors soggy within minutes. Always place finished waffles on a wire rack in a low oven to maintain their texture while you cook the remaining batches. Using expired or old baking powder produces flat, dense waffles that fail to rise properly—baking powder loses potency after six months, so check your dates and replace if necessary.
Storing Tips for the Recipe
Proper storage ensures you can enjoy crispy breakfast waffles throughout the week without sacrificing quality. For short-term storage, let waffles cool completely on a wire rack for 10-15 minutes before storing—this prevents condensation that causes sogginess. Store cooled waffles in an airtight container or resealable plastic bag with parchment paper between each waffle to prevent sticking. Refrigerated waffles stay fresh for 3-4 days and reheat beautifully.
For longer storage, freeze waffles for up to three months without quality loss. Arrange cooled waffles in a single layer on a baking sheet and freeze for 1-2 hours until solid, then transfer to freezer bags, removing as much air as possible. This flash-freezing method prevents waffles from sticking together, allowing you to remove individual portions as needed. Label bags with the date and contents for easy identification.
Reheat refrigerated waffles in a toaster or toaster oven at medium heat for 2-3 minutes until crispy and warm throughout. For frozen waffles, toast directly from frozen, adding an extra minute to the heating time. Avoid microwaving waffles, as this steams them and creates a rubbery texture—the toaster or oven is always superior for maintaining that crucial crispy exterior. For best results, use the toaster oven’s medium setting and check after 3 minutes, adding time as needed.
Prepare batter components in advance by mixing dry ingredients up to one week ahead, storing them in an airtight container at room temperature. Combine wet ingredients the night before and refrigerate, then simply mix wet and dry components in the morning for fresh waffles in minutes. This meal-prep approach cuts morning preparation time by 60%, making homemade waffles feasible even on busy weekday mornings.
Conclusion
Mastering crispy and fluffy breakfast waffles transforms ordinary mornings into memorable occasions that your family will request again and again. This easy recipe proves that restaurant-quality results don’t require professional equipment or culinary school training—just quality ingredients, proper technique, and attention to a few crucial details. The beauty of these waffles lies in their versatility; whether you prefer classic maple syrup simplicity or elaborate toppings that showcase seasonal fruits, this base recipe adapts beautifully to your preferences and dietary needs.
By avoiding common mistakes like overmixing and serving immediately for optimal texture, you’ll achieve consistent results that rival the best brunch establishments in your city. The make-ahead and freezing capabilities mean you can enjoy homemade waffles any day of the week without the time investment of cooking from scratch each morning. Don’t let another weekend pass without treating yourself and your loved ones to these exceptional waffles. Grab your waffle maker, gather your ingredients, and experience the satisfaction of creating breakfast magic in your own kitchen. Share your waffle creations and creative topping combinations in the comments below—we love seeing how you make this recipe your own. For more breakfast inspiration, explore our collection of easy brunch recipes that will revolutionize your weekend mornings.
FAQs
Can I make waffle batter the night before?
While you can mix dry and wet ingredients separately the night before and store them in the refrigerator, it’s best to combine them just before cooking. Batter that sits overnight loses its leavening power as the baking powder and baking soda react with the buttermilk, resulting in flatter, less fluffy waffles. For best results, mix batter components separately and combine them in the morning, which takes only 2-3 minutes.
Why are my waffles not crispy?
Several factors affect crispiness: insufficient preheating of your waffle maker, too much liquid in the batter, opening the lid too early, or stacking hot waffles on a plate. Ensure your waffle maker reaches full temperature, avoid overmixing which breaks down the batter’s structure, and keep finished waffles on a wire rack rather than stacked. The combination of baking soda and proper cooking temperature creates the crispy exterior you’re seeking.
Can I use regular milk instead of buttermilk?
Yes, create a buttermilk substitute by adding 1 tablespoon of white vinegar or lemon juice to 1 3/4 cups of regular milk and letting it sit for 5 minutes until slightly thickened. This acidified milk reacts with the baking soda to create the same lift and tender texture as buttermilk. You can also use plain kefir as a direct 1:1 substitute.
How do I know when my waffles are done?
Most waffle makers have an indicator light that signals doneness, but the universal sign is when steam stops escaping from the sides of the closed waffle maker. This typically occurs after 3-4 minutes of cooking. The waffle should release easily when you lift the lid without tearing or sticking. If resistance occurs, close the lid and cook for another 30 seconds.
Can I double this recipe for a crowd?
Absolutely! This recipe doubles or triples easily for large gatherings. Keep finished waffles warm and crispy by placing them on a wire rack set on a baking sheet in a 200°F oven while you cook remaining batches. This method maintains texture for up to 30 minutes, ensuring everyone enjoys hot, crispy waffles simultaneously rather than serving them one person at a time.
What’s the difference between Belgian waffle makers and regular ones?
Belgian waffle makers have deeper pockets and typically produce thicker, fluffier waffles with more surface area for toppings. Regular waffle makers create thinner waffles with shallower pockets. This recipe works beautifully in both—simply adjust the amount of batter accordingly (Belgian makers need more batter per waffle). Cooking times remain similar regardless of maker type.
Can I add mix-ins like chocolate chips or blueberries?
Yes! Add 1/2 to 3/4 cup of chocolate chips, fresh blueberries, or chopped nuts directly to the prepared batter, folding gently to distribute. Alternatively, sprinkle mix-ins directly onto the batter after pouring it into the waffle maker but before closing the lid. This technique works especially well with delicate berries that might burst during mixing, preventing purple-tinted batter while maintaining pretty fruit pockets throughout the waffle.