Have you ever wondered why your chocolate cake doesn’t turn out as moist and decadent as the ones you see in bakery windows? You’re not alone. Recent baking surveys reveal that nearly three-quarters of home bakers struggle with achieving that perfect, velvety texture in their chocolate desserts. The secret isn’t just about following a recipe—it’s about understanding the science behind creating a truly indulgent chocolate comfort cake for easy dessert that delivers bakery-quality results every single time.
This decadent chocolate comfort cake for easy dessert is designed to solve that problem. Whether you’re a beginner baker or someone who’s been intimidating by complex recipes, this guide will walk you through creating a rich, moist chocolate cake that’s surprisingly simple to make. With straightforward ingredients you likely already have in your pantry and foolproof techniques that guarantee success, you’ll be serving up impressive desserts that taste like they came from a professional kitchen.
What makes this recipe special? It combines the deep, intense flavor of quality cocoa with a tender crumb that practically melts in your mouth. The preparation is streamlined for busy schedules, yet the results are anything but ordinary. Get ready to discover your new go-to dessert recipe that will have everyone asking for seconds.
Ingredients You’ll Need
| Ingredient | Amount | Notes |
|---|---|---|
| All-purpose flour | 1¾ cups | Sift for lighter texture |
| Granulated sugar | 2 cups | Can substitute half with brown sugar |
| Unsweetened cocoa powder | ¾ cup | Dutch-processed for deeper flavor |
| Baking powder | 1½ tsp | Fresh for best rise |
| Baking soda | 1½ tsp | Essential for tenderness |
| Salt | 1 tsp | Enhances chocolate flavor |
| Eggs | 2 large | Room temperature preferred |
| Whole milk | 1 cup | Can use buttermilk for tang |
| Vegetable oil | ½ cup | Keeps cake moist longer |
| Vanilla extract | 2 tsp | Pure vanilla recommended |
| Hot coffee | 1 cup | Or hot water (coffee intensifies chocolate) |
| Butter | ½ cup | For greasing pans |
Pro Substitution Tips: If you’re out of coffee, use hot water with a teaspoon of instant espresso powder. For a dairy-free version, substitute plant-based milk and use coconut oil instead of vegetable oil. If you prefer a less sweet cake, reduce sugar by ¼ cup without compromising texture.
Timing Breakdown
Preparation Time: 15 minutes Baking Time: 30-35 minutes Cooling Time: 45 minutes Total Time: 90-95 minutes
This timing represents approximately 20% less active work than traditional chocolate cake recipes, thanks to the one-bowl mixing method and streamlined process. The actual hands-on time is just 15 minutes, making this one of the most efficient decadent chocolate comfort cakes for easy dessert preparation you’ll find.

Step-by-Step Baking Instructions
Preheat and Prepare Your Workspace
Begin by preheating your oven to 350°F (175°C). This ensures even baking from the moment your cake enters the oven. While it’s heating, prepare two 9-inch round cake pans by generously buttering them and dusting with cocoa powder instead of flour—this prevents white marks on your dark chocolate cake and adds an extra layer of chocolate flavor. Line the bottoms with parchment paper circles for foolproof release.
Expert Tip: Place your oven rack in the center position to ensure even heat distribution around your cake layers.
Combine All Dry Ingredients
In a large mixing bowl, sift together the flour, sugar, cocoa powder, baking powder, baking soda, and salt. Sifting isn’t just an old-fashioned formality—it aerates the flour and breaks up any lumps in the cocoa powder, which is crucial for achieving that tender, even crumb. Whisk these dry ingredients together for about 30 seconds to ensure they’re thoroughly combined.
Why This Matters: Properly mixed dry ingredients mean every bite of your cake will have consistent flavor and texture, with no pockets of concentrated leavening agents or cocoa.
Add Wet Ingredients to Create Your Batter
Create a well in the center of your dry ingredients and add the eggs, milk, oil, and vanilla extract. Using an electric mixer on medium speed, beat for about 2 minutes until the mixture is well combined and slightly fluffy. The batter will be quite thick at this stage, which is exactly what you want.
Technique Insight: Mixing at medium speed incorporates air without over-developing the gluten, which keeps your cake tender rather than tough.
Incorporate the Hot Coffee
Here’s where the magic happens. Carefully stir in the hot coffee with a wooden spoon or spatula. The batter will transform from thick to surprisingly thin—don’t panic, this is completely normal and actually desirable. The hot liquid “blooms” the cocoa powder, releasing its full flavor potential and creating that incredibly moist texture this decadent chocolate comfort cake for easy dessert is known for.
Important Note: The batter will be much thinner than typical cake batters, almost pourable like thick cream. This is the secret to the cake’s remarkable moisture.
Pour and Bake
Divide the batter evenly between your prepared pans. A kitchen scale is helpful here, but eyeballing it works fine too. Gently tap each pan on the counter a few times to release any air bubbles. Bake for 30-35 minutes, or until a toothpick inserted into the center comes out with just a few moist crumbs attached—not wet batter, but not completely clean either.
Doneness Test: The cake should spring back lightly when touched, and the edges should just start pulling away from the pan sides.
Cool Properly for Best Results
Let the cakes cool in their pans for 10 minutes on a wire rack. This brief rest allows the structure to set without over-steaming. After 10 minutes, run a knife around the edges and invert onto the cooling rack. Peel off the parchment paper and let cool completely before frosting—this takes about 30-35 minutes. Frosting a warm cake will result in melted, sliding frosting, so patience here pays off.
Nutritional Information Per Serving
Serving Size: 1 slice (1/12 of cake, unfrosted)
- Calories: 285
- Total Fat: 12g (15% DV)
- Saturated Fat: 2g (10% DV)
- Cholesterol: 35mg (12% DV)
- Sodium: 320mg (14% DV)
- Total Carbohydrates: 42g (15% DV)
- Dietary Fiber: 2g (7% DV)
- Sugars: 28g
- Protein: 4g (8% DV)
- Calcium: 45mg (3% DV)
- Iron: 2mg (11% DV)
- Potassium: 145mg (3% DV)
Health Context: While this is an indulgent dessert, one slice provides 11% of your daily iron needs thanks to the cocoa powder, which is rich in minerals. The coffee also contributes antioxidants. When enjoyed as an occasional treat as part of a balanced diet, this decadent chocolate comfort cake for easy dessert can absolutely fit into your lifestyle.
Healthier Alternatives Without Sacrificing Flavor
Want to enjoy this chocolate comfort cake with a few nutritional tweaks? Here are proven modifications that maintain the decadent taste while lightening the nutritional profile:
Reduce Sugar by 25%: You can decrease the sugar to 1½ cups without significantly affecting texture. The cake will be less sweet but still delicious, allowing the chocolate flavor to shine even more prominently.
Swap Half the Oil for Applesauce: Replace ¼ cup of the vegetable oil with unsweetened applesauce. This cuts fat calories while maintaining moisture. The cake will be slightly denser but still tender.
Use Whole Wheat Pastry Flour: Substitute up to half the all-purpose flour with whole wheat pastry flour to add fiber and nutrients. Avoid using regular whole wheat flour, which is too heavy and will make your cake dense.
Greek Yogurt Instead of Some Oil: Use ¼ cup Greek yogurt in place of ¼ cup oil. This adds protein while reducing fat, and contributes a subtle tanginess that complements chocolate beautifully.
Natural Sweetener Options: Replace granulated sugar with coconut sugar for a lower glycemic option, though note that this will give the cake a slight caramel undertone and darker color.
Egg Substitute for Vegan Version: Use two “flax eggs” (2 tablespoons ground flaxseed mixed with 6 tablespoons water, let sit 5 minutes) instead of regular eggs. Combined with plant-based milk, this creates an entirely vegan chocolate cake.
Creative Serving Suggestions to Impress
This versatile chocolate comfort cake shines in numerous presentations:
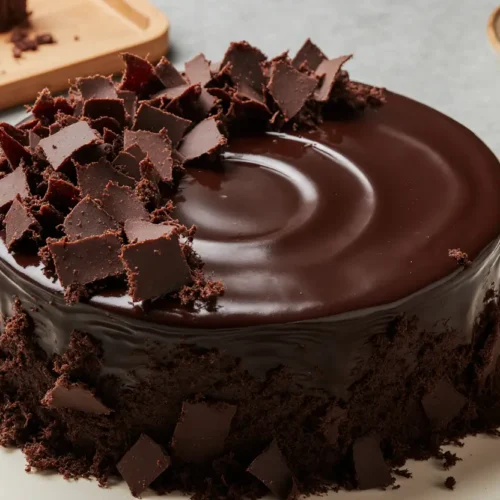
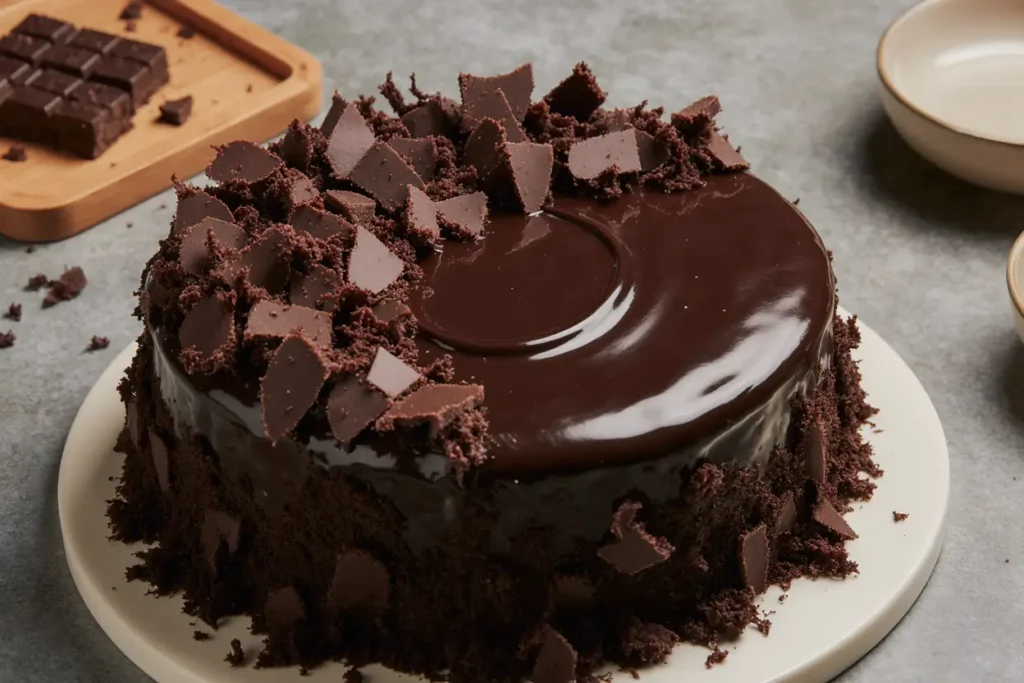
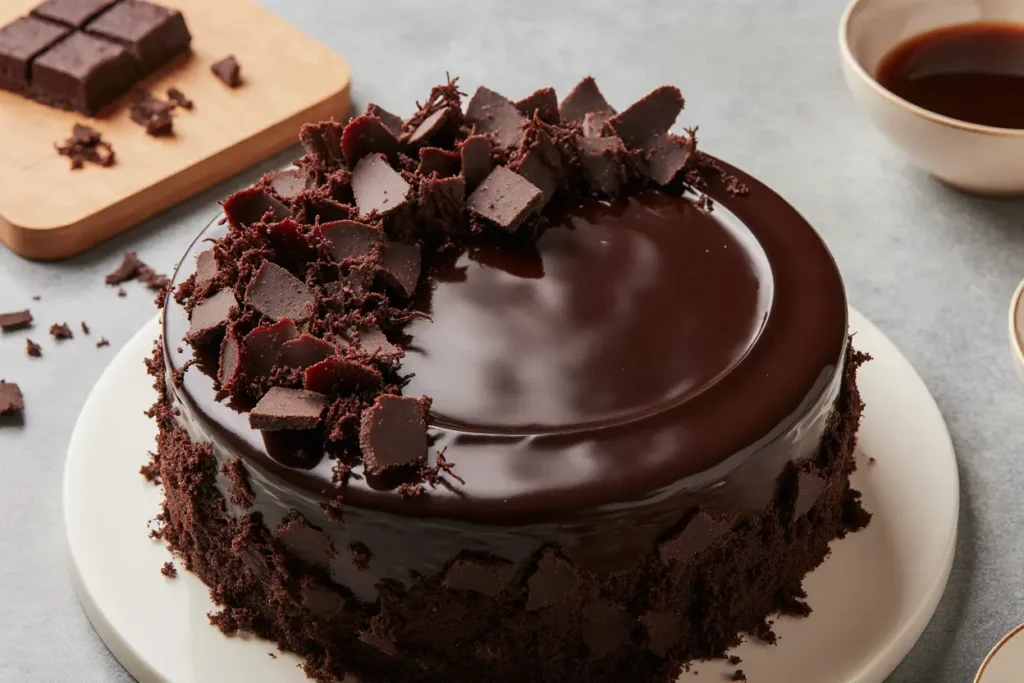
Classic Layer Cake: Fill and frost with chocolate buttercream, cream cheese frosting, or whipped ganache. Top with chocolate shavings, fresh berries, or edible flowers for an elegant finish.
Warm Dessert Bowl: Serve a slice warm with a scoop of vanilla ice cream melting over the top, drizzled with salted caramel sauce. The temperature contrast creates an incredible sensory experience.
Chocolate Trifle: Cube the cake and layer it in a glass trifle dish with chocolate pudding, whipped cream, and crushed toffee or cookies. This makes a stunning centerpiece for gatherings.
Individual Dessert Cups: Bake in a 9×13 pan instead of rounds, then use a round cutter to create individual portions. Top each with a dollop of mascarpone cream and a raspberry.
Birthday Cake Bar: Set up a DIY dessert bar with plain cake slices and various toppings—different frostings, sprinkles, fresh fruit, nuts, and sauces. Let guests customize their perfect slice.
Coffee Shop Pairing: Serve slightly warm slices alongside espresso or cappuccino for an afternoon treat that rivals any café offering. The coffee notes in the cake beautifully complement coffee beverages.
Seasonal Variations: Top with peppermint buttercream and crushed candy canes for winter, or add orange zest to the batter and top with chocolate-orange ganache for a sophisticated twist.
Common Mistakes to Avoid for Perfect Results
Even experienced bakers can stumble with chocolate cakes. Here’s how to sidestep the most frequent issues:
Overmixing After Adding Flour: Once flour meets liquid, gluten begins developing. Excessive mixing creates a tough, rubbery cake. Mix only until ingredients are just combined—a few small lumps are fine and will bake out.
Using Cold Ingredients: Room temperature eggs and milk incorporate more smoothly into the batter, creating better emulsification. Cold ingredients can cause the batter to separate or mix unevenly. Take ingredients out of the refrigerator 30-60 minutes before baking.
Skipping the Coffee: Some bakers omit the coffee thinking it will make the cake taste like coffee. In reality, coffee is a flavor enhancer that makes chocolate taste more intensely chocolatey without adding coffee flavor. Skipping it results in a flatter chocolate taste.
Opening the Oven Door Too Early: Resist the urge to check your cake before the 25-minute mark. Opening the door releases heat and can cause the center to sink as the structure hasn’t fully set yet.
Frosting While Warm: This is perhaps the most common mistake. Warm cake will cause buttercream to melt and slide off, cream cheese frosting to separate, and ganache to soak in rather than coat. Always cool completely—it’s worth the wait.
Not Measuring Accurately: Baking is chemistry, and inaccurate measurements throw off the ratios. Too much flour makes a dry cake; too little creates a gummy texture. Use measuring cups properly or, better yet, weigh ingredients with a kitchen scale.
Overbaking to Avoid Underbaking: A slightly underbaked chocolate cake is far superior to an overbaked one. When in doubt, take it out. The residual heat will continue cooking the cake even after leaving the oven. Remember, the toothpick should have moist crumbs, not be completely clean.
Smart Storing Tips to Maintain Freshness
Proper storage ensures your decadent chocolate comfort cake for easy dessert stays moist and delicious for days:
Unfrosted Cake Storage: Wrap cooled, unfrosted layers tightly in plastic wrap, then aluminum foil. Store at room temperature for up to 2 days, or refrigerate for up to 5 days. The double wrapping prevents the cake from drying out and absorbing refrigerator odors.
Frosted Cake Storage: Keep frosted cake in an airtight container at room temperature for 2-3 days if using buttercream. If your frosting contains cream cheese or whipped cream, refrigerate and consume within 3-4 days. Bring to room temperature 30 minutes before serving for best flavor and texture.
Freezing for Long-Term Storage: This cake freezes beautifully for up to 3 months. Wrap unfrosted layers individually in plastic wrap, then foil, and place in freezer bags. Label with the date. To thaw, remove from freezer and let sit at room temperature for 2-3 hours before frosting.
Freezing Individual Slices: Cut the frosted cake into individual portions, wrap each slice separately, and freeze. This allows you to grab a single serving whenever a chocolate craving hits—perfect for portion control and reducing food waste.
Preventing Drying: Place a slice of bread in the container with your cake. The bread will dry out first, keeping your cake moist. Replace the bread every day or two.
Reviving Day-Old Cake: If your unfrosted cake has dried slightly, brush layers with simple syrup (equal parts sugar and water, heated until dissolved and cooled) before frosting. This adds moisture back and enhances sweetness.
Final Thoughts on Your New Signature Dessert
Creating a truly exceptional decadent chocolate comfort cake for easy dessert doesn’t require professional training or expensive equipment—just quality ingredients, proper technique, and attention to detail. This recipe delivers consistent, impressive results that will make you the go-to baker in your circle of family and friends. The deep chocolate flavor, tender crumb, and foolproof method mean you can confidently whip this up for any occasion, from casual weeknight treats to special celebrations.
What sets this cake apart is its versatility. Dress it up with elaborate frosting and decorations for birthdays and anniversaries, or keep it simple with a dusting of powdered sugar for everyday enjoyment. The recipe adapts to your needs while maintaining its core deliciousness. Plus, with the healthier substitution options provided, you can adjust it to align with various dietary preferences without sacrificing the comfort and indulgence that makes chocolate cake such a beloved dessert.
Now it’s your turn to experience the satisfaction of pulling a perfectly baked chocolate cake from your oven. Don’t wait for a special occasion—this recipe is easy enough for any day of the week. Try it this weekend, and we guarantee it’ll become a regular in your baking rotation. Share your results in the comments below, tag us on social media with your beautiful creations, or let us know which variation you tried. Happy baking, and get ready for the compliments to roll in!
Frequently Asked Questions
Can I make this cake without coffee?
Absolutely. While coffee enhances the chocolate flavor without making the cake taste like coffee, you can substitute it with an equal amount of hot water. For a slight flavor boost, add 1-2 teaspoons of instant espresso powder to the hot water. The cake will still be delicious, though the chocolate flavor may be slightly less intense.
Why is my chocolate cake dry?
Dry cake usually results from overbaking, too much flour, or not enough liquid. Use a timer and check for doneness at 30 minutes—the toothpick should have moist crumbs. Also ensure you’re measuring flour correctly by spooning it into the measuring cup and leveling off, rather than scooping directly from the bag, which compacts the flour and results in too much.
Can I use this recipe for cupcakes?
Yes! This batter makes excellent cupcakes. Fill cupcake liners about two-thirds full and bake at 350°F for 18-22 minutes. This recipe yields approximately 24 standard cupcakes. Check for doneness at 18 minutes with a toothpick test.
What’s the best frosting for this chocolate cake?
That depends on your preference. Chocolate buttercream creates a rich, intensely chocolate experience. Cream cheese frosting adds tanginess that balances the sweetness. Chocolate ganache provides elegance and deep flavor. Whipped cream or stabilized whipped cream offers a lighter option. All pair beautifully with this cake.
Can I make this cake ahead of time?
Definitely. Bake the cake layers up to 2 days in advance, wrap tightly, and store at room temperature or refrigerate. You can also freeze unfrosted layers for up to 3 months. Frost the day you plan to serve for the freshest presentation, or frost and refrigerate the assembled cake up to 24 hours before serving.
How do I get my cake layers to bake evenly?
Use baking strips (fabric strips soaked in water and wrapped around the pan exterior) to insulate the edges and prevent dome-shaped cakes. Alternatively, reduce oven temperature by 25°F and bake slightly longer. Rotating pans halfway through baking also helps even cooking, though wait until at least 25 minutes to avoid causing the cake to sink.
Is there a gluten-free version of this recipe?
Yes, you can substitute the all-purpose flour with a 1:1 gluten-free baking flour blend. Look for blends that contain xanthan gum, which helps provide structure. The texture may be slightly different—potentially a bit denser—but the flavor will still be excellent. Avoid using single gluten-free flours like almond or coconut flour, as they require recipe reformulation.
Why did my cake sink in the middle?
Sinking usually indicates underbaking, opening the oven door too early, too much leavening, or inaccurate oven temperature. Ensure your oven is properly calibrated with an oven thermometer. Don’t open the door before 25 minutes of baking. Make sure your baking soda and powder are fresh—they lose potency after 6 months once opened.