


There’s something utterly enchanting about a dessert that surprises you when you dig in. Enter the Decadent Red Velvet Lava Cake—a rich, vibrant, velvety cake with a molten cream cheese core that oozes indulgence. Whether you’re looking to impress on date night, spoil your friends, or treat yourself to a luxurious solo dessert, this recipe is a dream come true. It’s the kind of sweet that looks like it came straight from a five-star patisserie but is totally achievable in your own kitchen.
This recipe makes four individually portioned mini cakes—perfect for small gatherings, anniversaries, Valentine’s Day, or anytime you want to show love through dessert. With a luscious combination of red velvet cake and creamy cheesecake filling, it’s essentially the best of both worlds.
Why You’ll Fall in Love with This Recipe
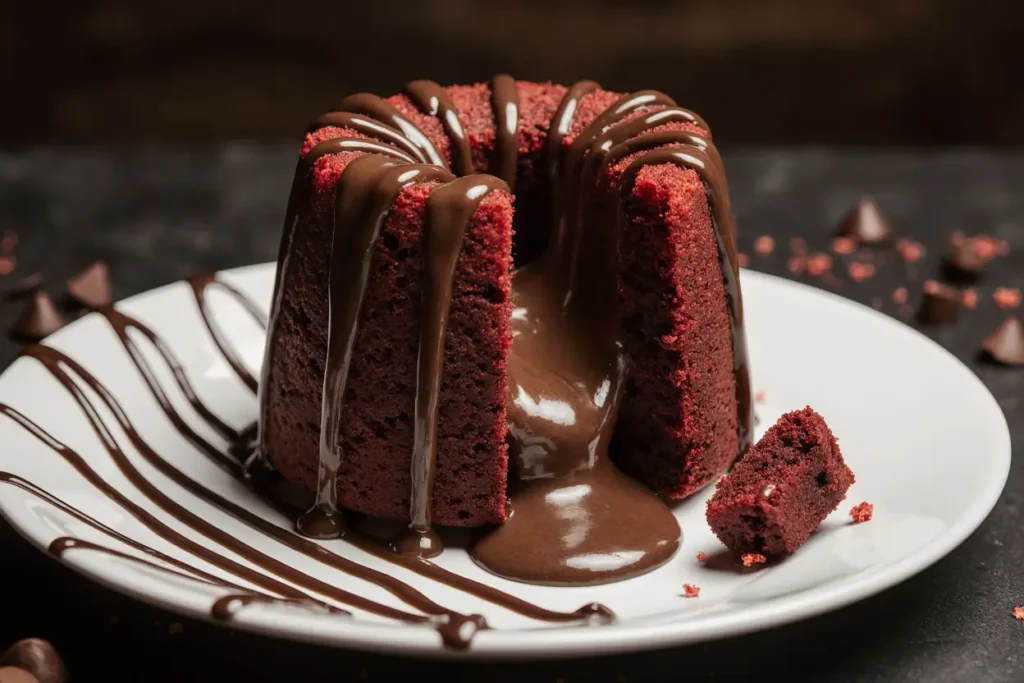
This red velvet lava cake isn’t just a dessert—it’s an experience. Imagine slicing into a warm, soft cake only to reveal a flowing center of sweetened cream cheese. The red velvet base, enriched with butter and white chocolate, offers a soft yet structured exterior that holds its shape while still yielding to the creamy center.
Here’s what makes this recipe stand out:
- Perfect balance of tangy cream cheese and sweet white chocolate.
- Elegant presentation but surprisingly easy to make.
- Prep-friendly—you can prepare the components ahead and bake when ready.
- Customizable—great for flavor twists or dietary swaps.
Ingredients Overview
For the Red Velvet Lava Cake Batter:
- ½ cup (115g) unsalted butter
- ½ cup white chocolate chips or chopped white chocolate
- 2 large eggs
- 1 egg yolk
- ½ cup powdered sugar
- 1 tbsp cocoa powder
- ½ tsp vanilla extract
- ½ tsp red gel food coloring
- ¼ cup all-purpose flour
- Pinch of salt
For the Cream Cheese Lava Filling:
- 115g (4 oz) cream cheese, softened
- 2 tbsp powdered sugar
- ¼ tsp vanilla extract
This combination results in four perfectly portioned mini cakes bursting with flavor, texture, and rich contrast between warm cake and molten core.
Kitchen Equipment You’ll Need
Before you begin, make sure you have the following tools:
- Mixing bowls
- Whisk and rubber spatula
- Electric hand mixer or stand mixer (optional for lava filling)
- Microwave-safe bowl or double boiler
- 4 ramekins or muffin cups (6-oz size works best)
- Non-stick spray or butter for greasing
- Fine mesh sieve (for dusting powdered sugar)
- Baking sheet (for even baking if using muffin cups)

Step-by-Step Instructions
1. Prepare the Cream Cheese Lava Filling
Timing Tip: Do this first so it has time to firm up.
- In a small bowl, combine the softened cream cheese, powdered sugar, and vanilla extract. Mix until smooth and creamy.
- Divide the mixture into four small mounds and place them on a parchment-lined plate or tray.
- Freeze for 20–30 minutes, or until solid enough to handle.
2. Make the Red Velvet Batter
- In a microwave-safe bowl or double boiler, melt the butter and white chocolate until smooth. Stir to combine and set aside to cool slightly.
- In a large bowl, whisk together the eggs, egg yolk, powdered sugar, cocoa powder, and vanilla extract. Whisk until smooth and glossy.
- Stir in the melted chocolate and butter mixture along with the red gel food coloring.
- Gently fold in the flour and a pinch of salt. Mix just until combined—do not overmix.
3. Assemble the Lava Cakes
- Preheat your oven to 220°C (425°F).
- Generously grease and flour four ramekins or muffin cups.
- Spoon half of the red velvet batter into each ramekin, spreading it to cover the bottom.
- Place a frozen cream cheese mound in the center of each.
- Top with the remaining batter, ensuring the filling is completely covered.
4. Bake
- Place the ramekins on a baking sheet and bake for 12–14 minutes.
- The edges should be firm and set, but the center should still jiggle slightly.
- Let cool for just 1–2 minutes, then carefully invert each cake onto a plate.
5. Serve and Savor
- Serve immediately to enjoy the full molten effect.
- Garnish with a dusting of powdered sugar, fresh berries, or a scoop of vanilla ice cream.
- For added decadence, drizzle with melted white chocolate or raspberry coulis.
Recipe Tips and Tricks
- Do not overbake. The signature gooey center depends on a slightly underdone middle.
- Use quality chocolate. The better the white chocolate, the richer the flavor.
- Room temp ingredients. This ensures a smoother batter and better texture.
- Make ahead. You can freeze the assembled, unbaked cakes for up to 2 days. Bake from frozen, adding 1–2 minutes to the baking time.
Creative Variations
Want to put your own spin on this dessert? Try these:
- Chocolate Lava: Swap red food coloring and cocoa for 1 additional tbsp cocoa powder and use dark chocolate instead of white chocolate.
- Peanut Butter Core: Replace the cream cheese filling with a frozen scoop of sweetened peanut butter.
- Lemon Velvet: Use yellow gel coloring and swap vanilla extract for lemon extract in both the cake and filling for a tangy twist.
- Gluten-Free: Substitute all-purpose flour with a 1:1 gluten-free blend.
How to Store and Reheat Leftovers
If you happen to have leftovers (a rarity!), here’s how to store and enjoy them later:
- Refrigeration: Store cooled cakes in an airtight container in the fridge for up to 3 days.
- Reheat: Microwave individual cakes for about 20–30 seconds until warm and molten again.
- Freezing: You can freeze unbaked, assembled cakes wrapped in plastic wrap and foil. Bake from frozen for 14–16 minutes.
Food and Drink Pairings
Serve your red velvet lava cakes with:
- A glass of chilled Prosecco or rosé champagne for elegance.
- Espresso or dark roast coffee to balance the richness.
- A scoop of vanilla bean ice cream or mascarpone whipped cream.
- A drizzle of raspberry sauce for added tartness.
These additions elevate the already luxurious dessert to fine-dining status.
Frequently Asked Questions (FAQ)
Can I make these ahead of time?
Yes! You can prepare and freeze the assembled cakes. Bake straight from frozen, adding 1–2 extra minutes to the bake time.
What’s the best way to ensure the lava center stays molten?
Do not overbake. The key is to remove the cakes when the edges are set but the centers are still soft and jiggly.
Can I use regular food coloring instead of gel?
Gel is recommended for more vibrant color without thinning the batter, but you can use liquid coloring—start with 1 tsp and adjust as needed.
Can I make this without ramekins?
Yes, sturdy muffin tins can work—just reduce the baking time slightly and grease well.
What’s the difference between red velvet and chocolate cake?
Red velvet contains less cocoa powder and is typically softer and slightly tangy thanks to buttermilk or cream cheese additions. In this recipe, the white chocolate and red coloring make it even more indulgent and distinctive.
Final Thoughts: The Ultimate Dessert to Impress
The Decadent Red Velvet Lava Cake is a luxurious treat that blends visual appeal with irresistible flavor and texture. It’s easy enough for home bakers yet elegant enough to serve at your next celebration. With a rich, ruby-red hue and a creamy, molten center, this dessert is a love letter in every bite.
Enjoyed This Recipe?
If you loved this Red Velvet Lava Cake, please share it with friends and family on social media! And don’t forget to subscribe to our blog for more indulgent recipes, baking tips, and sweet inspiration delivered straight to your inbox. Your next favorite dessert is just a click away. 🍰💕


