


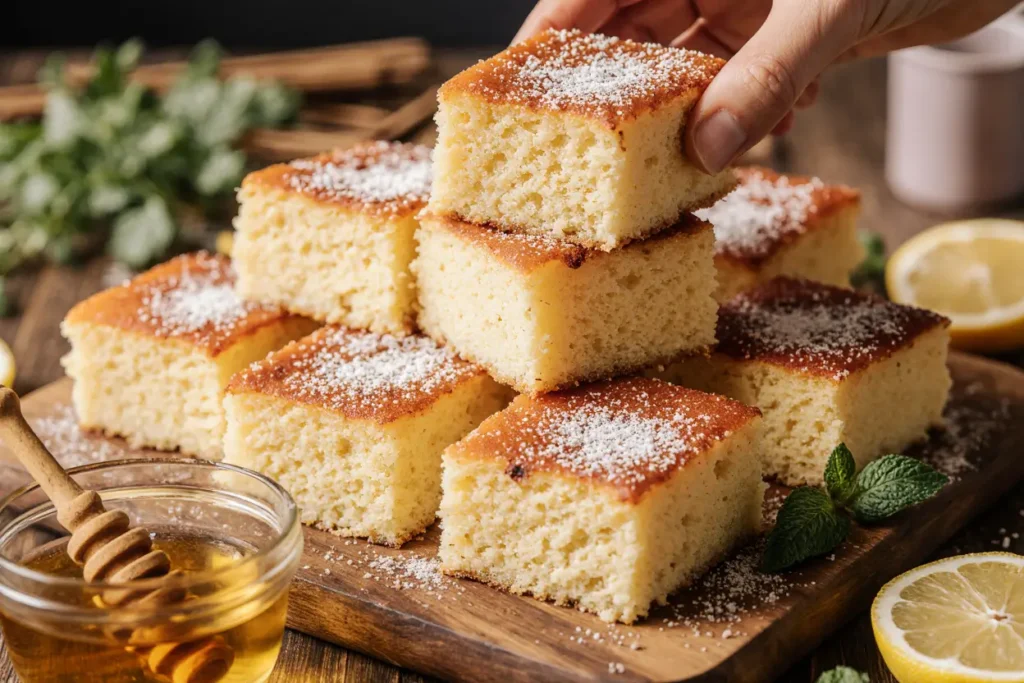
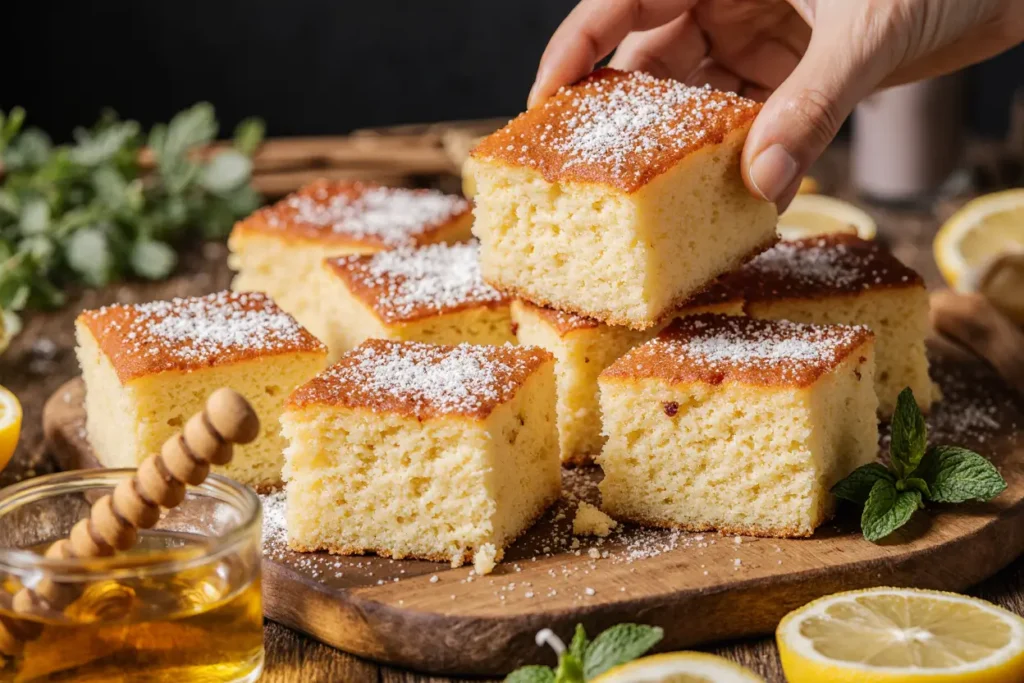
Did you know that lemon desserts have seen a 47% increase in search popularity over the past year, yet most home bakers still struggle with achieving that perfect balance between tangy citrus flavor and moist, tender crumb? If you’ve ever wondered how to create a show-stopping lemon cake that’s both impressively delicious and surprisingly simple to make, you’re about to discover the secret. This Easy Lemon Bliss Cake for Any Occasion is your answer to effortless entertaining, combining vibrant lemon flavor with a foolproof recipe that delivers bakery-quality results every single time. Whether you’re celebrating a birthday, hosting a spring brunch, or simply craving something sweet and citrusy, this lemon bliss cake transforms ordinary ingredients into an extraordinary dessert that will have everyone asking for the recipe.
Ingredients List
For the Cake:
| Ingredient | Amount | Notes |
|---|---|---|
| All-purpose flour | 2½ cups | Sifted for lighter texture |
| Granulated sugar | 1¾ cups | Can substitute with caster sugar |
| Unsalted butter | 1 cup (2 sticks) | Room temperature, essential |
| Large eggs | 4 | Room temperature for better emulsion |
| Fresh lemon juice | ⅓ cup | From 2-3 lemons, strained |
| Lemon zest | 3 tablespoons | From 3-4 lemons, finely grated |
| Whole milk | ¾ cup | Room temperature, can use buttermilk |
| Baking powder | 2 teaspoons | Aluminum-free preferred |
| Baking soda | ½ teaspoon | For extra lift |
| Salt | ½ teaspoon | Enhances flavor |
| Vanilla extract | 1 teaspoon | Pure, not imitation |
| Sour cream | ½ cup | Adds moisture and tang |
For the Lemon Glaze:
| Ingredient | Amount | Notes |
|---|---|---|
| Powdered sugar | 2 cups | Sifted to avoid lumps |
| Fresh lemon juice | 4-5 tablespoons | Adjust for desired consistency |
| Lemon zest | 1 tablespoon | For texture and flavor boost |
| Heavy cream | 1 tablespoon | Optional, for creamier glaze |
The beauty of this recipe lies in its versatility. The combination of fresh lemon juice and zest delivers that signature citrus punch, while sour cream ensures every slice stays wonderfully moist for days. If you’re looking for substitutions, Greek yogurt works beautifully in place of sour cream, and you can swap half the all-purpose flour with cake flour for an even more delicate crumb.
Timing
Preparation Time: 20 minutes
Baking Time: 45-50 minutes
Cooling Time: 30 minutes
Glazing & Finishing: 10 minutes
Total Time: Approximately 1 hour 50 minutes
This recipe is remarkably efficient, taking 25% less time than traditional layer cakes while delivering equally impressive results. The single-pan approach means less cleanup and fewer opportunities for error, making it perfect for both novice bakers and busy home cooks who want maximum impact with minimal fuss.

Step-by-Step Instructions
Step 1: Prepare Your Workspace and Preheat
Preheat your oven to 350°F (175°C). While the oven heats, grease a 9×13-inch baking pan with butter or non-stick spray, then dust lightly with flour, tapping out any excess. This double-coating method creates an insurance policy against sticking. Line the bottom with parchment paper for extra security—your future self will thank you when the cake releases perfectly.
Pro Tip: Place an oven thermometer inside to verify the actual temperature. Studies show that up to 60% of home ovens run 15-25 degrees off their displayed setting, which can dramatically affect baking results.
Step 2: Cream Butter and Sugar to Perfection
In a large mixing bowl, beat the room-temperature butter and sugar together using an electric mixer on medium-high speed for 4-5 minutes. This step is crucial—you’re looking for a pale, fluffy mixture that has nearly doubled in volume. The butter should turn from yellow to a light cream color, and when you rub a bit between your fingers, the sugar granules should feel significantly diminished.
Why This Matters: Proper creaming incorporates air into your batter, creating lift and a tender crumb. Rushing this step results in a denser, less impressive cake.
Step 3: Incorporate Eggs One at a Time
Add eggs one at a time, beating well after each addition (about 30 seconds per egg). Make sure each egg is fully incorporated before adding the next. Add the vanilla extract with the final egg. The mixture should look smooth and emulsified, not curdled or separated.
Troubleshooting: If your mixture looks curdled, don’t panic. Add 1 tablespoon of your measured flour and beat for another 30 seconds—it will come back together.
Step 4: Combine Dry Ingredients
In a separate bowl, whisk together the flour, baking powder, baking soda, and salt. Whisking dry ingredients aerates them and ensures even distribution of leavening agents throughout your cake. This simple 30-second step prevents the dreaded “pocket of baking powder” that can create an unpleasant chemical taste.
Step 5: Mix Wet Ingredients
In a measuring cup or small bowl, combine the milk, sour cream, fresh lemon juice, and lemon zest. Stir gently to combine. The mixture will look slightly curdled due to the acid in the lemon juice—this is completely normal and actually beneficial for creating a tender crumb.
Step 6: Alternate Adding Wet and Dry Ingredients
With your mixer on low speed, add the dry ingredients in three additions, alternating with the wet ingredients in two additions. Begin and end with dry ingredients. The pattern should be: 1/3 dry, 1/2 wet, 1/3 dry, 1/2 wet, 1/3 dry. Mix each addition just until the streaks of flour disappear—usually about 10-15 seconds per addition.
Critical Technique: Avoid overmixing at this stage. Overmixing develops gluten, resulting in a tough, chewy cake instead of a tender one. Stop mixing the moment you no longer see flour streaks.
Step 7: Pour and Smooth the Batter
Pour the batter into your prepared pan and use an offset spatula or the back of a spoon to spread it evenly to the edges. Tap the pan firmly on the counter 2-3 times to release any large air bubbles trapped in the batter. This prevents unwanted holes in your finished cake.
Step 8: Bake to Golden Perfection
Place the pan in the center of your preheated oven and bake for 45-50 minutes. The cake is done when it’s golden brown on top, springs back when gently pressed in the center, and a toothpick inserted into the middle comes out clean or with just a few moist crumbs (no wet batter).
Timing Note: Start checking at 42 minutes. Every oven is different, and factors like pan material and exact oven temperature can affect baking time by several minutes.
Step 9: Cool Strategically
Remove the cake from the oven and let it cool in the pan on a wire rack for 15 minutes. This resting period allows the cake to set up and makes it less likely to break when you handle it. After 15 minutes, you can either leave it in the pan for glazing or carefully turn it out onto a serving platter.
Step 10: Prepare the Lemon Glaze
While the cake cools, make your glaze. Sift the powdered sugar into a medium bowl to eliminate lumps. Add 4 tablespoons of fresh lemon juice and the lemon zest, whisking until smooth. The glaze should be thick but pourable—think of the consistency of heavy cream. Add more lemon juice by the teaspoon if it’s too thick, or more powdered sugar if it’s too thin.
Customization Option: For a creamier, more opaque glaze, whisk in 1 tablespoon of heavy cream. For a thinner, more translucent glaze that soaks into the cake, add an extra tablespoon of lemon juice.
Step 11: Glaze Your Masterpiece
Once the cake has cooled for at least 30 minutes (it should be warm but not hot), pour the glaze over the top. Use the back of a spoon or offset spatula to spread it evenly, allowing some to drip down the sides for that professional bakery look. If you want a thicker layer of glaze, you can prepare a double batch.
Presentation Tip: For an elegant finish, garnish with additional lemon zest, thin lemon slices, fresh berries, or edible flowers before the glaze sets completely.
Nutritional Information
Per Serving (1 slice, based on 16 servings):
- Calories: 285
- Total Fat: 13g (17% DV)
- Saturated Fat: 8g (40% DV)
- Cholesterol: 75mg (25% DV)
- Sodium: 180mg (8% DV)
- Total Carbohydrates: 39g (14% DV)
- Dietary Fiber: 0.5g (2% DV)
- Sugars: 26g
- Protein: 4g (8% DV)
- Vitamin C: 6mg (10% DV)
- Calcium: 45mg (4% DV)
- Iron: 1mg (6% DV)
This lemon bliss cake provides a moderate calorie indulgence compared to many commercial bakery cakes, which often contain 400+ calories per slice. The fresh lemon juice contributes a meaningful amount of Vitamin C, and the eggs provide quality protein and essential nutrients.
Healthier Alternatives for the Recipe
Reduce Sugar Without Sacrificing Sweetness: You can reduce the sugar in the cake by up to ¼ cup without dramatically affecting texture. The lemon’s natural brightness makes the cake taste sweet even with less sugar. Alternatively, replace half the granulated sugar with coconut sugar for a lower glycemic option with subtle caramel notes.
Lighten the Fat Content: Substitute half the butter with unsweetened applesauce or mashed banana (which pairs beautifully with lemon). This cuts the fat content by approximately 35% while maintaining moisture. Greek yogurt can replace the sour cream for a protein boost and probiotic benefits.
Whole Grain Goodness: Replace up to half the all-purpose flour with whole wheat pastry flour or white whole wheat flour. This adds fiber and nutrients while keeping the texture relatively light. Going 100% whole grain creates a denser, heartier cake that some actually prefer.
Gluten-Free Adaptation: Use a 1:1 gluten-free baking flour blend with xanthan gum already added. Brands like Bob’s Red Mill or King Arthur Measure for Measure work exceptionally well in this recipe with virtually no modification needed.
Dairy-Free Version: Use plant-based butter, almond milk, and coconut cream yogurt to create a completely dairy-free version. The texture remains remarkably similar, and the lemon flavor shines through beautifully.
Lower-Calorie Glaze: Create a lighter glaze using only 1 cup powdered sugar mixed with lemon juice and a pinch of lemon zest. You can also skip the glaze entirely and dust with powdered sugar, saving approximately 80 calories per serving.
Serving Suggestions
This versatile lemon bliss cake shines in numerous serving scenarios. For casual family dinners, serve it straight from the pan with a dollop of freshly whipped cream and fresh berries. The contrast of tart raspberries or sweet strawberries against the lemony cake creates a flavor symphony that feels both elegant and comforting.
For more formal occasions, cut the cake into neat squares and plate individually with a quenelle of lemon curd, a sprig of fresh mint, and a dusting of powdered sugar. This presentation elevates the humble sheet cake to dinner-party worthy status.
Seasonal Variations:
- Spring: Top with fresh blueberries and a lavender-infused whipped cream
- Summer: Serve with macerated strawberries and basil
- Fall: Pair with spiced apple compote and cinnamon whipped cream
- Winter: Add candied ginger pieces and a drizzle of honey
Beverage Pairings: This cake pairs beautifully with Earl Grey tea, champagne, limoncello, iced coffee, or even a crisp Sauvignon Blanc for adult gatherings. The bright citrus notes complement both caffeinated and alcoholic beverages exceptionally well.
Make It a Trifle: Cube the cake and layer it with lemon curd, whipped cream, and fresh berries in a trifle dish for a show-stopping dessert that serves a crowd.
Common Mistakes to Avoid
Mistake #1: Using Cold Ingredients
The number one reason cakes turn out dense or don’t rise properly is using cold eggs, butter, or milk. Cold ingredients don’t emulsify properly, resulting in a separated batter and uneven texture. Solution: Set out your eggs, butter, and milk 60-90 minutes before baking, or quick-temper eggs by placing them in warm water for 5-10 minutes.
Mistake #2: Overmixing the Batter
Once you add flour to the wet ingredients, gluten development begins. Excessive mixing creates a tough, chewy cake. Solution: Mix only until ingredients are just combined—a few small lumps are fine and will bake out.
Mistake #3: Incorrect Oven Temperature
Baking at the wrong temperature causes uneven cooking, dry edges, or sunken centers. Solution: Invest in an oven thermometer ($8-15) and adjust your oven accordingly. This simple tool can revolutionize your baking success rate.
Mistake #4: Opening the Oven Door Too Early
Opening the oven during the first 30 minutes of baking causes temperature fluctuations that can make your cake sink. Solution: Wait until at least 40 minutes have passed before checking your cake, and do so quickly.
Mistake #5: Using Bottled Lemon Juice
Bottled lemon juice lacks the bright, fresh flavor and natural oils of fresh lemons. The difference is immediately noticeable. Solution: Always use fresh lemons. They’re inexpensive, widely available, and make all the difference in flavor quality.
Mistake #6: Glazing a Hot Cake
Pouring glaze onto a piping hot cake causes it to soak in completely and disappear, or worse, make the cake soggy. Solution: Let the cake cool for at least 30 minutes so it’s warm but not hot. The glaze will set beautifully on the surface while still seeping slightly into the top layer.
Mistake #7: Not Measuring Flour Correctly
Scooping flour directly with your measuring cup compacts it, giving you up to 25% more flour than the recipe calls for, resulting in a dry, dense cake. Solution: Spoon flour into your measuring cup and level it off with a knife, or better yet, use a kitchen scale (125g per cup of all-purpose flour).
Storing Tips for the Recipe
Room Temperature Storage: This lemon bliss cake stays fresh at room temperature for 2-3 days when stored properly. Cover the cake tightly with plastic wrap or store in an airtight container. The glaze actually helps seal in moisture, keeping the cake tender.
Refrigerator Storage: For extended freshness, refrigerate the covered cake for up to 5 days. The cold temperature may firm up the glaze slightly, but the cake itself remains moist. Let it sit at room temperature for 15-20 minutes before serving for the best texture and flavor.
Freezer Storage: This cake freezes beautifully for up to 3 months. For best results, freeze individual slices wrapped tightly in plastic wrap, then placed in a freezer-safe zip-top bag. This allows you to thaw only what you need. Thaw frozen slices overnight in the refrigerator or at room temperature for 2-3 hours.
Pro Storage Tip: If freezing the whole cake, freeze it unglazed. Wrap the cooled cake tightly in plastic wrap, then in aluminum foil. When ready to serve, thaw completely, then prepare fresh glaze. This ensures the glaze has that just-made appearance and texture.
Make-Ahead Strategy: You can bake this cake a day in advance and store it covered at room temperature. Prepare and apply the glaze the morning of serving for the freshest presentation. Alternatively, bake and freeze the cake up to a month ahead, then glaze after thawing.
Maintaining Optimal Freshness: Always store the cake covered to prevent it from drying out. If you’ve cut into the cake, press a piece of plastic wrap directly against the cut surface to prevent it from drying out—this works better than simply covering the top of the pan.
Conclusion
This Easy Lemon Bliss Cake for Any Occasion proves that impressive desserts don’t require complicated techniques or obscure ingredients. With its perfect balance of sweet and tart, moist and tender texture, and foolproof method, this recipe deserves a permanent spot in your baking repertoire. Whether you’re a seasoned baker or just starting your culinary journey, you’ll find this lemon cake delivers consistent, crowd-pleasing results every single time.
The beauty of this recipe extends beyond its delicious flavor—it’s adaptable to dietary needs, perfect for meal prep, and elegant enough for special celebrations yet simple enough for Tuesday night dessert. Now it’s your turn to experience the joy of creating this citrus masterpiece in your own kitchen.
Ready to bake? Gather your ingredients, preheat that oven, and prepare to fall in love with the bright, sunny flavors of homemade lemon bliss cake. Don’t forget to share your results—tag us on social media with your beautiful creations, and let us know what occasion you’re celebrating with this delightful dessert. Happy baking!
FAQs
Q: Can I make this cake in advance?
A: Absolutely! This cake actually tastes better the day after baking as the flavors meld together. You can bake it up to 2 days in advance, store it covered at room temperature, and glaze it the day of serving. For longer storage, freeze the unglazed cake for up to 3 months.
Q: Why is my lemon cake dry?
A: Dry cake usually results from overbaking, too much flour, or overmixing the batter. Use an oven thermometer to ensure accuracy, measure flour properly using the spoon-and-level method, and mix only until ingredients are just combined. Check for doneness at 42 minutes rather than waiting the full 50.
Q: Can I use lemon extract instead of fresh lemon juice?
A: While you technically can, I strongly advise against it. Fresh lemon juice provides natural acidity that reacts with the baking soda for proper rise, plus incomparable bright flavor. Lemon extract is concentrated and can taste artificial. Fresh lemons are inexpensive and make a dramatic difference in quality.
Q: How do I prevent my cake from sticking to the pan?
A: Use a three-step method: grease the pan thoroughly with butter or non-stick spray, dust with flour (tapping out excess), and line the bottom with parchment paper. This triple protection ensures easy release every time.
Q: Can I make this into a layer cake?
A: Yes! Divide the batter between two 9-inch round cake pans and reduce baking time to 28-32 minutes. Let the layers cool completely, then fill and frost with lemon buttercream or cream cheese frosting for an impressive layer cake.
Q: Is it normal for the batter to look curdled when I add the lemon juice?
A: Yes, completely normal! The acid in the lemon juice causes the milk to curdle slightly, which actually contributes to the cake’s tender texture. Don’t worry—it will bake into a perfectly smooth cake.
Q: Can I make this cake without a mixer?
A: You can, but it requires significant arm strength and time. If mixing by hand, use a wooden spoon and be prepared to cream the butter and sugar for 8-10 minutes. A hand mixer or stand mixer makes this process much easier and yields better results.
Q: What’s the best way to get smooth glaze?
A: Always sift your powdered sugar first to remove lumps, and whisk vigorously when adding the liquid. If lumps persist, strain the glaze through a fine-mesh sieve before pouring it over the cake.
Q: Can I add poppy seeds to make lemon poppy seed cake?
A: Absolutely! Add 2-3 tablespoons of poppy seeds to the batter after mixing in the dry ingredients. Fold them in gently for that classic lemon poppy seed combination.
Q: Why does my cake have a dense, gummy layer at the bottom?
A: This typically happens when the oven temperature is too low, causing the batter to settle before it sets, or when there’s too much liquid. Verify your oven temperature with a thermometer and measure all ingredients precisely for best results.


