


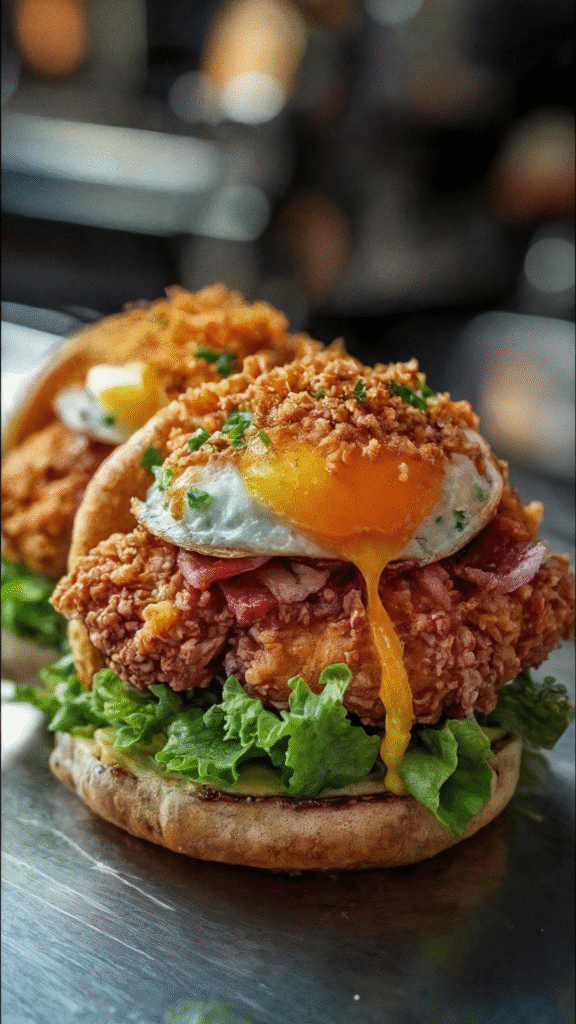
If you’re a fan of bold brunches or love putting a creative twist on comfort food, the Fried Chicken Chalupa with Bacon & Egg is about to become your new favorite go-to recipe. With crispy golden chicken, smoky bacon, and a perfectly fried egg nestled inside a warm tortilla, this dish packs all the textures and flavors you crave — crunchy, creamy, savory, and a touch spicy if you like it hot. Whether you’re cooking for a lazy Sunday brunch, a satisfying dinner, or an indulgent breakfast-for-dinner moment, this chalupa has you covered.
In this post, I’ll walk you through every step of this mouthwatering dish, offer up expert tips and variations, suggest the best drinks to pair with it, and even show you how to store and reheat leftovers — if you manage to have any.
Who Will Love This Recipe?
This recipe is for anyone who:
- Loves elevated fast food-style meals made at home
- Craves indulgent brunch recipes with big flavor
- Enjoys customizing meals with simple ingredient swaps
- Wants a one-dish meal that satisfies all the cravings
It’s also perfect for home cooks who like their food fun, Instagram-worthy, and unapologetically delicious. Think of it as a Tex-Mex and Southern breakfast mashup with restaurant-style flair — but you can whip it up in your own kitchen in under 30 minutes.
Ingredients You’ll Need
Here’s everything that goes into making this high-impact chalupa:
For the Chalupa:
- 2 fried chicken tenders 🍗
- 4 soft flour tortillas 🌮
- 4 strips crispy bacon 🥓
- 2 eggs 🍳
- 1 cup lettuce, shredded 🥬
- 1/4 cup mayonnaise or ranch dressing 🍶
- 1/4 cup hot sauce (optional) 🌶️
- Salt and pepper to taste 🧂
Kitchen Equipment
You won’t need any fancy gadgets to pull this off, but having the following tools on hand will make your cooking easier and more efficient:
- Deep fryer or heavy-bottomed pot (for frying chicken)
- Non-stick skillet or cast iron pan
- Paper towels (for draining bacon and fried items)
- Tongs
- Slotted spoon
- Spatula
- Cutting board and knife
- Small mixing bowl
- Plate for assembling chalupas
Step-by-Step Instructions
1. Fry the Chicken
Start by coating your chicken tenders in a seasoned breading (a mix of flour, salt, pepper, and paprika works great). Heat your oil to 350°F (175°C) and deep fry the tenders until golden brown and fully cooked, about 5-6 minutes. Let them drain on a paper towel-lined plate.
Pro Tip: Want to save time? Use high-quality store-bought fried chicken or air fry your chicken tenders with a drizzle of oil for a lighter version.
2. Prepare the Bacon
Place the bacon strips in a cold skillet and turn the heat to medium. Let them cook slowly until crispy, flipping as needed. Transfer to paper towels to drain excess grease.
Shortcut Tip: Microwave bacon between two paper towels for 3-4 minutes if you’re in a rush!
3. Fry the Eggs
Crack your eggs into a hot pan with a touch of oil or butter. Fry them sunny side up or over-easy to keep the yolk runny — it’s the golden sauce that brings everything together. Season lightly with salt and pepper.
Pro Tip: A runny yolk adds a rich, creamy element that balances the crisp textures of the chicken and bacon.
4. Warm the Tortillas
Microwave the flour tortillas for about 20 seconds or warm them briefly in a skillet to make them pliable and delicious.
5. Assemble the Chalupas
On each tortilla, spread a thin layer of mayonnaise or ranch dressing. Add shredded lettuce, a fried chicken tender, two strips of bacon, and top with a hot fried egg. Drizzle hot sauce if desired.
6. Serve Immediately
These chalupas are best eaten hot, right after assembly, when the egg is still gooey and the bacon is perfectly crisp.
Variations & Customizations
Want to make this dish your own? Here are some creative spins to try:
- Spicy Swap: Use chipotle mayo or sriracha ranch in place of plain mayo.
- Add Cheese: Melted pepper jack or shredded cheddar adds gooey goodness.
- Go Green: Add avocado slices or guacamole for creaminess and healthy fats.
- Low-Carb Option: Swap the tortilla for lettuce wraps or keto-friendly wraps.
- Vegetarian Version: Replace chicken and bacon with crispy tofu and veggie bacon.
Food & Drink Pairings
Pair your Fried Chicken Chalupa with:
- Drinks:
- Spicy Bloody Mary
- Iced coffee or cold brew
- Sparkling water with lime
- Sides:
- Crispy hash browns
- Street corn salad
- Fresh fruit salad
This dish already has bold flavors, so a refreshing drink and a crunchy or cooling side make the perfect accompaniment.
How to Store and Reheat Leftovers
Though best served fresh, you can store leftovers:
- Chicken and Bacon: Store separately in airtight containers in the fridge for up to 3 days. Reheat in an oven or air fryer to keep them crispy.
- Eggs: Best made fresh, but can be stored for 1 day and reheated gently in a skillet.
- Tortillas and Lettuce: Keep tortillas wrapped in foil or a ziplock. Store lettuce in a paper towel-lined container to keep it crisp.
Assembly Tip: Store components separately and assemble just before serving for the best taste and texture.
FAQs
Q: Can I make this recipe ahead of time?
A: Yes! Prep the chicken and bacon ahead of time and reheat before serving. Fry the egg and assemble the chalupa right before eating for the best texture and flavor.
Q: Can I use corn tortillas instead of flour?
A: You can, but flour tortillas hold the filling better and give that soft, chewy bite that pairs beautifully with crispy fillings.
Q: Is this kid-friendly?
A: Absolutely! You can skip the hot sauce and opt for ranch dressing to make it more appealing to younger eaters.
Q: How can I make it healthier?
A: Use grilled chicken instead of fried, turkey bacon instead of pork, and Greek yogurt as a dressing base.
Final Thoughts
The Fried Chicken Chalupa with Bacon & Egg is a next-level brunch recipe that hits every crave-worthy note. It’s satisfying, easy to customize, and downright fun to eat. Whether you’re entertaining friends or treating yourself to a solo brunch, this dish brings the wow factor without complicated steps or obscure ingredients.
Love this Recipe?
If this recipe made your morning (or evening) better, don’t keep it to yourself! Share it with your foodie friends, pin it to your brunch board, and be sure to subscribe to the blog for more creative, flavor-packed recipes every week. Let’s keep cooking and sharing the joy — one delicious bite at a time! 🧡