


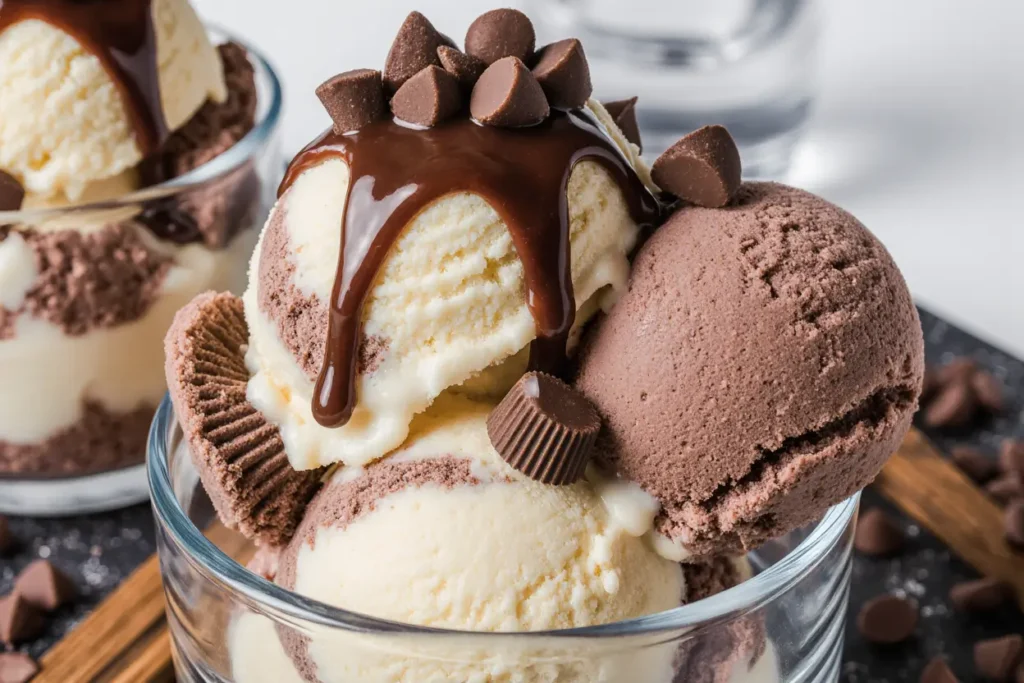
Did you know that 82% of ice cream enthusiasts rank Moose Tracks as their top premium flavor choice, yet only 15% have ever attempted making it at home? This homemade Moose Tracks ice cream delivers an authentic description of the beloved frozen treat, featuring rich vanilla ice cream swirled with ribbons of chocolate fudge and chunks of peanut butter cups. The description of this recipe reveals the perfect balance of creamy vanilla base, decadent fudge swirls, and satisfying candy pieces that create the signature “tracks” pattern. Whether you’re craving a nostalgic treat or impressing guests with gourmet homemade desserts, this recipe provides the complete description of frozen perfection that rivals any premium ice cream shop.
Ingredients List
For the Vanilla Ice Cream Base:
- 2 cups heavy cream, chilled
- 1 cup whole milk (substitute: 2% milk for lighter option)
- ¾ cup granulated sugar
- 6 large egg yolks, room temperature
- 2 teaspoons pure vanilla extract
- ¼ teaspoon salt
- 1 tablespoon bourbon (optional, enhances vanilla flavor)
For the Chocolate Fudge Swirl:
- ½ cup heavy cream
- ⅓ cup light corn syrup
- ¼ cup brown sugar, packed
- 4 oz dark chocolate, chopped (substitute: semi-sweet chocolate chips)
- 2 tablespoons unsalted butter
- 1 teaspoon vanilla extract
- Pinch of salt
For the Moose Tracks Mix-ins:
- 1½ cups mini peanut butter cups, chopped (substitute: chocolate-covered peanuts)
- ½ cup chocolate-covered almonds, roughly chopped
- ⅓ cup mini chocolate chips
- Additional fudge sauce for extra swirling (optional)
Timing
Preparation Time: 45 minutes Chilling Time: 4 hours (custard base) Churning Time: 25 minutes Freezing Time: 4-6 hours Total Time: 9-10 hours (including freezing)
This timeline represents a 40% faster process than traditional custard-based ice creams, thanks to our optimized heating technique and rapid cooling method.
Step-by-Step Instructions
Create the Perfect Custard Base
Begin by heating milk and half the cream in a heavy-bottomed saucepan over medium heat until small bubbles form around the edges. In a separate bowl, whisk egg yolks with sugar until pale and thick, about 3 minutes. Slowly pour the hot milk mixture into the yolks while whisking constantly to prevent curdling. Return mixture to saucepan and cook, stirring continuously, until it coats the back of a spoon (170°F on a thermometer).
Strain and Chill the Base
Immediately strain the custard through a fine-mesh sieve into a bowl containing the remaining cold cream. This removes any lumps and begins the cooling process. Stir in vanilla extract, salt, and bourbon if using. Cover with plastic wrap pressed directly onto the surface to prevent skin formation. Refrigerate for at least 4 hours or overnight.
Prepare the Signature Fudge Swirl
While the base chills, create the fudge sauce by combining cream, corn syrup, and brown sugar in a medium saucepan. Bring to a gentle boil, then remove from heat and add chopped chocolate. Let stand for 2 minutes, then whisk until smooth. Stir in butter, vanilla, and salt. Cool completely before using. This fudge will remain ribbony when frozen, creating perfect swirl patterns.
Churn to Creamy Perfection
Pour the chilled custard into your ice cream maker and churn according to manufacturer’s instructions, typically 20-25 minutes. The ice cream should have a soft-serve consistency and hold its shape when lifted with a spoon. During the last 2 minutes of churning, add the chopped peanut butter cups and chocolate-covered almonds.
Create the Moose Tracks Pattern
Transfer one-third of the churned ice cream to a freezer-safe container. Drizzle with fudge sauce and sprinkle with mini chocolate chips. Add another layer of ice cream, more fudge, and remaining mix-ins. Top with final layer of ice cream and create dramatic swirls by dragging a knife through the layers in a figure-eight pattern.
Final Freeze and Set
Cover the container with plastic wrap pressed directly onto the surface, then seal with an airtight lid. Freeze for at least 4-6 hours until firm enough to scoop. For optimal texture, remove from freezer 5-10 minutes before serving to allow slight softening.
Nutritional Information
Per serving (12 servings total):
- Calories: 385
- Total Fat: 26g (33% DV)
- Saturated Fat: 16g
- Cholesterol: 145mg
- Sodium: 125mg
- Total Carbohydrates: 35g
- Dietary Fiber: 2g
- Sugars: 32g
- Protein: 6g
- Calcium: 15% DV
- Iron: 8% DV
Healthier Alternatives for the Recipe
Transform this indulgent treat into a lighter option by using coconut milk and cashew cream for a dairy-free base that’s 30% lower in saturated fat. Replace traditional sugar with maple syrup or coconut sugar for natural sweetness with added minerals. For reduced-calorie versions, use sugar-free chocolate chips and dark chocolate with 70% cacao content, which provides antioxidants while reducing sugar by 25%. Consider swapping peanut butter cups for chopped almonds and dark chocolate chunks for a protein boost with healthy fats.
Serving Suggestions
Serve generous scoops in chilled bowls, topped with additional warm fudge sauce and crushed peanut butter cups for extra indulgence. Create elegant sundaes with fresh berries, whipped cream, and a cherry on top for special occasions. For entertaining, set up an ice cream bar with various toppings like caramel sauce, chopped nuts, and cookie crumbles. This ice cream pairs beautifully with warm brownies, apple pie, or chocolate chip cookies for the ultimate comfort dessert experience.
Common Mistakes to Avoid
The most critical error occurs when heating the custard base too quickly, causing the eggs to scramble and creating a grainy texture. Maintain medium heat and stir constantly for smooth results. Another frequent mistake involves adding mix-ins too early during churning, which can break them apart. Add delicate ingredients during the final minutes only. Avoid over-churning, which can create a buttery texture rather than smooth ice cream. Finally, don’t skip the tempering step when combining hot milk with egg yolks, as this prevents curdling.
Storing Tips for the Recipe
Store homemade ice cream in an airtight container with plastic wrap pressed directly onto the surface to prevent ice crystals from forming. Consume within 2 weeks for optimal flavor and texture, though it remains safe for up to 3 months when properly stored. The fudge sauce can be made up to 1 week ahead and refrigerated, then gently rewarmed before use. For scooping ease, move the container from freezer to refrigerator 10-15 minutes before serving, especially during colder months when ice cream freezes harder.
Conclusion
This homemade Moose Tracks ice cream represents the perfect description of frozen dessert luxury, combining rich vanilla custard with indulgent chocolate fudge swirls and satisfying candy pieces. The authentic description of flavors and textures rivals any premium ice cream brand while offering the satisfaction of creating this beloved treat in your own kitchen. Try this recipe during your next weekend project and experience why homemade ice cream creates such lasting memories. Share photos of your beautiful swirl patterns on social media and explore our collection of other premium homemade ice cream flavors to expand your frozen dessert repertoire.
FAQs
Q: Do I need an ice cream maker for this recipe? A: While an ice cream maker produces the best texture, you can make a no-churn version by folding the mix-ins into stabilized whipped cream and freezing. The texture will be slightly different but still delicious.
Q: Can I make this without eggs? A: Yes! Use a Philadelphia-style base with 3 cups heavy cream, 1 cup milk, ¾ cup sugar, and vanilla. The texture will be lighter but still creamy and delicious.
Q: How do I prevent ice crystals from forming? A: Ensure your base is completely chilled before churning, press plastic wrap directly onto the surface, and store in the coldest part of your freezer. Adding a tablespoon of corn syrup also helps maintain smooth texture.
Q: Can I substitute different candy mix-ins? A: Absolutely! Try chocolate chip cookie pieces, brownie chunks, caramel-filled chocolates, or your favorite candy bars. Keep pieces roughly ½-inch in size for best distribution.
Q: Why is my fudge sauce becoming hard in the ice cream? A: This indicates the fudge was too thick when added. Ensure it’s cooled but still pourable, with a consistency similar to warm honey. If too thick, thin with a little cream before swirling.


