Honey Pistachio Baklava Cheesecake
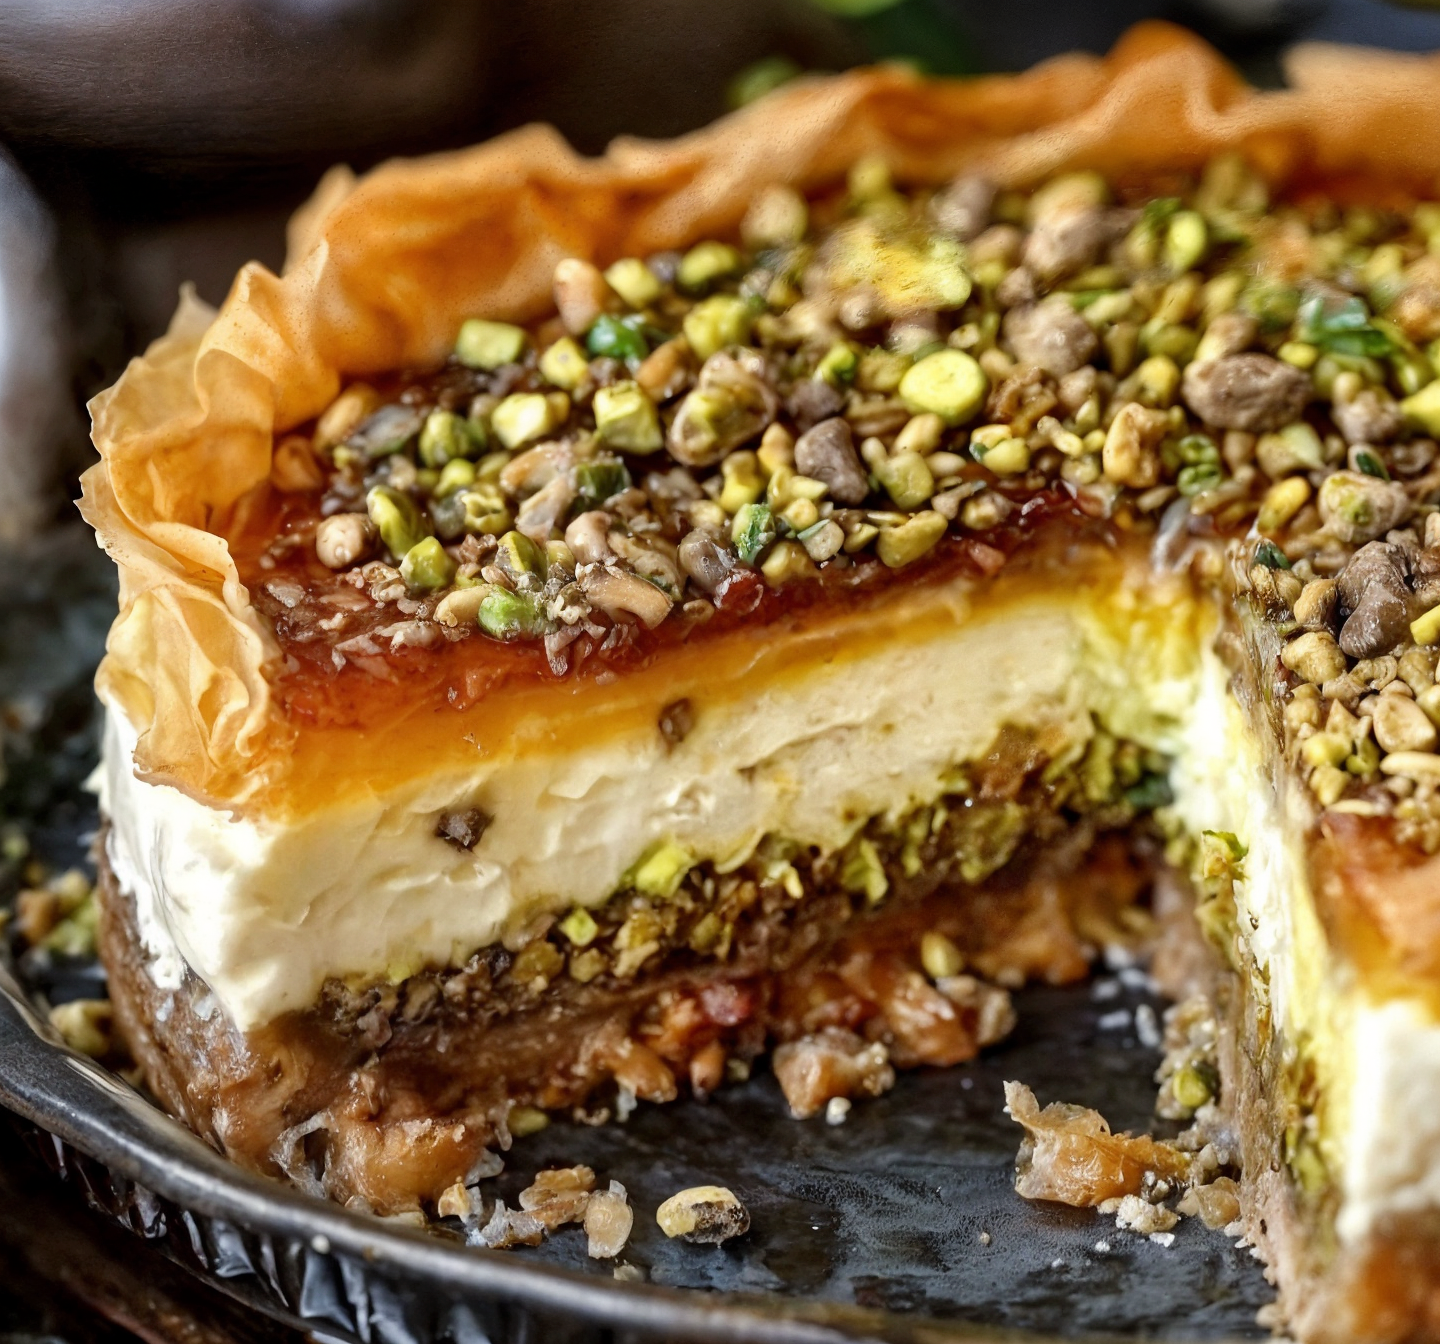
Imagine the rich, velvety texture of a classic cheesecake infused with bright citrus, layered between golden sheets of buttery phyllo pastry, and topped with a honey-drenched pistachio crown that crackles with every bite. Welcome to the world of Honey Pistachio Baklava Cheesecake—a show-stopping dessert that’s as luxurious as it is unforgettable.
This recipe blends the sweet traditions of Middle Eastern baklava with the creamy indulgence of Western-style cheesecake. Whether you’re hosting a special dinner, celebrating the holidays, or simply spoiling yourself (you deserve it!), this cheesecake brings elegance and wow factor to any table.
Why You’ll Love This Cheesecake
This Honey Pistachio Baklava Cheesecake is:
Beautifully layered with crisp phyllo and nutty cinnamon filling
Creamy and tangy from the rich cheesecake and Greek yogurt
Luxuriously sweet with a honey-rosewater pistachio topping
Perfectly balanced with citrus notes from lemon zest and juice
Ideal for special occasions, but totally doable at home
It’s a flavor-packed dessert that blends textures, cultures, and tradition in a way that feels both timeless and modern.
Ingredients You’ll Need
For the Baklava Base:
10 sheets phyllo pastry, thawed
2 sticks (approx. 1 cup) unsalted butter, melted
1 cup roasted walnuts
1 cup roasted almonds
1 tsp ground cinnamon
1/4 tsp salt
2 Tbsp melted butter (for nut mixture)
Cheesecake Filling:
500g cream cheese, room temperature
1 cup granulated sugar
Pinch of salt
2 tsp vanilla extract
1 Tbsp lemon zest
1 Tbsp lemon juice
1 Tbsp corn starch
3 large eggs, room temperature
250g strained Greek yogurt (or sour cream)
For the Topping:
1 cup shelled pistachios, coarsely chopped
1 cup honey
1 Tbsp lemon juice
Splash of rosewater
Garnish:
Additional honey, for drizzling
Step-by-Step Instructions
1. Prepare the Nut Mixture
In a food processor, pulse the roasted walnuts and almonds until coarsely chopped (not too fine—you want texture). Mix with cinnamon, salt, and 2 tablespoons of melted butter. Set aside.
2. Prepare the Phyllo Base
Preheat your oven to 350°F (175°C). Grease the bottom and sides of a 9-inch springform pan. Brush one phyllo sheet with melted butter, and gently press it into the bottom of the pan, letting the excess hang over the sides. Repeat with 5 more sheets, rotating slightly each time to create a layered effect.
Spread half of the nut mixture over the phyllo base. Add 4 more sheets of buttered phyllo on top, again layering and rotating. Finish by adding the remaining nut mixture. Fold the overhanging phyllo inwards to form a rustic edge. Bake for 15–18 minutes until lightly golden. Let cool while you prepare the cheesecake filling.
3. Make the Cheesecake Filling
In a large bowl, beat the cream cheese and sugar until smooth and fluffy. Add the salt, vanilla, lemon zest, and lemon juice. Mix in cornstarch until just combined. Beat in eggs one at a time, then stir in Greek yogurt (or sour cream) until smooth and creamy.
Pour the cheesecake filling over the cooled phyllo base. Smooth the top with a spatula.
4. Bake the Cheesecake
Lower the oven temperature to 325°F (160°C). Place the springform pan on a baking tray. Bake for 50–60 minutes, or until the edges are set and the center jiggles slightly. Turn off the oven, crack the door, and let the cheesecake cool inside for 1 hour. Then chill in the refrigerator for at least 6 hours (preferably overnight).
5. Make the Honey Pistachio Topping
Just before serving, warm the honey slightly with lemon juice and a splash of rosewater in a small saucepan. Stir in chopped pistachios and let cool slightly before spooning over the chilled cheesecake. Drizzle additional honey on top for a glossy finish.
Kitchen Equipment Needed
9-inch springform pan
Mixing bowls (various sizes)
Hand mixer or stand mixer
Pastry brush
Food processor (or sharp knife for chopping nuts)
Spatula
Baking tray
Saucepan
Tips & Tricks for Success
Thaw phyllo overnight in the fridge and keep it covered with a damp towel while working to prevent drying out.
Room temperature ingredients are crucial for a smooth cheesecake batter—no lumps!
Don’t skip the lemon zest—it balances the sweetness and adds brightness.
Avoid overmixing the batter once eggs are added to prevent cracking.
Let it chill—this cake truly tastes best after a night in the fridge.
Storage & Leftovers
Refrigerator: Store covered in the fridge for up to 5 days.
Freezer: Freeze slices individually wrapped in plastic and foil for up to 2 months. Thaw overnight in the fridge.
Make-ahead tip: You can bake the cheesecake a day or two in advance, then add the honey pistachio topping just before serving for optimal crunch.
What to Serve with Baklava Cheesecake
This luxurious dessert pairs beautifully with:
Turkish coffee or espresso – for bold contrast
Mint tea or black tea – to balance sweetness
Sparkling wine or dessert wine – for festive occasions
Fresh berries or figs – if you want a light, fruity side
Variations & Customizations
Nut-Free: Use sunflower or pumpkin seeds instead of nuts.
Citrus Swap: Use orange zest instead of lemon for a warmer flavor.
Spice it Up: Add cardamom or ground ginger to the nut mixture.
Rose-Free: Skip the rosewater if it’s not your thing—vanilla or orange blossom water are lovely alternatives.
FAQ: Honey Pistachio Baklava Cheesecake
Can I make this gluten-free?
Yes, use gluten-free phyllo or a nut-based crust instead.
Can I make it without a springform pan?
You can, but removing the cheesecake might be tricky. Line a cake pan with parchment for easier lifting if needed.
Is rosewater necessary?
Not at all—it adds floral complexity, but you can omit it or use vanilla.
Can I use different nuts?
Absolutely—hazelnuts, pecans, or cashews work great.
Why did my cheesecake crack?
Cracks usually come from overbaking or rapid temperature changes. Be sure to cool it slowly and don’t overmix.
Final Thoughts + Call to Action
Honey Pistachio Baklava Cheesecake is more than a dessert—it’s an experience. Each bite offers crisp phyllo, warm cinnamon-laced nuts, creamy cheesecake, and a golden honey pistachio crown. It’s rich. It’s regal. And it’s meant to be shared.
If this recipe delighted your taste buds, share it with your friends, post your creation on social media, and don’t forget to subscribe to the blog for more fusion favorites and elevated baking ideas. Let’s make magic in the kitchen together—one decadent layer at a time. 🥄🍯✨
Happy baking!