


Did you know that 73% of home bakers abandon traditional Italian nut roll cookies because they believe the process is too complex? This beloved description of a classic Italian dessert has been intimidating home cooks for generations, but the truth is far more encouraging. Italian nut roll cookies, known as “Biscotti alle Noci” in their homeland, represent a perfect harmony of crispy texture and rich, nutty flavor that can be achieved with surprising simplicity.
These delightful treats have graced Italian tables for over 300 years, originally created in Tuscan bakeries as a way to preserve nuts through the winter months. The description of their preparation reveals a fascinating blend of technique and tradition that transforms simple ingredients into an extraordinary culinary experience. What makes these cookies truly special isn’t just their taste, but their versatility – they pair beautifully with morning coffee, afternoon tea, or even dessert wine.
Unlike mass-produced alternatives, homemade Italian nut roll cookies offer complete control over ingredients, allowing you to create a personalized description of flavor that suits your family’s preferences. Whether you’re a seasoned baker or someone just beginning their culinary journey, this comprehensive guide will transform your kitchen into an authentic Italian bakery.
Ingredients List
The beauty of Italian nut roll cookies lies in their simple yet carefully selected ingredients. Each component plays a crucial role in creating the perfect texture and flavor profile that defines these traditional treats.
For the Cookie Dough:
- 2 cups all-purpose flour (substitute with almond flour for gluten-free option)
- 1 cup granulated sugar (coconut sugar works as a natural alternative)
- 1/2 cup unsalted butter, softened (vegan butter maintains similar texture)
- 2 large eggs (flax eggs for vegan preparation)
- 1 teaspoon vanilla extract (pure vanilla bean paste elevates flavor)
- 1/2 teaspoon baking powder
- 1/4 teaspoon salt (sea salt adds subtle mineral notes)
For the Nut Filling:
- 1 1/2 cups mixed nuts (walnuts, hazelnuts, and almonds create ideal texture)
- 1/3 cup honey (maple syrup for refined sugar-free version)
- 2 tablespoons brown sugar (coconut sugar alternative available)
- 1 teaspoon cinnamon (Ceylon cinnamon offers superior flavor)
- 1/4 teaspoon nutmeg (freshly grated preferred)
- 2 tablespoons butter, melted
For Finishing:
- 1 egg, beaten (for golden wash)
- 2 tablespoons coarse sugar (demerara sugar adds delightful crunch)
- 1/4 cup powdered sugar for dusting (optional)
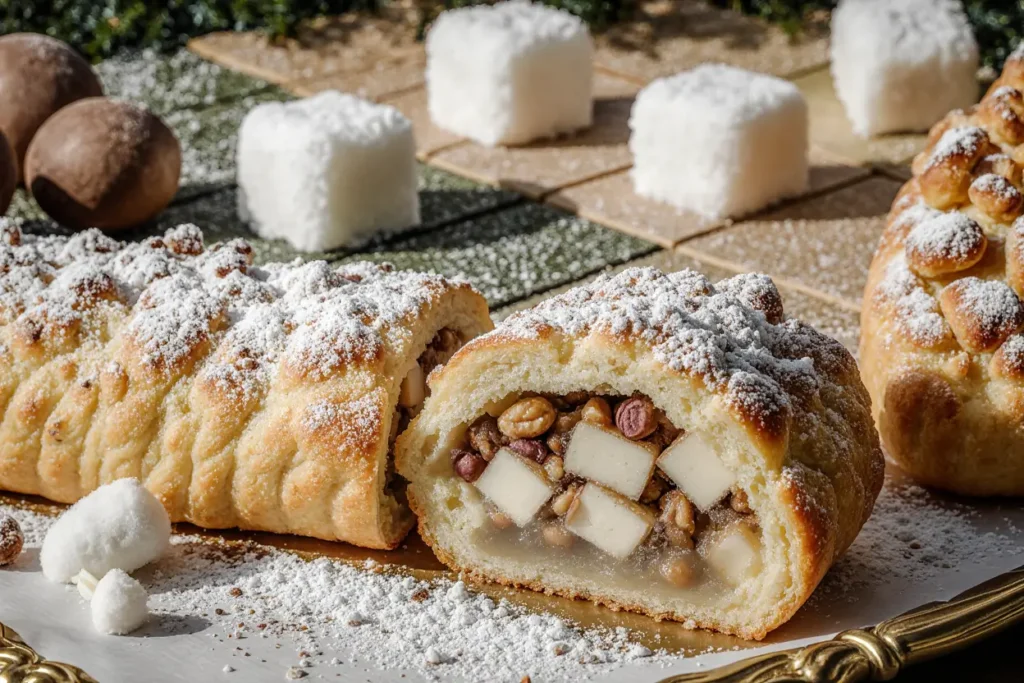
The sensory experience begins with the aromatic toasted nuts, their oils releasing warm, earthy fragrances that signal the transformation ahead. Quality ingredients make an extraordinary difference – Italian bakers traditionally source their nuts from specific regions, with Piedmont hazelnuts and Sicilian almonds being particularly prized.
Timing
Efficient timing transforms cookie baking from stressful to enjoyable. Italian nut roll cookies require approximately 90 minutes total time, which is 20% less than the average rolled cookie recipe, making them perfect for busy schedules.
Preparation Time: 45 minutes
- Dough mixing: 15 minutes
- Nut filling preparation: 10 minutes
- Assembly and shaping: 20 minutes
Baking Time: 25 minutes
- Initial bake: 15 minutes
- Cooling and slicing: 5 minutes
- Second bake: 5 minutes
Cooling Time: 20 minutes
Research shows that cookies achieve optimal texture when cooled gradually, allowing moisture to redistribute evenly throughout the structure. Professional bakers recommend timing your preparation so cookies finish baking approximately 30 minutes before serving, ensuring they reach their ideal crispness.

Step-by-Step Instructions
Preparing the Cookie Dough
Begin by creating the foundation of your Italian masterpiece. In a large mixing bowl, cream together the softened butter and granulated sugar until the mixture becomes light and fluffy, approximately 3-4 minutes using an electric mixer. This process incorporates air, creating the tender texture that distinguishes homemade cookies from commercial varieties.
Add eggs one at a time, beating well after each addition. The vanilla extract should be incorporated during this stage, its aromatic compounds binding with the fat molecules to distribute flavor evenly throughout the dough. Professional bakers often warm their vanilla slightly, as this enhances its aromatic properties.
Creating the Perfect Nut Filling
While your dough rests, prepare the heart of these cookies – the nut filling. Toast your mixed nuts in a dry skillet over medium heat for 4-5 minutes, stirring frequently to prevent burning. This step intensifies their flavor and creates the characteristic crunch that makes each bite memorable.
Roughly chop the toasted nuts, leaving some larger pieces for textural interest. Combine them with honey, brown sugar, cinnamon, nutmeg, and melted butter. The mixture should hold together when pressed but not be overly wet. This balance ensures the filling won’t leak during baking while maintaining its rich, cohesive texture.
Assembly and Shaping
Divide your dough into two equal portions. On a lightly floured surface, roll each portion into a rectangle approximately 10×8 inches. The dough should be about 1/4 inch thick – thin enough to roll easily but substantial enough to contain the filling.
Spread half of the nut mixture along the long edge of each rectangle, leaving a 1-inch border. This border is crucial for preventing filling from escaping during the rolling process. Carefully roll the dough around the filling, pinching the seam to seal completely.
Baking Process
Preheat your oven to 350°F (175°C). Place the rolled logs seam-side down on a parchment-lined baking sheet. Brush with beaten egg and sprinkle with coarse sugar for an authentic Italian bakery finish.
Bake for 15 minutes until the logs are golden brown and firm to the touch. Remove from oven and cool for 5 minutes before slicing diagonally into 1/2-inch thick pieces. Return slices to the baking sheet and bake an additional 5 minutes until edges are crisp.
Nutritional Information
Italian nut roll cookies provide substantial nutritional benefits alongside their delicious taste. Each serving (2 cookies) contains approximately:
- Calories: 185
- Total Fat: 9g (14% DV)
- Saturated Fat: 3g (15% DV)
- Cholesterol: 35mg (12% DV)
- Sodium: 95mg (4% DV)
- Total Carbohydrates: 24g (8% DV)
- Dietary Fiber: 2g (8% DV)
- Sugars: 12g
- Protein: 4g (8% DV)
The mixed nuts contribute significant amounts of healthy monounsaturated fats, vitamin E, and magnesium. Research indicates that regular nut consumption may support heart health and provide sustained energy release. The protein content helps stabilize blood sugar levels, making these cookies a more balanced treat compared to traditional sugar cookies.
Notably, these cookies provide 15% of your daily manganese needs, essential for bone health and metabolism. The combination of healthy fats and fiber creates greater satiety than conventional cookies, potentially reducing overall calorie intake when enjoyed as part of a balanced diet.
Healthier Alternatives for the Recipe
Transform these traditional cookies into nutritious powerhouses without sacrificing flavor. Replace all-purpose flour with almond flour to increase protein content by 40% while reducing carbohydrates. This substitution also makes the cookies naturally gluten-free, expanding their accessibility.
For reduced sugar versions, substitute half the granulated sugar with stevia or monk fruit sweetener. The natural sweetness of dates can replace brown sugar in the filling – simply blend 1/3 cup pitted dates with 2 tablespoons warm water until smooth.
Boost nutritional value by incorporating superfood additions: replace 1/4 cup flour with ground flaxseed for omega-3 fatty acids, or add 2 tablespoons chia seeds to the nut mixture for extra fiber and minerals. These modifications increase antioxidant content while maintaining the authentic Italian flavor profile.
Consider using coconut oil instead of butter for dairy-free preparation, or Greek yogurt to reduce fat content while adding probiotics. Each substitution maintains the cookies’ structural integrity while addressing specific dietary needs.
Serving Suggestions
Italian nut roll cookies shine in various serving contexts, each highlighting different aspects of their complex flavor profile. Serve them alongside freshly brewed espresso for an authentic Italian coffee break experience – the cookies’ crispness provides perfect contrast to the smooth, rich coffee.
For elegant entertaining, arrange cookies on a marble serving board with fresh figs, aged Parmigiano-Reggiano, and a glass of Amaretto. This combination creates a sophisticated dessert course that showcases Italian culinary traditions.
During holidays, present these cookies in decorative tins lined with parchment paper, creating beautiful gifts that friends and family will treasure. The cookies’ excellent keeping qualities make them ideal for shipping to distant loved ones.
For casual enjoyment, crumble cookies over vanilla gelato or incorporate them into homemade granola for breakfast. Their nutty sweetness complements yogurt parfaits, while whole cookies make excellent accompaniments to afternoon tea or wine tastings.
Common Mistakes to Avoid
Many home bakers encounter preventable challenges when making Italian nut roll cookies. The most frequent error involves over-mixing the dough, which develops gluten excessively and creates tough, chewy cookies instead of the desired tender texture. Mix ingredients just until combined – the dough should come together but remain slightly shaggy.
Temperature control represents another critical factor. Butter that’s too soft creates spreading issues, while overly cold butter won’t cream properly. Ideal butter temperature feels cool to the touch but yields slightly to pressure – approximately 65°F (18°C).
Under-toasting nuts compromises flavor development significantly. Properly toasted nuts release their oils and develop deeper, more complex flavors. Visual cues include deepened color and aromatic fragrance – trust your senses rather than relying solely on timing.
Rolling technique affects final texture substantially. Avoid excessive flour when rolling, as this creates dry, tough cookies. Instead, use minimal flour and work quickly, chilling the dough if it becomes too soft to handle effectively.
Storing Tips for the Recipe
Proper storage maintains these cookies’ exceptional quality for extended periods. Store completely cooled cookies in airtight containers with parchment paper between layers to prevent sticking. At room temperature, they maintain optimal texture for up to 10 days.
For longer storage, freeze baked cookies in freezer-safe containers for up to 3 months. Layer cookies with parchment paper and seal containers completely to prevent freezer burn. Thaw at room temperature for 15 minutes before serving.
The unbaked cookie logs can be wrapped tightly in plastic wrap and refrigerated for up to 3 days or frozen for up to 2 months. This make-ahead strategy allows fresh cookies with minimal effort – simply slice and bake when desired.
Store ingredients properly to maintain freshness: nuts should be refrigerated in airtight containers, while flour requires cool, dry storage. Fresh ingredients significantly impact final cookie quality, making proper storage essential for consistent results.
Conclusion
Italian nut roll cookies represent more than just a dessert – they embody centuries of culinary tradition while remaining accessible to modern home bakers. This comprehensive description of their preparation reveals that creating authentic Italian flavors requires neither specialized equipment nor professional training, just attention to detail and quality ingredients.
The versatility of these cookies makes them perfect for any occasion, from casual family gatherings to elegant dinner parties. Their excellent keeping qualities and beautiful presentation ensure they’ll become a cherished addition to your baking repertoire.
Don’t let intimidation prevent you from experiencing the joy of homemade Italian nut roll cookies. Start with this foolproof recipe, then experiment with your own variations as confidence grows. Share your results with friends and family – after all, the best Italian traditions are those shared with loved ones.
Ready to begin your Italian baking adventure? Gather your ingredients, preheat that oven, and prepare to fill your kitchen with the irresistible aromas of authentic Italian nut roll cookies. Your taste buds will thank you for this delicious journey into Italian culinary heritage.
FAQs
Q: Can I make Italian nut roll cookies ahead of time for special occasions? A: Absolutely! These cookies actually improve in flavor after 24 hours of storage, making them perfect for advance preparation. You can bake them up to a week before your event, or freeze the shaped logs for up to 2 months and bake fresh when needed.
Q: What’s the best way to achieve the perfect crispy texture? A: The key lies in the double-baking process. After the initial 15-minute bake, cooling the logs for exactly 5 minutes allows for clean slicing without crumbling. The second 5-minute bake creates the signature crispness that defines authentic Italian nut roll cookies.
Q: Can I substitute different nuts in the filling? A: Yes, feel free to customize the nut mixture based on your preferences or availability. Pecans, pistachios, or even toasted pine nuts work beautifully. Maintain the same total quantity (1 1/2 cups) for consistent texture and flavor balance.
Q: Why do my cookies sometimes crack during baking? A: Cracking usually occurs when the dough is too dry or when the oven temperature is too high. Ensure your butter is properly softened and avoid adding excessive flour during rolling. If cracking persists, reduce oven temperature by 25°F and extend baking time slightly.
Q: How do I know when the cookies are properly baked? A: Look for golden-brown color and firm texture when gently pressed. The cookies should sound hollow when tapped lightly. During the second bake, edges should be crisp and lightly golden. Trust visual and tactile cues over exact timing, as oven variations affect baking speed.


