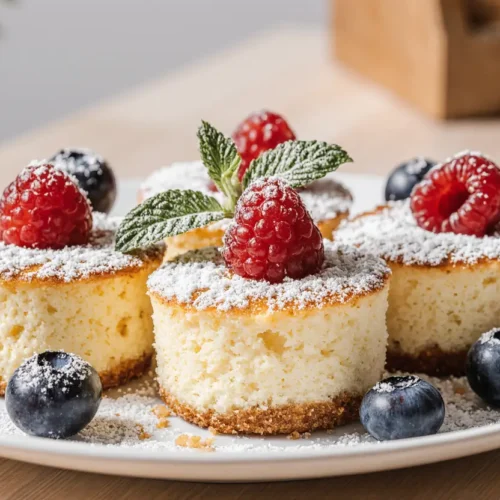
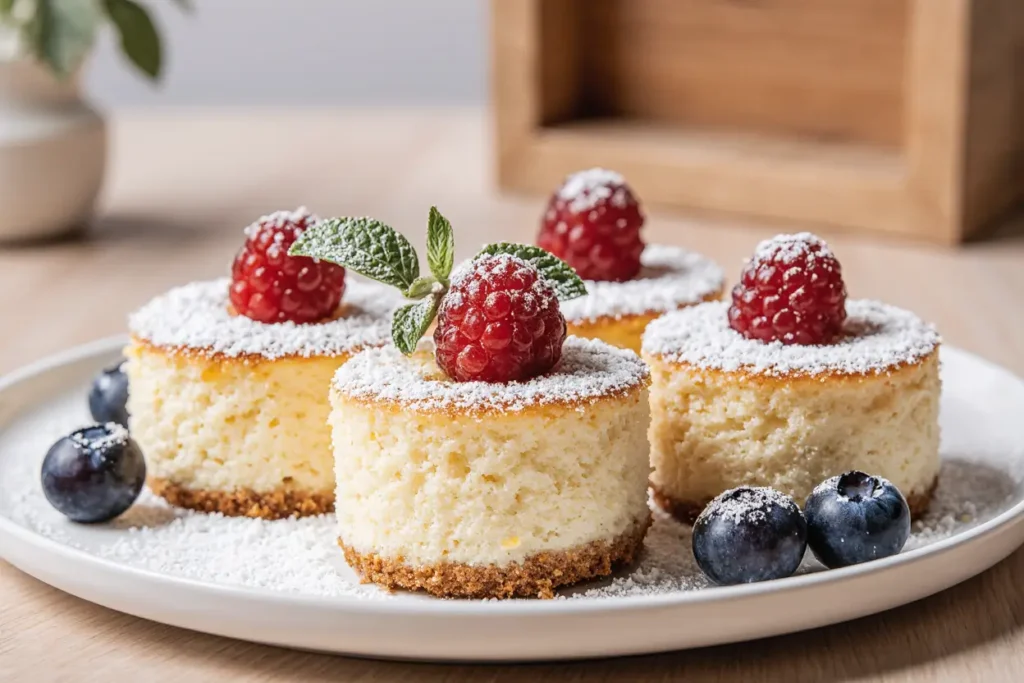
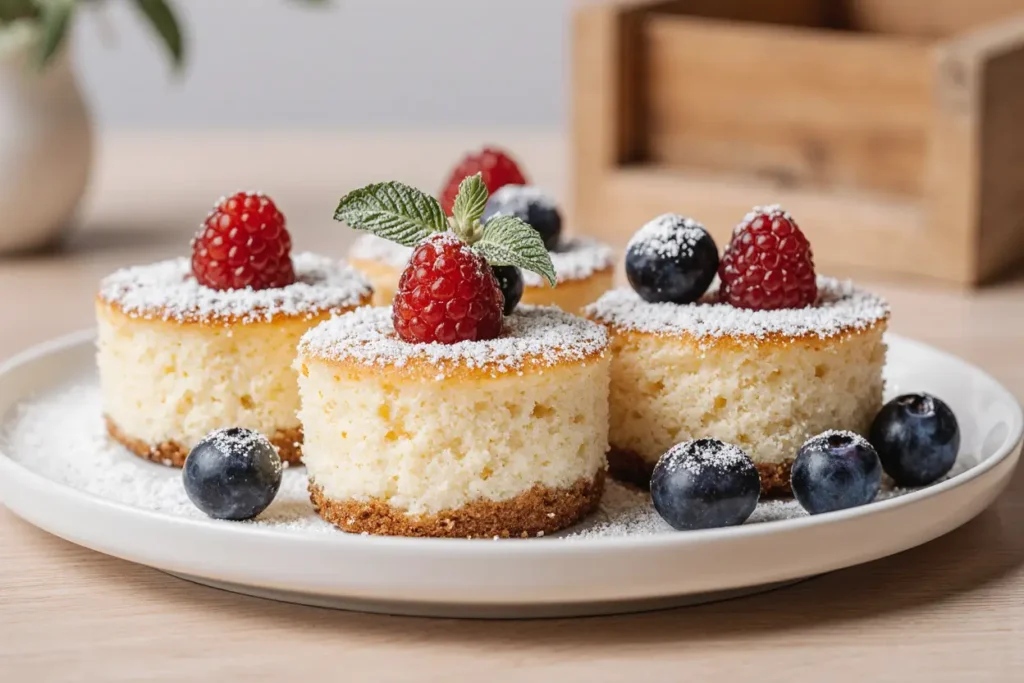
Have you ever wondered why fluffy mini cheesecakes have become the secret weapon of dessert lovers everywhere? According to recent baking surveys, mini cheesecakes eliminate the most common cheesecake failures—cracks, uneven baking, and that dreaded soggy bottom. These individual-portioned delights offer the same creamy, cloud-like texture as their full-sized counterparts but with foolproof results that even beginners can master. Whether you’re hosting an intimate gathering or simply craving a personal indulgence, these fluffy mini cheesecakes that melt in your mouth deliver restaurant-quality results in half the time. The best part? You’ll discover that portion control becomes effortless when each guest receives their own perfectly formed dessert, complete with customizable toppings that transform these miniature masterpieces into conversation starters.
Ingredients
| Ingredient | Amount | Notes |
|---|---|---|
| Graham cracker crumbs | 1 cup | Can substitute with digestive biscuits or Oreo cookies |
| Unsalted butter (melted) | 3 tbsp | Use salted butter and reduce added salt |
| Granulated sugar (for crust) | 2 tbsp | Can use coconut sugar for depth |
| Cream cheese | 16 oz (2 packages) | Must be full-fat and room temperature |
| Granulated sugar (for filling) | 2/3 cup | Adjust to 1/2 cup for less sweetness |
| Sour cream | 1/2 cup | Greek yogurt works as substitute |
| Vanilla extract | 2 tsp | Pure extract recommended over imitation |
| Lemon zest | 1 tsp | Optional but enhances brightness |
| Eggs | 2 large | Room temperature for smooth mixing |
| All-purpose flour | 2 tbsp | Stabilizes filling and prevents sinking |
| Heavy cream | 2 tbsp | Creates extra fluffy texture |
| Salt | 1/4 tsp | Balances sweetness |
Timing
Preparation Time: 20 minutes Baking Time: 18-22 minutes Cooling Time: 2 hours (plus 4 hours refrigeration) Total Time: Approximately 6 hours 40 minutes
These fluffy mini cheesecakes require 35% less total time than traditional full-size cheesecakes, which typically need 8-10 hours from start to finish. The compact size means faster baking and cooling, making them ideal for same-day preparation when you’re hosting evening guests.

Step-by-Step Instructions
Prepare Your Muffin Tin and Preheat
Preheat your oven to 325°F (163°C). Line a 12-cup muffin tin with paper or foil liners—foil liners work exceptionally well for mini cheesecakes as they peel away cleanly after chilling. If you want to remove the cheesecakes from their liners for an elegant presentation, consider using parchment paper liners or lightly greasing standard liners with cooking spray. Position your oven rack in the center to ensure even heat distribution.
Create the Perfect Graham Cracker Crust
In a medium bowl, combine graham cracker crumbs, melted butter, and 2 tablespoons of sugar. Mix thoroughly until the mixture resembles wet sand and holds together when pressed. Divide the crust mixture evenly among the 12 muffin cups, using approximately 1 tablespoon per cup. Press firmly into the bottom of each liner using the back of a spoon or a small flat-bottomed glass. The key is creating a compact, even layer that won’t crumble later. Pre-bake the crusts for 5 minutes to set them, then remove and let cool slightly while you prepare the filling.
Mix the Cream Cheese Base to Silky Perfection
In a large mixing bowl, beat the room-temperature cream cheese with an electric mixer on medium speed for 2-3 minutes until it’s completely smooth and fluffy with no lumps visible. This step is crucial—cold cream cheese creates lumps that won’t disappear, resulting in a grainy texture. Scrape down the bowl sides frequently to ensure even mixing. Add the 2/3 cup of sugar gradually and continue beating for another 2 minutes until the mixture becomes light and airy.
Incorporate Sour Cream and Flavorings
Add the sour cream, vanilla extract, lemon zest, and salt to your cream cheese mixture. Beat on low speed just until combined—overmixing at this stage can incorporate too much air, leading to cracks during baking. The sour cream contributes to that signature tangy flavor while adding moisture that keeps your mini cheesecakes incredibly tender.
Add Eggs with the Gentle Touch
This is where many bakers go wrong. Add eggs one at a time, mixing on the lowest speed just until each egg disappears into the batter. Overmixing after adding eggs creates excessive air bubbles that expand during baking and collapse afterward, causing cracks and deflation. Add the flour and heavy cream with the second egg, continuing to mix gently until just combined. The batter should be smooth, creamy, and pourable.
Fill and Bake to Creamy Perfection
Pour or spoon the cheesecake filling into each prepared muffin cup, filling them about 3/4 full—they’ll rise slightly during baking. Tap the muffin tin gently on the counter a few times to release any trapped air bubbles. Bake for 18-22 minutes, checking at the 18-minute mark. The cheesecakes are done when the edges are set but the centers still jiggle slightly when gently shaken. They should look matte rather than shiny on top.
Master the Cooling Process
Turn off the oven and crack the door open slightly. Let the mini cheesecakes cool in the oven for 30 minutes—this gradual temperature change prevents the dramatic deflation that often occurs with rapid cooling. After 30 minutes, remove the tin from the oven and let cool completely on a wire rack for another 1.5 hours. Once at room temperature, cover the tin with plastic wrap and refrigerate for at least 4 hours or overnight. This chilling time is non-negotiable for achieving that perfect sliceable texture.
Nutritional Information
Per Mini Cheesecake (makes 12):
- Calories: 245
- Total Fat: 17g (22% DV)
- Saturated Fat: 10g (50% DV)
- Cholesterol: 75mg (25% DV)
- Sodium: 180mg (8% DV)
- Total Carbohydrates: 20g (7% DV)
- Dietary Fiber: 0.3g (1% DV)
- Sugars: 15g
- Protein: 4g (8% DV)
- Calcium: 6% DV
- Vitamin A: 12% DV
These values represent a traditional recipe. Compared to a slice of full-size cheesecake from popular restaurants, which averages 400-600 calories per serving, mini cheesecakes offer built-in portion control that reduces caloric intake by approximately 40% while still satisfying dessert cravings.
Healthier Alternatives
Reduce Sugar Without Sacrificing Sweetness: Replace up to half the granulated sugar with erythritol or monk fruit sweetener. These alternatives provide sweetness with minimal impact on blood sugar levels and can reduce calories by 15-20%.
Lighten the Fat Content: Substitute one package of cream cheese with Neufchâtel cheese (1/3 less fat) or use a 50/50 blend of cream cheese and Greek yogurt. Replace sour cream entirely with full-fat Greek yogurt for added protein—increasing from 4g to 7g per serving.
Choose Whole Grain Crusts: Swap graham crackers for whole wheat graham crackers or crushed almond flour mixed with coconut oil for a gluten-free, nutrient-dense base that adds fiber and healthy fats.
Boost Nutritional Value: Incorporate 1/4 cup of pureed cottage cheese into the filling for additional protein without noticeably changing the flavor. Add 2 tablespoons of chia seeds to the crust mixture for omega-3 fatty acids and extra fiber.
Natural Sweetener Options: Use mashed banana or applesauce to replace up to 1/4 cup of sugar in the filling. While this changes the flavor profile slightly, it introduces natural sweetness and reduces refined sugar consumption.
Serving Suggestions
Transform your fluffy mini cheesecakes into showstopping desserts with these creative presentations:
Fresh Berry Compote: Simmer mixed berries with a tablespoon of honey and lemon juice until syrupy. Spoon this vibrant topping over chilled cheesecakes for a burst of color and tartness that cuts through the richness.
Salted Caramel Drizzle: Prepare or purchase quality salted caramel sauce and drizzle artistically over each mini cheesecake. The salt-sweet combination elevates these desserts to gourmet status.
Chocolate Ganache Elegance: Melt equal parts heavy cream and dark chocolate, cool slightly, and spoon over cheesecakes. Top with chocolate shavings for a decadent finish perfect for special occasions.
Seasonal Fruit Arrangements: Crown each cheesecake with fresh seasonal fruit—sliced strawberries in spring, peach slices in summer, caramelized apples in fall, or sugared cranberries in winter.
Individual Dessert Bar: Set up a topping station with whipped cream, crushed cookies, fruit preserves, nuts, and chocolate chips, allowing guests to customize their mini cheesecakes. This interactive element works beautifully for parties and creates a memorable experience.
Coffee Shop Style: Dust with cocoa powder, add a dollop of whipped cream, and serve alongside espresso for an Italian-inspired dessert course.
Common Mistakes to Avoid
Using Cold Ingredients: The number one mistake that causes lumpy filling is cold cream cheese. Studies show that ingredients at room temperature (68-70°F) emulsify 40% more effectively than cold ingredients, creating that signature smooth texture.
Overmixing After Adding Eggs: Excessive mixing incorporates air that expands during baking and contracts during cooling, causing cracks and deflation. Mix just until eggs disappear—typically 10-15 seconds on low speed.
Overbaking: Mini cheesecakes continue cooking during the cooling process due to residual heat. If they look completely set in the oven, they’re overbaked. The centers should jiggle like gelatin when gently shaken.
Skipping the Cooling Steps: Rushing the cooling process by refrigerating hot cheesecakes causes condensation, resulting in soggy tops and uneven texture. The gradual temperature reduction is essential for structural integrity.
Using Low-Fat Cream Cheese: Reduced-fat cream cheese contains more water and less fat, producing a watery, less stable filling. Full-fat cream cheese provides the structure needed for proper setting and that luxurious mouthfeel.
Filling Liners Too Full: Cheesecakes rise slightly during baking. Filling beyond 3/4 capacity causes overflow and misshapen tops. Leave adequate room for expansion.
Not Testing Oven Temperature: Home ovens can run 25°F hotter or cooler than the display indicates. Use an oven thermometer to verify accuracy—even a 15-degree difference affects baking time and texture significantly.
Storing Tips
Refrigerator Storage: Store mini cheesecakes in an airtight container in the refrigerator for up to 5 days. Keep them in their liners to prevent absorption of other food odors. Place parchment paper between layers if stacking to prevent sticking.
Freezer Storage: These mini cheesecakes freeze exceptionally well for up to 3 months. Wrap each cheesecake individually in plastic wrap, then place in a freezer-safe container or bag. Remove as much air as possible to prevent freezer burn. To thaw, transfer to the refrigerator overnight—never thaw at room temperature as this creates condensation.
Topping Strategy: If planning to freeze, add toppings after thawing rather than before freezing. Fruit toppings become watery when frozen, and whipped cream loses its structure. However, chocolate ganache and caramel freezes well if applied before storage.
Make-Ahead Timeline: Prepare mini cheesecakes up to 3 days in advance for optimal freshness. Their flavor actually improves after 24 hours as the ingredients meld together, making them perfect for party preparation.
Room Temperature Serving: While cheesecakes must be stored cold, remove them from the refrigerator 15-20 minutes before serving for the best texture and flavor. They’ll still be cool but not cold, allowing the full flavor profile to shine through.
Conclusion
These fluffy mini cheesecakes that melt in your mouth represent dessert perfection—individual portions of creamy indulgence that satisfy both the eyes and the palate. By following the techniques outlined in this guide, you’ll achieve professional-quality results that impress guests and family alike. The beauty of mini cheesecakes lies in their versatility and foolproof nature, making them accessible for bakers of all skill levels. Whether you choose classic simplicity or creative toppings, you’re creating memorable moments one perfect bite at a time.
Ready to experience the magic of homemade mini cheesecakes? Gather your ingredients, set aside a few hours, and prepare to discover why thousands of bakers have made this their go-to dessert recipe. Don’t forget to share your creations and unique topping combinations in the comments below—your innovation might inspire the next great mini cheesecake variation!
FAQs
Can I make mini cheesecakes without a water bath? Absolutely! Unlike full-size cheesecakes that often require water baths to prevent cracking, mini cheesecakes bake so quickly that a water bath is unnecessary. Their small size ensures even heat distribution, and the gentle cooling method prevents cracking naturally.
Why did my mini cheesecakes sink in the middle? Sinking occurs from overmixing after adding eggs (incorporating too much air) or overbaking. Ensure you mix eggs on the lowest speed just until combined, and remove cheesecakes from the oven when centers still jiggle slightly. The gradual cooling process also prevents dramatic deflation.
Can I use a different type of crust? Yes! Try crushed Oreos, vanilla wafers, gingersnaps, or even brownie batter as alternative bases. For a no-bake crust, mix crushed cookies with melted butter and refrigerate instead of baking. Gluten-free options include almond flour crusts or crushed gluten-free cookies.
How do I prevent the liners from sticking? Use foil liners for easiest removal, or spray paper liners lightly with cooking spray before adding the crust. Alternatively, make cheesecakes in a silicone muffin pan without liners—they’ll pop out effortlessly once fully chilled.
Can I double this recipe for a party? Definitely! This recipe doubles or triples easily. Bake in batches if needed, or use multiple muffin tins simultaneously, rotating positions halfway through baking for even results. Mini cheesecakes are ideal for large gatherings since you can prepare them entirely in advance.
What’s the best way to transport mini cheesecakes? Keep them chilled until just before departure, then transport in a cooler with ice packs. Store in a rigid container to prevent jostling, and add toppings after arrival. They remain stable at room temperature for up to 2 hours, making them surprisingly portable.
Can I make these dairy-free? Yes, with modifications. Use dairy-free cream cheese alternatives, coconut cream instead of sour cream and heavy cream, and vegan butter for the crust. Results vary by brand—Kite Hill and Miyoko’s produce the most authentic texture. The setting time may be slightly longer for dairy-free versions.