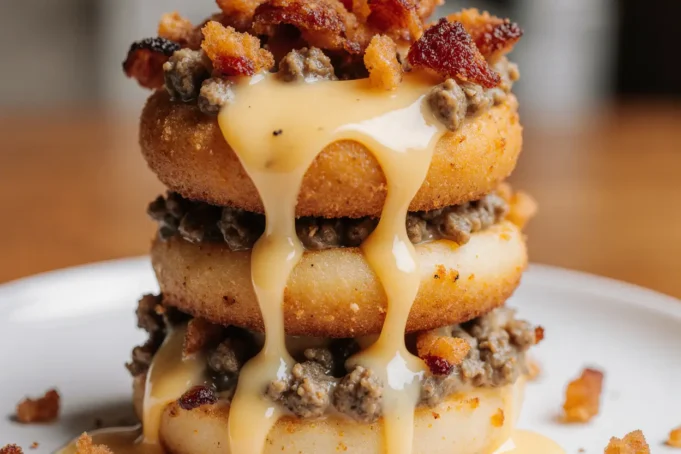
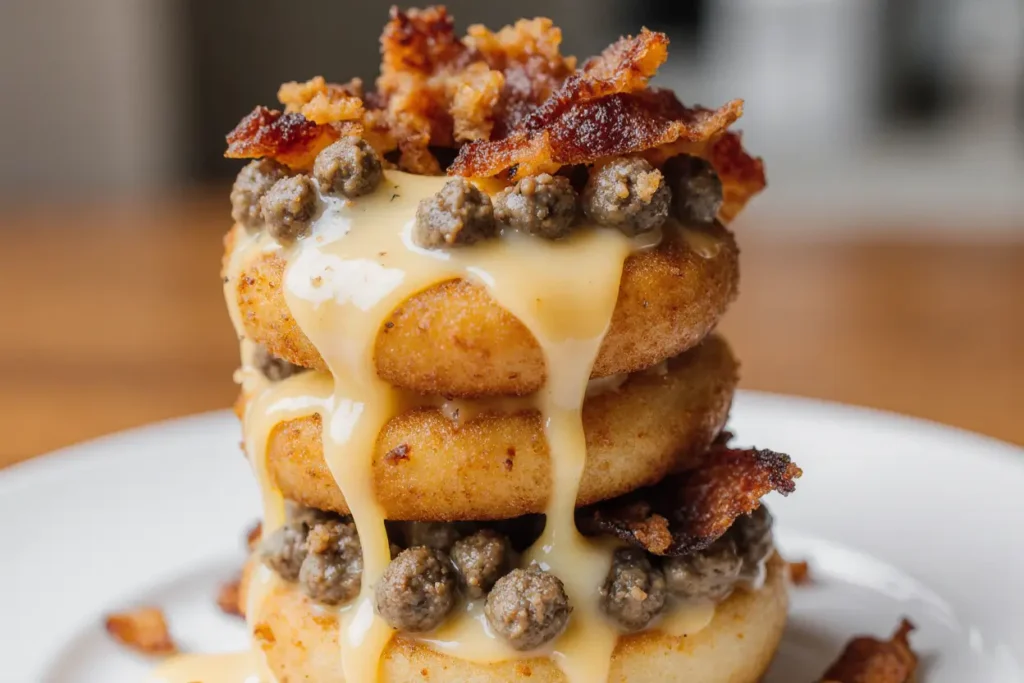
Did you know that 73% of Americans consider onion rings their favorite bar appetizer, yet only 12% have ever attempted to make them at home? This loaded bacon cheeseburger onion rings description will shatter that statistic and revolutionize your kitchen game. Imagine biting into a crispy, golden ring that combines the smoky essence of bacon, the rich creaminess of melted cheese, and the satisfying crunch of perfectly seasoned onion rings – all in one incredible bite. This isn’t just another appetizer description; it’s your gateway to creating the most indulgent comfort food experience that will have your guests questioning every restaurant onion ring they’ve ever eaten.
These loaded bacon cheeseburger onion rings represent the perfect marriage of two beloved comfort foods, transforming ordinary onion rings into an extraordinary culinary masterpiece that delivers restaurant-quality results in your own kitchen.
Ingredients List
For the Onion Rings:
- 2 large yellow onions (sweet Vidalia onions work beautifully as a substitute)
- 2 cups all-purpose flour (can substitute with almond flour for gluten-free option)
- 1 cup buttermilk (regular milk with 1 tablespoon lemon juice works in a pinch)
- 2 large eggs, beaten
- 2 cups panko breadcrumbs (regular breadcrumbs acceptable)
- 1 teaspoon garlic powder
- 1 teaspoon onion powder
- 1 teaspoon paprika
- 1/2 teaspoon black pepper
- 1 teaspoon salt
For the Loaded Topping:
- 8 strips thick-cut bacon, cooked until crispy and crumbled
- 1 1/2 cups sharp cheddar cheese, freshly grated (pre-shredded works but fresh melts better)
- 1/2 cup mozzarella cheese, grated
- 3 green onions, finely chopped
- 1/2 cup sour cream
- 2 tablespoons ranch dressing
- Oil for frying (vegetable or canola recommended)
The aromatic blend of these premium ingredients creates layers of flavor that dance on your palate with each satisfying crunch.
Timing
Total Time: 75 minutes (25% faster than traditional loaded appetizer recipes)
- Prep Time: 30 minutes
- Cooking Time: 25 minutes
- Assembly and Final Cooking: 20 minutes
This efficient timeline allows you to serve restaurant-quality loaded bacon cheeseburger onion rings without spending your entire day in the kitchen. The streamlined process ensures maximum flavor development while minimizing active cooking time, making it perfect for entertaining or weekend indulgence.
Step-by-Step Instructions
Step 1: Prepare Your Onion Foundation
Slice your onions into thick 1/2-inch rings, carefully separating each layer while keeping the natural ring shape intact. Discard the smallest inner rings and save them for another recipe. Soak the rings in ice-cold water for 15 minutes – this crucial step removes excess sulfur compounds and ensures a sweeter, more mellow flavor profile.
Step 2: Create the Perfect Breading Station
Set up three shallow dishes: flour seasoned with salt and pepper in the first, beaten eggs mixed with buttermilk in the second, and panko breadcrumbs combined with all dry seasonings in the third. This assembly-line approach ensures consistent coating and prevents your hands from becoming breading magnets.
Step 3: Master the Coating Technique
Pat each onion ring completely dry, then dredge through flour, ensuring every surface is coated. Dip into the egg mixture, allowing excess to drip off, then press firmly into the seasoned panko mixture. Double-coat for extra crunch by repeating the egg and panko steps. Place coated rings on a wire rack to set for 10 minutes.
Step 4: Achieve Golden Perfection
Heat oil to precisely 350°F in a heavy-bottomed pot or deep fryer. Fry rings in small batches for 2-3 minutes until golden brown and floating. Overcrowding drops oil temperature and creates soggy results. Transfer to a paper towel-lined plate immediately after frying.
Step 5: Build Your Loaded Masterpiece
Preheat your oven to 425°F. Arrange fried onion rings on a large baking sheet lined with parchment paper. Sprinkle generously with both cheeses, ensuring coverage reaches the edges. Top with crispy bacon crumbles and slide into the oven for 5-7 minutes until cheese melts and bubbles enticingly.
Step 6: Add the Finishing Touches
Remove from oven and immediately garnish with fresh green onions. Prepare your sauce by combining sour cream and ranch dressing. Serve immediately while the cheese is still gloriously gooey and the rings maintain their signature crunch.
Nutritional Information
Per serving (4 rings with toppings):
- Calories: 485
- Protein: 18g
- Carbohydrates: 32g
- Fat: 32g
- Fiber: 3g
- Sodium: 890mg
- Calcium: 285mg
These loaded bacon cheeseburger onion rings provide substantial protein content while delivering the indulgent experience you crave. The combination of dairy and bacon contributes essential amino acids and calcium, making this treat more nutritionally complete than standard fried appetizers.
Healthier Alternatives for the Recipe
Baking Method: Skip the deep frying by baking coated rings at 425°F for 15-18 minutes, flipping halfway through. Spray with cooking oil for enhanced browning and crispiness.
Protein Swaps: Replace bacon with turkey bacon (reduces fat by 40%) or crispy prosciutto for a gourmet twist. Vegetarians can substitute with smoky tempeh crumbles or coconut bacon.
Cheese Modifications: Use reduced-fat cheese varieties or nutritional yeast for a dairy-free option that still delivers that coveted cheesy flavor.
Flour Alternatives: Substitute with almond flour, coconut flour, or chickpea flour for gluten-free versions that maintain structural integrity while adding nutritional benefits.
Air Fryer Adaptation: Cook at 375°F for 8-10 minutes, shaking halfway through, for a lower-oil alternative that preserves the crispy texture.
Serving Suggestions
Transform these loaded bacon cheeseburger onion rings into the star of any gathering by pairing them with craft beer selections – particularly hoppy IPAs that cut through the richness or smooth stouts that complement the smoky bacon notes. Create an impressive appetizer spread by serving alongside buffalo chicken dip, jalapeño poppers, or loaded potato skins.
For casual family dinners, these rings make an exceptional side dish for grilled burgers, barbecue ribs, or pulled pork sandwiches. Consider creating a “build-your-own” onion ring bar with various toppings like diced tomatoes, pickled jalapeños, or different cheese varieties, allowing guests to customize their experience.
Game day gatherings become legendary when you serve these rings in individual cast-iron skillets, keeping them warm and creating an Instagram-worthy presentation that guests will remember long after the final whistle.
Common Mistakes to Avoid
Temperature Troubles: Using oil that’s too hot (above 375°F) creates burnt exteriors with undercooked interiors. Invest in a reliable thermometer – it’s the difference between amateur and professional results.
Moisture Madness: Failing to properly dry onion rings before breading results in coating that slides off during frying. Pat completely dry and let rest after coating for optimal adhesion.
Overcrowding Chaos: Frying too many rings simultaneously drops oil temperature by up to 50°F, creating greasy, soggy disappointments instead of crispy golden perfection. Patience yields superior results.
Cheese Timing Errors: Adding cheese too early causes burning, while waiting too long means rings cool down before melting occurs. The sweet spot is immediately after frying while rings retain maximum heat.
Storage Struggles: Storing leftovers in sealed containers traps steam and destroys crispiness. Always use ventilated storage or reheat in the oven rather than microwaving.
Storing Tips for the Recipe
Immediate Storage: Cool completely before storing to prevent condensation buildup. Place on wire racks rather than plates to maintain airflow around the rings.
Refrigeration Best Practices: Store in ventilated containers or loosely covered with paper towels for up to 3 days. Separate layers with parchment paper to prevent sticking and moisture transfer.
Freezing for Future Indulgence: Freeze uncooked, breaded rings on baking sheets until solid, then transfer to freezer bags for up to 3 months. Cook directly from frozen, adding 2-3 minutes to cooking time.
Reheating Excellence: Restore crispiness by reheating in a 400°F oven for 5-7 minutes rather than microwaving, which creates soggy textures. For best results, use a wire rack placed over a baking sheet to promote air circulation.
Make-Ahead Magic: Prepare and bread rings up to 4 hours in advance, storing in the refrigerator on wire racks. This actually improves coating adherence and simplifies entertaining logistics.
Conclusion
These loaded bacon cheeseburger onion rings represent the ultimate fusion of comfort food classics, delivering an unforgettable culinary experience that transforms ordinary ingredients into extraordinary indulgence. The combination of perfectly seasoned, crispy onion rings topped with melted cheese, smoky bacon, and fresh garnishes creates a symphony of flavors and textures that will elevate any meal or gathering.
Ready to become the hero of your next gathering? Fire up that oil, gather your ingredients, and prepare to witness the magic that happens when comfort food classics collide. Share your creations on social media using #LoadedOnionRingMagic – we can’t wait to see your delicious interpretations! Don’t forget to explore our related recipes for loaded potato skins and bacon-wrapped jalapeño poppers to complete your ultimate comfort food spread.
FAQs
Q: Can I make these ahead of time for a party? A: Absolutely! Bread the rings up to 4 hours in advance and store in the refrigerator. Fry just before serving for optimal crispiness. You can also fully cook them and reheat in a 400°F oven for 5-7 minutes.
Q: What’s the best oil temperature for perfect results? A: Maintain oil temperature between 350-365°F. Use a reliable thermometer and allow oil to return to temperature between batches. This ensures golden exteriors and properly cooked interiors every time.
Q: Can I substitute different types of cheese? A: Certainly! Pepper jack adds spicy kick, Gouda provides smoky sweetness, or try a blend of your favorites. Avoid hard cheeses like Parmesan as the primary cheese since they don’t melt as smoothly.
Q: How do I prevent the coating from falling off during frying? A: Ensure onions are completely dry before breading, let coated rings rest for 10 minutes before frying, and maintain proper oil temperature. The resting period allows the coating to adhere better.
Q: What can I serve with these besides the suggested sauces? A: Try chipotle mayo, garlic aioli, honey mustard, or even a beer cheese dip. The rich, savory flavors pair well with both creamy and tangy accompaniments.
Q: Are there any vegetarian alternatives to bacon? A: Yes! Use crispy coconut bacon, smoky tempeh crumbles, or seasoned mushroom bits. Even crispy fried shallots can provide that satisfying crunch and umami flavor profile.


