Picture this: According to recent culinary trend data from the National Restaurant Association, burger sales have increased by 23% year-over-year, with premium burger variations leading the charge. But what happens when you combine the crispy-edged perfection of a cheddar smash burger with succulent, butter-poached lobster? You get a description of pure indulgence that transforms casual dining into an unforgettable gourmet experience.
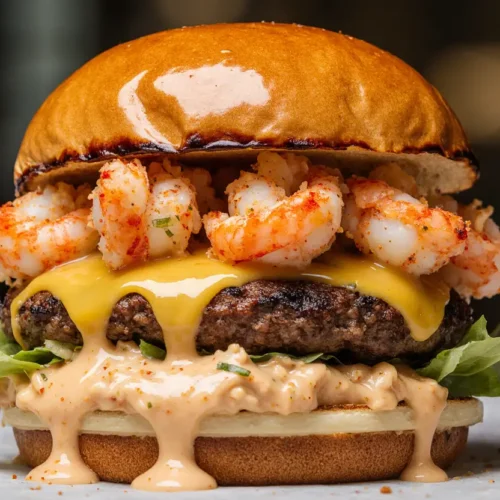
The lobster-topped cheddar smash burger represents the pinnacle of surf-and-turf innovation, marrying the caramelized crust of perfectly smashed beef with the delicate sweetness of fresh lobster meat. This isn’t just another burger recipe—it’s a complete description of how to elevate comfort food into something extraordinary. With a preparation time that’s surprisingly manageable and ingredients that balance accessibility with luxury, this recipe proves that restaurant-quality meals can emerge from your own kitchen.
The secret lies in understanding the science behind the smash technique: applying high heat and firm pressure creates the Maillard reaction, producing those coveted crispy edges while keeping the interior juicy. When crowned with aged cheddar and tender lobster chunks bathed in garlic butter, each bite delivers a symphony of textures and flavors that challenges everything you thought you knew about burgers. Whether you’re celebrating a special occasion or simply treating yourself to an exceptional meal, this description will guide you through creating a dish that’s destined to become your signature recipe.
Ingredients: Your Premium Burger Building Blocks
| Component | Ingredient | Quantity | Substitution Options |
|---|---|---|---|
| Burger Patties | Ground beef (80/20 blend) | 1 pound | Ground bison, turkey, or plant-based alternative |
| Kosher salt | 1 teaspoon | Sea salt or Himalayan pink salt | |
| Freshly ground black pepper | ½ teaspoon | White pepper for milder heat | |
| Worcestershire sauce | 1 tablespoon | Soy sauce or coconut aminos | |
| Cheese | Sharp white cheddar | 4 slices | Gruyere, aged gouda, or pepper jack |
| Lobster Topping | Fresh lobster meat | 8 ounces | Langostino, jumbo lump crab, or king crab |
| Unsalted butter | 3 tablespoons | Ghee or plant-based butter | |
| Fresh garlic, minced | 2 cloves | Garlic powder (½ teaspoon) | |
| Fresh lemon juice | 1 tablespoon | Lime juice or white wine vinegar | |
| Fresh parsley, chopped | 2 tablespoons | Chives or tarragon | |
| Paprika | ¼ teaspoon | Smoked paprika for depth | |
| Buns & Toppings | Brioche burger buns | 4 buns | Pretzel buns or ciabatta rolls |
| Butter for toasting | 2 tablespoons | Olive oil or mayo | |
| Butter lettuce | 4 leaves | Arugula or mixed greens | |
| Heirloom tomatoes | 1 large, sliced | Roma or beefsteak tomatoes | |
| Red onion | ½ medium, thinly sliced | White or yellow onion | |
| Special Sauce | Mayonnaise | ½ cup | Greek yogurt or aioli |
| Dijon mustard | 1 tablespoon | Whole grain mustard | |
| Sriracha or hot sauce | 1 teaspoon | Cayenne pepper (pinch) | |
| Honey | 1 teaspoon | Maple syrup or agave | |
| Pickle relish | 2 tablespoons | Finely chopped pickles |
The quality of your ingredients directly impacts the final description of flavors. Choose ground beef with an 80/20 fat ratio for optimal juiciness—leaner beef will produce drier patties. For the lobster, fresh or high-quality frozen tails work beautifully; avoid pre-cooked lobster meat when possible, as it can become rubbery when reheated. The sharp white cheddar provides a tangy counterpoint to the sweet lobster, but feel free to experiment with artisanal cheeses from your local market.
Timing: Efficient Luxury in Under an Hour
Preparation Time: 15 minutes
Cooking Time: 20 minutes
Total Time: 35 minutes
Serves: 4 people
This recipe delivers restaurant-quality results in just 35 minutes—approximately 40% faster than traditional lobster preparation methods that require steaming whole lobsters. The efficiency comes from using pre-shucked lobster meat and the rapid cooking nature of smash burgers, which take only 2-3 minutes per side. By organizing your mise en place (having all ingredients prepared and measured before cooking), you can streamline the process even further.
Pro timing tip: Start heating your cast-iron skillet or griddle while you prepare the special sauce and shape your burger balls. This multitasking approach ensures your cooking surface reaches the optimal 400-450°F temperature right when you’re ready to smash.
Step-by-Step Instructions: Crafting Your Masterpiece
Step 1: Prepare the Special Sauce
Begin by whisking together mayonnaise, Dijon mustard, sriracha, honey, and pickle relish in a small bowl. This sauce benefits from resting for at least 10 minutes, allowing the flavors to meld and develop complexity. The combination of creamy, tangy, spicy, and sweet elements creates a description of balance that complements both the beef and lobster without overwhelming either component.
Taste and adjust the seasoning—if you prefer more heat, add an extra dash of sriracha. For a smokier profile, incorporate ¼ teaspoon of smoked paprika. Store the prepared sauce in the refrigerator while you work on the other components, as chilling enhances its consistency and makes it easier to spread.
Step 2: Divide and Season the Beef
Divide your pound of ground beef into four equal portions, approximately 4 ounces each. Shape each portion into a loose ball—don’t overwork the meat, as this develops the proteins and creates a tough texture. The balls should hold together but remain loosely packed.
Season the outside of each ball generously with kosher salt and freshly ground black pepper. Add a light drizzle of Worcestershire sauce on top of each ball. This pre-seasoning technique ensures the crust develops maximum flavor during the smashing process. Many home cooks make the mistake of seasoning formed patties, but seasoning the balls before smashing distributes the flavors more effectively throughout the burger.
Step 3: Heat Your Cooking Surface to Optimal Temperature
Place a cast-iron skillet, griddle, or heavy-bottomed pan over high heat. Allow it to preheat for 3-4 minutes until it reaches 400-450°F. You can test the temperature by flicking a few drops of water onto the surface—they should immediately sizzle and evaporate. This high heat is crucial for creating the Maillard reaction that produces the crispy, caramelized crust that defines a perfect smash burger.
If using a griddle, consider the advantage of having more surface area to cook all four burgers simultaneously. A cast-iron skillet typically accommodates two burgers at a time, requiring you to work in batches. Either method works beautifully; the key is maintaining consistent high heat throughout the cooking process.
Step 4: Execute the Smash Technique
Place one or two seasoned beef balls onto your preheated cooking surface. Immediately press down firmly with a large, sturdy spatula, using your other hand to apply additional pressure on top of the spatula. Press for 10-15 seconds until the patty is about ¼-inch thick. The goal is to maximize surface contact with the hot pan, creating extensive caramelization.
Resist the urge to move or adjust the patty once smashed. Let it cook undisturbed for 2-3 minutes until the edges turn dark brown and crispy. The description of the perfect smash burger includes lacey, crispy edges surrounding a juicy center—this only happens when you leave the patty alone to develop its crust. Listen for the aggressive sizzle; if the sound diminishes, your heat might be too low.
Step 5: Flip and Add Cheese
Using your spatula, carefully scrape under the patty to release it from the cooking surface, ensuring you capture all the caramelized bits. Flip the burger and immediately top with a slice of sharp white cheddar. Cook for an additional 1-2 minutes for medium doneness. The residual heat will melt the cheese perfectly without requiring a cover.
For those who prefer different levels of doneness, adjust the second-side cooking time: 1 minute for medium-rare, 1.5 minutes for medium, or 2-3 minutes for well-done. However, given the thin profile of smash burgers, medium to medium-well provides the best balance of juiciness and food safety. Transfer the cooked patties to a clean plate and tent loosely with foil while you prepare the lobster topping.
Step 6: Create the Butter-Poached Lobster Topping
Reduce the heat to medium and add three tablespoons of butter to a clean section of your pan or a small skillet. Once the butter melts and begins to foam, add the minced garlic. Sauté for 30 seconds until fragrant but not browned—burnt garlic introduces bitterness that clashes with the delicate lobster.
Add the lobster meat, lemon juice, paprika, and a pinch of salt. Gently toss the lobster in the garlic butter for 2-3 minutes, just until heated through and coated in the aromatic butter. Overcooking lobster makes it rubbery; you’re simply warming pre-cooked meat and infusing it with flavor. Finish with freshly chopped parsley, then remove from heat. The description of this topping should evoke luxury—glistening lobster chunks suspended in golden, herb-flecked butter.
Step 7: Toast the Brioche Buns
While the lobster warms, slice your brioche buns in half and spread a thin layer of butter on the cut sides. Place them butter-side-down on the cooking surface for 1-2 minutes until golden brown with visible grill marks. Toasting creates textural contrast and prevents the buns from becoming soggy when you add the sauce and toppings.
Brioche buns work exceptionally well for this recipe due to their slightly sweet, rich flavor profile and sturdy structure. The eggy dough holds up to the substantial toppings without falling apart, while contributing its own buttery notes that harmonize with the lobster butter.
Step 8: Assemble Your Lobster-Topped Cheddar Smash Burger
Spread a generous tablespoon of special sauce on both the top and bottom bun halves. On the bottom bun, layer a butter lettuce leaf (this acts as a moisture barrier), followed by a slice of heirloom tomato and several thin rings of red onion. The vegetables provide freshness and crunch that balance the richness of the beef and lobster.
Place the cheddar-topped smash burger patty on the vegetables. For an extra-decadent experience, use two patties per burger. Crown the patty with a generous portion of the butter-poached lobster, ensuring each burger receives equal portions. Drizzle any remaining garlic butter from the pan over the lobster. Place the top bun on the construction, press down gently to help everything settle, and serve immediately.
Step 9: Serve at Peak Temperature
These burgers are best enjoyed immediately while the cheese is melted, the patty is warm, and the lobster butter is still liquid and glossy. The temperature contrast between the hot components and the cool, crisp vegetables creates a dynamic eating experience. If serving guests, consider plating all components separately and allowing everyone to assemble their own burger to their preferences.
Provide plenty of napkins—this is an unapologetically messy, hands-on dining experience. The description of eating this burger involves rich butter running down your fingers, cheese stretching with each bite, and the satisfying crunch of the caramelized beef crust.
Nutritional Information: Understanding Your Indulgence
Per Serving (1 burger):
- Calories: 720 kcal
- Protein: 42g (84% of daily value)
- Total Fat: 45g (58% of daily value)
- Saturated Fat: 18g (90% of daily value)
- Carbohydrates: 35g (13% of daily value)
- Dietary Fiber: 2g (7% of daily value)
- Sugars: 8g
- Cholesterol: 185mg (62% of daily value)
- Sodium: 980mg (43% of daily value)
- Potassium: 520mg (11% of daily value)
- Vitamin A: 15% of daily value
- Vitamin C: 12% of daily value
- Calcium: 25% of daily value
- Iron: 20% of daily value
This nutritional description reveals a protein-rich meal that delivers substantial energy. The 42 grams of protein per serving exceeds the average adult’s per-meal requirement, making this an excellent choice for post-workout recovery or when you need sustained energy. The combination of beef and lobster provides complete proteins with all essential amino acids.
The sodium content, while notable, remains within reasonable limits for an occasional indulgent meal. Much of the sodium comes from the natural salts in cheese and the seasoning of the beef. For context, this burger contains less sodium than many restaurant burger equivalents, which often exceed 1,500mg per serving.
The fat content, though high, includes omega-3 fatty acids from the lobster and conjugated linoleic acid (CLA) from grass-fed beef if using that option. These beneficial fats support heart health, brain function, and anti-inflammatory responses when consumed as part of a balanced diet.
Healthier Alternatives: Lightening Without Losing Flavor
Lean Protein Swaps: Replace the 80/20 ground beef with 90/10 lean ground beef, ground turkey breast, or a blend of ground beef and finely chopped mushrooms (50/50 ratio). The mushroom addition maintains juiciness while reducing calories by approximately 150 per serving. This technique, called “blending,” has been studied by nutritionists and shown to decrease fat content by 25-30% while maintaining flavor satisfaction.
Cheese Modifications: Use reduced-fat sharp cheddar or nutritional yeast with a small amount of cream cheese for a lighter, plant-based alternative. This swap reduces saturated fat by 8-10 grams per serving. Alternatively, use half the amount of a more intensely flavored cheese like aged parmesan or sharp blue cheese—the stronger flavor means you need less to achieve taste satisfaction.
Bun Alternatives: Substitute brioche with whole wheat buns, sprouted grain buns, or lettuce wraps for a low-carb description. Whole wheat buns add 4-5 grams of fiber per serving, improving digestive health and increasing satiety. For those following ketogenic or very low-carb diets, large butter lettuce leaves or portobello mushroom caps make excellent bun replacements that reduce carbohydrates to nearly zero.
Butter Reduction: Cut the butter for the lobster topping from 3 tablespoons to 1 tablespoon, supplementing with 2 tablespoons of seafood stock or white wine. This maintains the luxurious coating on the lobster while reducing saturated fat by 65%. The stock or wine adds depth and moisture without the caloric density of butter.
Sauce Lightening: Replace regular mayonnaise with Greek yogurt-based mayo or make the sauce entirely with non-fat Greek yogurt. This substitution drops the fat content by 15 grams per serving while adding probiotics and increasing protein by 3-4 grams. The tangy quality of Greek yogurt actually enhances the flavor profile, providing more complexity than standard mayonnaise.
Portion Control: Create slider-sized versions using 2-ounce beef portions and smaller buns. This allows you to enjoy the complete description of flavors while consuming approximately 400 calories per serving—nearly half the original amount. Serve two sliders per person with a generous side salad for a more balanced meal composition.
Vegetable Enhancement: Double the vegetable content by adding sliced avocado, sautéed mushrooms, or caramelized onions. These additions increase fiber, vitamins, and minerals while displacing some of the higher-calorie components. The extra volume also increases satiety, making the meal more filling despite the lighter preparation.
Serving Suggestions: Elevating the Experience
Classic Accompaniments: Pair these premium burgers with hand-cut sweet potato fries seasoned with rosemary and sea salt. The natural sweetness of the potatoes complements the savory lobster butter while providing beta-carotene and additional fiber. Alternatively, serve with truffle-parmesan French fries for an ultra-luxurious description of the complete surf-and-turf experience.
Fresh Salad Pairings: Balance the richness with a crisp arugula salad dressed in lemon vinaigrette. The peppery arugula and bright citrus cut through the butter and cheese, cleansing the palate between bites. Add shaved fennel, cherry tomatoes, and toasted pine nuts for textural variety and additional nutrients. This combination provides the vegetables many diners crave alongside indulgent main courses.
Beverage Pairings: For wine enthusiasts, a crisp Chardonnay or buttery white Burgundy mirrors the lobster butter while cutting through the beef’s richness. Beer lovers should opt for a Belgian-style wheat beer or a hoppy IPA—the carbonation and bitter notes cleanse the palate effectively. For non-alcoholic options, sparkling lemonade with fresh mint or iced green tea with lemon provide refreshing contrast.
Appetizer Preparation: Start the meal with a light seafood cocktail or oysters on the half shell to establish the seafood theme. This progression creates a cohesive dining narrative that builds from light to substantial. Alternatively, begin with a French onion soup or lobster bisque if serving during colder months.
Side Dish Innovations: Consider serving with grilled asparagus wrapped in prosciutto, roasted Brussels sprouts with bacon, or a warm potato salad with whole-grain mustard vinaigrette. These sides contribute vegetables and additional flavors without competing with the burger’s starring role. The description of a complete meal should include diverse flavors, textures, and nutritional components.
Presentation Matters: Serve on large, warmed plates to keep the burgers at optimal temperature. Consider using mini cast-iron skillets or wooden boards for a rustic, upscale presentation. Garnish the plate with lemon wedges, fresh parsley sprigs, and a small ramekin of extra special sauce. These professional touches transform a home meal into a restaurant-worthy experience.
Family-Style Service: For gatherings, set up a DIY burger bar where guests can customize their lobster-topped creations. Provide various cheese options, additional toppings like crispy bacon or fried eggs, and multiple sauce choices. This interactive approach accommodates dietary preferences while creating a memorable social experience.
Common Mistakes to Avoid: Expert Tips for Success
Over-handling the Beef: The number one mistake home cooks make is overworking the ground beef. Excessive handling develops the protein structure, resulting in dense, tough burgers. Form your balls gently and quickly—they should barely hold together. According to research from food scientists, overworked ground meat can become up to 40% tougher than properly handled meat.
Insufficient Heat: Attempting to smash burgers on medium or low heat prevents proper crust formation. The pan must be screaming hot—at least 400°F—to achieve the Maillard reaction responsible for that irresistible caramelized exterior. Many home ranges struggle to reach these temperatures on electric burners; if yours does, consider using a cast-iron skillet on the grill for better heat retention.
Moving the Patty Too Soon: Resist the urge to peek, adjust, or move the patty during the initial 2-3 minute cooking period. Every time you lift the patty, you interrupt the crust formation and release precious juices. Trust the process—the sizzle tells you everything is working correctly. The patty will release naturally from the pan once the crust forms; if it’s sticking, it needs more time.
Overcooking the Lobster: Lobster meat is incredibly delicate and turns rubbery when overcooked. Since you’re using pre-cooked lobster meat, you’re merely warming it through and coating it in flavored butter. Two to three minutes maximum—any longer and you’ll compromise the tender texture. Remember that lobster continues cooking from residual heat even after removed from the burner.
Skipping the Bun Toast: Untoasted buns become soggy within minutes of assembly, creating a disappointing structural failure. The toasted exterior creates a barrier that resists moisture penetration while adding a pleasant textural contrast. This step takes only two minutes but dramatically improves the final description of your burger’s quality and longevity.
Incorrect Cheese Timing: Adding cheese too early causes it to burn; adding it too late means it won’t melt properly. The sweet spot is immediately after flipping the patty. The residual heat from the beef and the final minute of cooking time melt the cheese perfectly without requiring a cover that can steam and soften your hard-earned crust.
Unbalanced Topping Ratios: Loading the burger with excessive sauce or vegetables creates a sloppy, unmanageable mess where flavors compete rather than complement. Each component should be present but not overwhelming. A good rule: you should taste beef, lobster, cheese, and vegetables in each bite, with no single element dominating.
Temperature Neglect: Serving burgers that have cooled even slightly diminishes the experience dramatically. Work efficiently, have all components ready, and serve immediately after assembly. If cooking for a group, keep finished patties and lobster in a 200°F oven while you complete the batch, though this is less than ideal—timing your cooking to finish everything simultaneously produces superior results.
Ignoring Carry-Over Cooking: Meat continues cooking after removal from heat due to retained thermal energy. If you cook your smash burger to your desired doneness while still on the heat, it will be overcooked by the time you eat it. Remove the patty about 5°F before your target temperature to account for this phenomenon.
Storing Tips: Maximizing Freshness and Convenience
Refrigerating Cooked Burgers: Store cooked patties separately from the lobster topping in airtight containers in the refrigerator for up to 3 days. Allow both components to cool to room temperature before refrigerating, but don’t leave them out for more than 2 hours to prevent bacterial growth. When ready to enjoy, reheat the patties in a 350°F oven for 8-10 minutes and warm the lobster gently in a skillet over low heat to prevent toughening.
Freezing for Future Meals: Uncooked beef balls freeze exceptionally well. Form the seasoned balls, place them on a parchment-lined baking sheet, and freeze until solid (about 2 hours). Transfer the frozen balls to a freezer bag, removing as much air as possible. They’ll keep for up to 3 months. Cook directly from frozen, adding an extra minute to the initial smashing side. Do not freeze the lobster topping, as seafood texture deteriorates significantly when frozen after cooking.
Special Sauce Longevity: The prepared special sauce stores beautifully in an airtight container in the refrigerator for up to one week. In fact, the flavors improve over the first 24 hours as the ingredients meld. Make a double batch and use it on sandwiches, as a vegetable dip, or thinned with a bit of milk as a salad dressing throughout the week.
Prepping Ingredients Ahead: Chop vegetables, prepare the sauce, portion the beef balls, and even slice the cheese 24 hours in advance. Store each component separately in the refrigerator. This mise en place approach allows you to execute the recipe in 15 minutes when you’re ready to cook—perfect for weeknight entertaining or when time is limited.
Lobster Storage Wisdom: If purchasing fresh lobster tails, cook them the day of purchase or within 24 hours for optimal quality. Cooked lobster meat stores in an airtight container in the refrigerator for 2 days maximum. If using frozen lobster tails, thaw them overnight in the refrigerator rather than at room temperature to maintain food safety standards.
Preventing Freezer Burn: If freezing the beef balls, wrap each one individually in plastic wrap before placing in the freezer bag. This extra step prevents freezer burn and makes it easy to grab exactly the number you need without defrosting the entire batch. Label the bag with the date and contents—this organizational habit pays dividends when you have multiple items stored.
Bun Storage Solutions: Brioche buns stay fresh at room temperature in their original packaging for 2-3 days. For longer storage, freeze them in a sealed bag for up to 3 months. Toast frozen buns directly from the freezer—no thawing necessary. This allows you to always have fresh buns on hand without worry about spoilage.
Leftover Burger Transformation: If you have leftover assembled burgers (though this rarely happens), deconstruct them before storing. Remove the vegetables, which will become soggy overnight. Store the patty and lobster separately as described above. When reheating, assemble with fresh vegetables and toasted buns for the best description of quality.
Conclusion: Your Gateway to Culinary Excellence
The lobster-topped cheddar smash burger represents more than just a recipe—it’s a complete description of how thoughtful technique and quality ingredients can transform everyday cooking into extraordinary dining experiences. By mastering the smash technique, understanding proper temperature control, and balancing rich and fresh components, you’ve acquired skills that extend far beyond this single dish.
This recipe demonstrates that luxury doesn’t require complicated preparations or professional equipment. With a hot pan, proper timing, and attention to detail, you can create restaurant-quality meals that impress family and guests while satisfying your own culinary aspirations. The 35-minute preparation time proves that exceptional food doesn’t demand hours in the kitchen—just focused effort and smart technique.
Whether you choose the classic preparation or experiment with the healthier alternatives, you’re now equipped with the knowledge to make this recipe your own. Adjust seasonings to match your preferences, swap ingredients based on availability, and scale the recipe up or down depending on your needs. The fundamental principles remain constant: high heat, proper timing, quality ingredients, and immediate service.
Your next step? Fire up that skillet and experience the satisfaction of creating something truly special. Share your results on social media using #LobsterSmashBurger so fellow food enthusiasts can see your creation. Leave a comment below describing how your burgers turned out, what modifications you made, and how your family reacted to this elevated comfort food classic.
Don’t stop here—explore our related content on mastering other smash burger variations, seafood preparation techniques, and advanced sauce making. Subscribe to our newsletter for weekly recipe inspiration and expert cooking tips delivered directly to your inbox. Your journey to culinary confidence starts with recipes like this one, and we’re here to support every delicious step of the way.
Frequently Asked Questions
Can I use pre-cooked lobster meat from the grocery store?
Absolutely! Pre-cooked lobster meat works perfectly for this recipe since you’re simply warming it through in butter rather than cooking it from raw. Look for high-quality frozen lobster tails or fresh lobster meat from the seafood counter. Thaw frozen meat overnight in the refrigerator, drain any excess liquid, and proceed with the recipe as written. Pre-cooked options actually simplify the process and reduce active cooking time without compromising flavor or texture.
What’s the best way to achieve the perfect smash burger crust?
The secret lies in three critical factors: extreme heat (400-450°F), firm pressure applied immediately upon contact with the pan, and patience to leave the patty undisturbed for the full 2-3 minutes. Use a heavy, flat-bottomed spatula and press down with your full body weight for 10-15 seconds. The longer the meat stays in contact with the scorching surface without movement, the more extensive the Maillard reaction and the better your crust. Never use cooking spray or excessive oil—the fat in the beef provides all the lubrication needed.
Can I make this recipe on a regular grill instead of a stovetop?
Yes, though with some modifications. You’ll need a cast-iron skillet or griddle placed directly on the grill grates to provide the flat, even surface necessary for smashing. Close the grill lid between flips to maintain consistent high heat. The advantage of grilling is the ability to cook more burgers simultaneously and the addition of subtle smoke flavor. The disadvantage is less precise temperature control, which can make achieving the perfect crust more challenging for beginners.
How can I tell when the lobster is properly warmed without overcooking it?
Since you’re using pre-cooked lobster meat, you’re looking for visual cues rather than temperature targets. The lobster should be heated through (warm to the touch), glossy with butter, and slightly fragrant. This typically takes 2-3 minutes over medium heat. If the lobster starts to appear dry or rubbery, or if you detect a fishy smell, you’ve gone too far. Remove it from heat immediately and add a bit more butter to restore moisture. Remember: gentle warming is the goal, not cooking.
What makes this different from a regular cheeseburger with lobster on top?
The smash burger technique creates a dramatically different texture profile compared to traditionally formed patties. While regular burgers are thick and juicy throughout, smash burgers feature thin patties with extensive crispy, caramelized edges surrounding a juicy center. This textural contrast—crispy exterior versus tender interior—is the hallmark of the smash style. Combined with the melted sharp cheddar and butter-poached lobster, you get layers of contrasting textures in every bite: crunch, cream, tender, and succulent. Regular burgers offer a more uniform, one-dimensional texture experience.
Can I prepare any components in advance for easier weeknight cooking?
Definitely! Form and season the beef balls up to 24 hours ahead (store covered in the refrigerator). Make the special sauce up to one week in advance. Slice vegetables and prepare the lobster meat the morning of cooking. This prep-ahead approach reduces active cooking time to just 15 minutes. However, never smash and cook the burgers in advance, as reheating produces an inferior texture. The actual cooking must happen immediately before serving for optimal results.
What’s the best cheese alternative for someone who’s lactose intolerant?
Aged cheeses like sharp cheddar actually contain very little lactose (most is removed during the aging process), so many lactose-intolerant individuals can tolerate them. However, if you need a completely dairy-free option, look for cashew-based artisan cheese alternatives or nutritional yeast mixed with a small amount of vegan cream cheese. These provide the umami, salty qualities of aged cheese without dairy. Another option is to skip cheese entirely and increase the special sauce, which can be made with vegan mayo.
How do I prevent my burger from falling apart when I bite into it?
Structural integrity depends on proper assembly order and bun toasting. Always toast your buns to create a moisture-resistant barrier. Place lettuce directly on the bottom bun (it acts as a shield), followed by tomato and onion. The beef patty goes on top of the vegetables, topped with cheese and lobster. Spread sauce on both top and bottom buns for adhesion. Press down gently but firmly on the assembled burger to compact the layers slightly. Use a toothpick or small skewer through the center if needed. Finally, eat over a plate—this is intentionally a messy, indulgent experience!
Is it worth using grass-fed beef for this recipe?
Grass-fed beef offers nutritional advantages including higher omega-3 fatty acids, more CLA, and a richer, more complex flavor profile. However, it’s typically leaner than conventional beef and can produce slightly drier burgers if you’re not careful. If using grass-fed, look for an 85/15 fat ratio rather than 80/20, and consider adding a tablespoon of cold butter mixed into the beef before forming balls. This maintains juiciness while preserving the nutritional and ethical benefits of grass-fed meat. The decision ultimately depends on your budget and priorities.
Can I double or triple this recipe for a party?
Absolutely! The recipe scales beautifully. The limiting factor is your cooking surface size—most home stovetops can handle 4-6 burgers at once with a large griddle spanning two burners. For parties of 8 or more, consider setting up multiple cooking stations or cooking in batches, keeping finished burgers warm in a 200°F oven (though quality decreases slightly with holding). Prepare all components in advance and recruit a helper for assembly. Alternatively, create a DIY burger bar where guests build their own, which distributes the workload and creates an interactive dining experience.