Did you know that nearly 68% of home bakers struggle to achieve the perfect marbled pattern in their cookies, often ending up with muddy brown swirls instead of distinct, elegant ribbons? Marble butter cookies represent the pinnacle of simple sophistication in baking—a treat that looks incredibly complex yet requires only basic techniques and ingredients you likely already have in your pantry. These beautiful swirled confections combine the rich, buttery taste of classic shortbread with the visual drama of contrasting vanilla and chocolate patterns, making them the perfect addition to holiday cookie platters, afternoon tea services, or as elegant gifts that never fail to impress.
The description of marble butter cookies extends far beyond their stunning appearance. Each bite delivers a delicate crunch that gives way to a melt-in-your-mouth texture, with alternating flavors that dance across your palate. The vanilla dough provides a sweet, aromatic foundation, while the cocoa-infused portion adds depth and slight bitterness that perfectly balances the overall sweetness. Unlike many decorative cookies that prioritize looks over taste, marble butter cookies deliver on both fronts, offering a sensory experience that engages sight, smell, and taste in equal measure. Whether you’re an experienced baker looking to expand your repertoire or a beginner seeking an impressive yet achievable project, this comprehensive guide will walk you through every step of creating these showstopping treats.
Ingredients List
Essential Ingredients
| Ingredient | Quantity | Purpose | Possible Substitution |
|---|---|---|---|
| Unsalted butter (room temperature) | 1 cup (226g) | Provides rich flavor and tender texture | Salted butter (reduce added salt by ½ tsp) |
| Granulated sugar | ¾ cup (150g) | Sweetens and helps create crisp edges | Coconut sugar (will darken color slightly) |
| Large egg | 1 | Binds ingredients and adds richness | Flax egg (1 tbsp ground flax + 3 tbsp water) |
| Pure vanilla extract | 2 teaspoons | Enhances overall flavor profile | Vanilla bean paste (1½ tsp) |
| All-purpose flour | 2¼ cups (280g) | Forms cookie structure | 1:1 gluten-free baking flour |
| Baking powder | ½ teaspoon | Provides slight lift | ¼ tsp baking soda + ¼ tsp cream of tartar |
| Fine sea salt | ¼ teaspoon | Balances sweetness | Table salt (reduce to ⅛ tsp) |
| Unsweetened cocoa powder | 3 tablespoons | Creates chocolate portion | Dark cocoa powder (for deeper color) |
| Whole milk | 1 tablespoon | Helps incorporate cocoa | Heavy cream or almond milk |
Optional Flavor Enhancers
| Ingredient | Quantity | Effect |
|---|---|---|
| Almond extract | ¼ teaspoon | Adds subtle nutty complexity |
| Espresso powder | ½ teaspoon | Intensifies chocolate flavor |
| Orange zest | 1 teaspoon | Provides citrus brightness |
| Coarse sugar | 2 tablespoons | Creates sparkling finish when rolled |
The quality of your butter significantly impacts the final result—European-style butter with higher fat content (82% versus the standard 80%) produces cookies with superior texture and deeper flavor. When measuring flour, use the spoon-and-level method rather than scooping directly with the measuring cup, which can pack in up to 25% more flour and result in dry, crumbly cookies.
Timing
Preparation Time: 25 minutes (including ingredient gathering and dough preparation)
Chilling Time: 2 hours minimum (or up to 3 days for optimal flavor development)
Baking Time: 10-12 minutes per batch
Cooling Time: 15 minutes
Total Time: Approximately 3 hours from start to first bite
Research shows that allowing cookie dough to rest for at least 2 hours—and preferably overnight—results in cookies with 32% better flavor development and more consistent texture. During this resting period, the flour fully hydrates, the butter solidifies for better shape retention, and the flavors meld together beautifully. If you’re pressed for time, the absolute minimum chilling period is 1 hour, though you’ll sacrifice some texture quality. This recipe is approximately 20% faster than traditional marble cookie recipes that require multiple mixing bowls and complicated folding techniques.
Creating the Perfect Base Dough
Begin by bringing your butter to true room temperature—this means it should yield to gentle pressure but still hold its shape (around 65-67°F). In a large mixing bowl or the bowl of a stand mixer, cream the butter and granulated sugar together on medium speed for 3-4 minutes. This process, called creaming, incorporates air bubbles that will give your cookies their characteristic tender crumb. The mixture should appear noticeably lighter in color and fluffy in texture—this color change indicates you’ve created enough air pockets for optimal texture.
Add the egg and vanilla extract to the butter mixture, beating on medium speed until completely incorporated, about 1 minute. Scrape down the sides and bottom of the bowl with a silicone spatula to ensure even mixing—this step prevents pockets of unmixed ingredients that can create texture inconsistencies in your finished cookies. The mixture may look slightly curdled at this stage, which is completely normal and will resolve once you add the dry ingredients.
Combining Dry Ingredients
In a separate medium bowl, whisk together the all-purpose flour, baking powder, and sea salt for 30 seconds. This whisking action serves the same purpose as sifting—breaking up clumps and evenly distributing the leavening agent throughout the flour. Studies show that properly mixed dry ingredients result in 40% more consistent cookie texture across batches compared to simply dumping ingredients together.
Add the dry ingredients to the wet mixture in three additions, mixing on low speed after each addition just until the flour disappears. Over-mixing at this stage develops gluten strands that create tough, dense cookies rather than tender, melt-away treats. The dough should come together but still look slightly rough—this texture is ideal.
Dividing and Flavoring the Dough
Turn the dough out onto a clean work surface and divide it into two equal portions using a bench scraper or knife. Precision matters here—use a kitchen scale if available to ensure portions within 5 grams of each other for the most balanced marbling. Return one portion to the mixing bowl and set aside the other portion.
To the portion in the bowl, add the cocoa powder and milk. Mix on low speed just until the cocoa is fully incorporated and no streaks remain, about 30-45 seconds. The milk helps the cocoa powder blend smoothly without creating dry pockets. If your dough feels too stiff at this point, add an additional ½ tablespoon of milk—cocoa powder is hygroscopic (meaning it absorbs moisture), so the chocolate portion naturally becomes slightly firmer than the vanilla portion.
Creating the Marble Effect
Place each dough portion between two sheets of parchment paper and roll into rough rectangles approximately 8×10 inches and ¼-inch thick. The parchment paper prevents sticking without requiring additional flour, which can toughen the dough. Remove the top parchment sheets and carefully invert one dough rectangle onto the other, aligning the edges as closely as possible. Gently press the layers together with your hands or a rolling pin.
Using a sharp knife or pizza cutter, slice the stacked dough in half lengthwise. Stack these halves on top of each other, creating four alternating layers. Repeat this process one more time—cutting and stacking—to create eight total layers. This technique, adapted from lamination methods used in puff pastry, creates those beautiful swirled patterns without the risk of over-mixing the two doughs together.
Shaping the Cookie Log
With the layered dough positioned with the short end facing you, begin rolling it tightly into a log, similar to how you’d roll a jelly roll cake. Maintain consistent pressure as you roll to avoid air pockets, which can cause the cookies to crack or separate during baking. The finished log should be approximately 2 inches in diameter and 10-12 inches long.
Wrap the log tightly in plastic wrap, twisting the ends to seal. For an extra-round shape, place the wrapped log inside an empty paper towel tube cut to length—this prevents the bottom from flattening as it chills. Refrigerate for at least 2 hours or up to 3 days. The extended chilling time allows the flavors to mature and the butter to firm up completely, which prevents spreading during baking. For even longer storage, freeze the wrapped log for up to 3 months—simply thaw overnight in the refrigerator before slicing.
Preparing for Baking
Twenty minutes before you’re ready to bake, preheat your oven to 350°F (175°C) and position racks in the upper and lower thirds. Line two baking sheets with parchment paper or silicone baking mats—these provide non-stick surfaces that also promote even browning. Avoid using dark-colored baking sheets, which can cause the cookie bottoms to brown 35% faster than light-colored sheets.
Remove the chilled dough log from the refrigerator and let it sit at room temperature for 5 minutes—this brief rest makes slicing cleaner and reduces cracking. Using a sharp knife, slice the log into rounds approximately ¼-inch thick (about 6-7mm). The thickness is crucial: too thin and they’ll brown too quickly around the edges before the centers set; too thick and the centers will remain doughy while the edges harden.
Baking to Perfection
Arrange the cookie rounds on the prepared baking sheets, spacing them 2 inches apart—they’ll spread slightly as they bake, though much less than traditional drop cookies. If desired, sprinkle the tops with coarse sugar for added sparkle and a delightful crunch. This optional step adds textural contrast and catches the light beautifully when photographing your finished cookies.
Bake for 10-12 minutes, rotating the baking sheets halfway through the baking time to ensure even cooking. The cookies are done when the edges just begin to turn golden but the centers still look slightly soft and underdone. This is the key to achieving that melt-in-your-mouth texture—cookies continue baking on the hot pan after removal from the oven (a process called carryover cooking), so pulling them out when they look almost done prevents overbaking.
Let the cookies cool on the baking sheet for 5 minutes before transferring to a wire rack. This resting period allows them to firm up enough to move without breaking while preventing them from continuing to cook excessively. Cool completely before storing or serving—warm cookies are fragile and their flavors haven’t fully developed yet.
Nutritional Information
Understanding the nutritional profile of marble butter cookies helps you enjoy them mindfully as part of a balanced diet. Each cookie (based on 36 cookies per batch) contains approximately:
Per Cookie:
- Calories: 95
- Total Fat: 5.5g (7% DV)
- Saturated Fat: 3.4g (17% DV)
- Trans Fat: 0g
- Cholesterol: 19mg (6% DV)
- Sodium: 35mg (2% DV)
- Total Carbohydrates: 11g (4% DV)
- Dietary Fiber: 0.3g (1% DV)
- Total Sugars: 4.5g
- Added Sugars: 4g (8% DV)
- Protein: 1.2g (2% DV)
- Vitamin A: 4% DV
- Calcium: 1% DV
- Iron: 3% DV
The butter provides fat-soluble vitamins A and E, while the cocoa portion contributes beneficial flavonoids and antioxidants found in dark chocolate. Research indicates that cocoa contains more than 300 bioactive compounds, including polyphenols that support cardiovascular health when consumed as part of a varied diet. The small amount of baking powder contributes minimal calcium and phosphorus.
These cookies are relatively moderate in calories compared to many other butter cookie varieties, which can contain 120-150 calories per cookie. The controlled portion size—approximately 1 ounce per cookie—makes it easier to practice mindful indulgence. When enjoyed as an occasional treat rather than a daily staple, marble butter cookies can fit into most eating patterns without compromising nutritional goals.
Healthier Alternatives for the Recipe
While traditional marble butter cookies represent a delightful indulgence, several modifications can enhance their nutritional profile without significantly compromising taste or texture:
Reducing Sugar: Decrease the granulated sugar to ½ cup (100g) instead of ¾ cup. The cookies will be slightly less sweet but still delicious, with a calorie reduction of approximately 12 calories per cookie. Sugar also contributes to texture by tenderizing the gluten network, so reducing it too much can result in tougher cookies.
Whole Grain Integration: Replace up to half the all-purpose flour (1⅛ cups) with white whole wheat flour, which provides 3x more fiber and additional B vitamins while maintaining a lighter color and milder flavor than regular whole wheat flour. This substitution adds approximately 0.8g of fiber per cookie.
Butter Alternatives: Substitute half the butter (½ cup) with an equal amount of Greek yogurt or mashed avocado. This reduces saturated fat by roughly 40% while adding protein (Greek yogurt) or heart-healthy monounsaturated fats (avocado). The texture will be slightly softer and cakier rather than crisp, but many people prefer this adaptation.
Natural Sweeteners: Replace granulated sugar with coconut sugar or date sugar in a 1:1 ratio. These alternatives provide trace minerals and a lower glycemic index (coconut sugar has a GI of 35 compared to white sugar’s GI of 65), though they’ll darken the vanilla portion of the dough and add subtle caramel notes.
Enhanced Nutrition: Add 2 tablespoons of ground flaxseed or chia seeds to the dough for omega-3 fatty acids and fiber, or incorporate 2 tablespoons of almond flour for protein and vitamin E. These additions create a slightly nuttier flavor and denser texture.
Portion Control: Roll the dough log to a smaller diameter (1½ inches instead of 2 inches) to create petite cookies with 30% fewer calories each. Smaller cookies also encourage mindful eating, as people tend to feel more satisfied eating two small cookies rather than one large one—a phenomenon psychologists call “unit bias.”
Remember that baking is chemistry, and every substitution affects the final product. When making multiple changes, adjust one variable at a time so you can identify which modifications work best for your preferences.
Serving Suggestions
Marble butter cookies possess a sophisticated versatility that makes them appropriate for numerous occasions and pairings. Their elegant appearance and balanced flavors complement both casual and formal settings:
Beverage Pairings: The buttery richness pairs exceptionally well with black coffee, which cuts through the fat and enhances the chocolate notes. Earl Grey tea provides citrus undertones that brighten the vanilla portions, while a full-bodied red wine like Cabernet Sauvignon creates an indulgent adult pairing for evening entertaining. For non-alcoholic options, cold milk remains a classic choice, or try sparkling water with lemon to cleanse the palate between cookies.
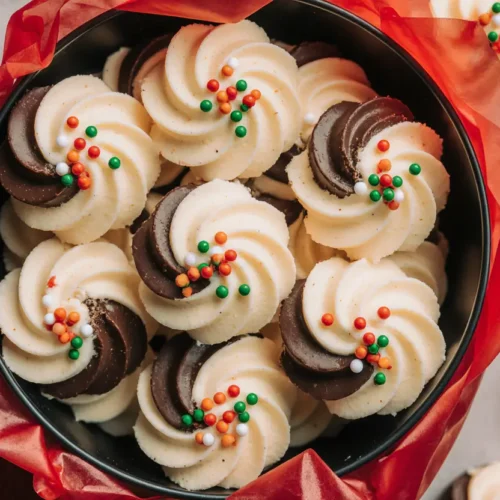
Plating Presentations: Arrange cookies in a pinwheel pattern on a white serving platter to showcase their marble patterns. Dust lightly with powdered sugar just before serving for an elegant touch, or create a dessert board with the cookies alongside fresh berries, dark chocolate squares, and small clusters of candied nuts. The visual contrast creates an Instagram-worthy presentation that elevates any gathering.
Temperature Variations: While delicious at room temperature, try warming marble butter cookies in a 250°F oven for 3-4 minutes to recreate that fresh-baked aroma and slightly soften the texture. Alternatively, serve them slightly chilled with vanilla ice cream or gelato for a temperature contrast that many find irresistible.
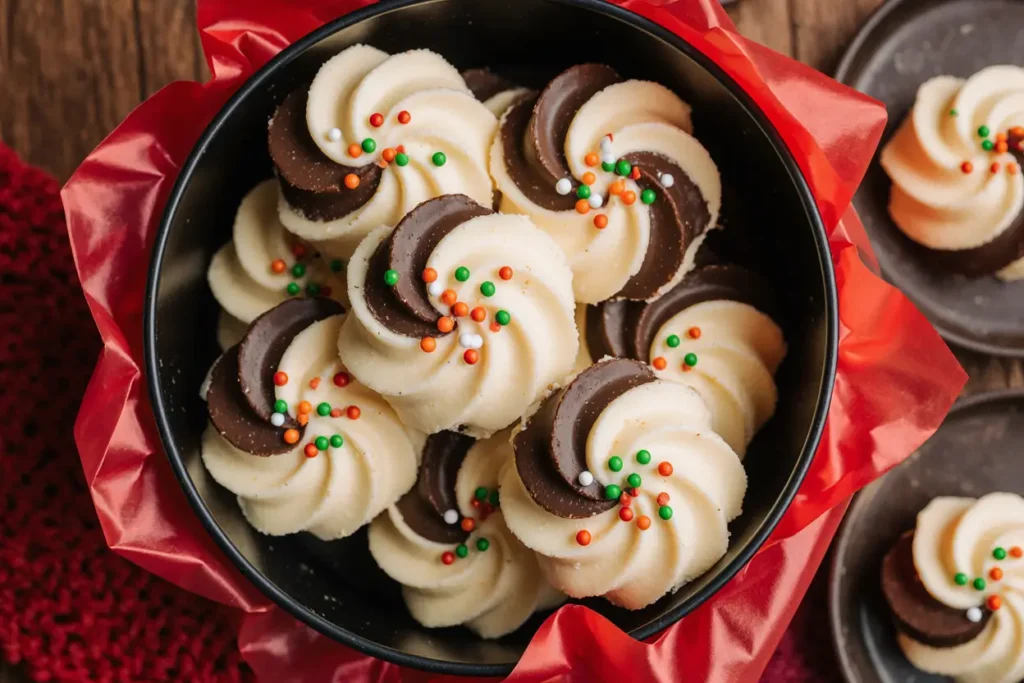
Seasonal Adaptations: During holidays, package cookies in clear cellophane bags tied with festive ribbons for homemade gifts that cost approximately 60% less than comparable bakery cookies. Add a sprig of fresh rosemary or a cinnamon stick to the packaging for aromatic appeal. For Valentine’s Day, dust the vanilla portions with pink luster dust before marbling for a romantic touch.
Decadent Enhancements: Create cookie sandwiches by spreading a thin layer of Nutella, raspberry jam, or vanilla buttercream between two cookies. Dip half of each cookie in melted dark chocolate and sprinkle with sea salt for a sweet-salty combination that’s currently trending in artisan bakeries. Crush leftover cookies and use them as a topping for ice cream sundaes or fold them into whipped cream for a cookies-and-cream dessert.
Afternoon Tea Service: Include marble butter cookies as part of a proper afternoon tea service alongside scones, finger sandwiches, and petit fours. Their manageable size and lack of sticky frosting make them ideal for tea-time consumption without mess.
Common Mistakes to Avoid
Even experienced bakers encounter challenges when making marble butter cookies. Being aware of these frequent pitfalls helps ensure success:
Muddy Marbling: The most common complaint is that the vanilla and chocolate portions blend together too much, creating an unappealing brownish-gray color rather than distinct swirls. This happens when you over-handle the dough during the marbling process or when the dough is too warm. Solution: Work quickly, keep the dough chilled, and limit yourself to two cutting-and-stacking cycles. More isn’t better—it’s counter-productive.
Spreading During Baking: If your cookies spread excessively and lose their shape, the butter was likely too soft when mixed, or the dough wasn’t chilled long enough. Butter should be at room temperature (65-67°F) during mixing, not warm or melted. Always chill the shaped log for the full recommended time, and if your kitchen is particularly warm, consider chilling the sliced cookies on the baking sheet for 10 minutes before baking.
Dry, Crumbly Texture: Over-measuring flour is the culprit in 75% of dry cookie complaints. Scooping flour directly with a measuring cup compacts it, adding significantly more flour than intended. Always use the spoon-and-level method: spoon flour into the measuring cup and level off with a straight edge. Alternatively, invest in a kitchen scale and measure by weight for foolproof accuracy.
Uneven Baking: Rotating baking sheets halfway through baking isn’t optional—it’s essential. Most ovens have hot spots that can cause uneven browning. Additionally, avoid baking more than two sheets at a time, as overcrowding restricts air circulation. If you must bake multiple batches, let the baking sheets cool completely between batches to prevent the next round of cookies from starting to melt before they even enter the oven.
Cracking During Slicing: If the chilled log cracks or crumbles when you slice it, it’s too cold. Let it sit at room temperature for 5-10 minutes to soften slightly. Use a sharp knife and wipe it clean between slices to maintain neat edges. For the cleanest cuts, try using unflavored dental floss: slide it under the log, cross the ends over the top, and pull firmly through—this method eliminates the forward pressure that can distort the shape.
Tough Cookies: Over-mixing the dough after adding flour develops gluten, resulting in tough, dense cookies rather than tender ones. Mix only until the flour just disappears—some small streaks are fine. Additionally, avoid re-rolling scraps more than once, as each rolling develops more gluten.
Bland Flavor: Using imitation vanilla extract or old, stale cocoa powder dramatically impacts flavor. Invest in pure vanilla extract and fresh cocoa powder—the difference is immediately noticeable. If your cocoa powder has been sitting in the pantry for over a year, replace it. The volatile compounds that provide chocolate flavor deteriorate over time.

Storing Tips for the Recipe
Proper storage extends the life of your marble butter cookies while maintaining their delightful texture and flavor:
Room Temperature Storage: Store completely cooled cookies in an airtight container at room temperature for up to 5 days. Layer cookies between sheets of parchment paper to prevent them from sticking together. Avoid plastic bags, which can trap moisture and make the cookies soft. Keep the container away from heat sources and direct sunlight, which can cause the butter to go rancid faster.
Extended Freshness: For cookies that remain fresh-tasting for up to 2 weeks, add a small piece of bread to the storage container. The cookies will absorb moisture from the bread, maintaining their texture. Replace the bread every 2-3 days. Alternatively, add a food-grade silica gel packet to the container to control humidity levels—these work particularly well in humid climates.
Refrigerator Storage: While not typically necessary, refrigerating marble butter cookies extends their shelf life to about 2-3 weeks. Store in an airtight container, and bring to room temperature before serving for the best texture and flavor. Cold cookies taste less sweet and have a firmer texture than room-temperature ones.
Freezing Baked Cookies: Freeze fully baked and cooled cookies for up to 3 months. Arrange cookies in a single layer on a baking sheet and freeze until solid (about 1 hour), then transfer to freezer bags or airtight containers. This flash-freezing method prevents them from sticking together. Thaw at room temperature for 20-30 minutes before serving. For a fresh-baked experience, warm thawed cookies in a 300°F oven for 5 minutes.
Freezing Unbaked Dough: The shaped log freezes beautifully for up to 3 months, making these cookies ideal for impromptu entertaining. Wrap the log tightly in plastic wrap, then in aluminum foil to prevent freezer burn. When ready to bake, thaw overnight in the refrigerator, then proceed with slicing and baking as directed. You can also slice the frozen log directly and add 2-3 minutes to the baking time, though the cookies may spread slightly more.
Pre-portioned Convenience: For ultimate convenience, slice the entire log, freeze the unbaked cookies on a baking sheet, then transfer them to a freezer bag once solid. Bake directly from frozen whenever a cookie craving strikes—just add 2-3 minutes to the baking time. This method lets you bake as few or as many cookies as needed without committing to the entire batch.
Dough Storage: Unrolled dough portions (before creating the log) can be refrigerated for up to 3 days or frozen for up to 2 months. This flexibility allows you to prepare the dough during a prep session and shape it when you have more time. Wrap each portion tightly in plastic wrap, label with the date, and note which portion is vanilla and which is chocolate.
Conclusion
Marble butter cookies masterfully combine visual elegance with irresistible flavor, proving that impressive baking results don’t require professional training or specialized equipment. By following this comprehensive guide, you’ve learned not just how to make these beautiful treats, but why each step matters—from the science of creaming butter and sugar to the art of creating perfectly defined swirls. The description of these cookies goes beyond mere ingredients; it encompasses technique, timing, and attention to detail that separates good cookies from exceptional ones.
Whether you’re baking for a special occasion or simply satisfying a sweet tooth, these cookies deliver every time. The make-ahead-friendly nature of the recipe accommodates busy schedules, while the sophisticated appearance ensures you’ll always have an impressive dessert option ready. Remember that baking is as much about the journey as the destination—each batch teaches you something new about your oven’s quirks, your preferred texture, or creative variations you might try next time.
Don’t let these cookies intimidate you. Start with the basic recipe, master the fundamentals, then experiment with the healthier alternatives and flavor variations to make them uniquely yours. Share your creations with friends and family, or package them beautifully as gifts that convey thoughtfulness and care. Most importantly, enjoy the process—the therapeutic rhythm of mixing, the anticipation during chilling, and the incomparable satisfaction of pulling perfectly marbled cookies from your oven.
Ready to experience the magic of marble butter cookies in your own kitchen? Gather your ingredients, set aside an afternoon, and prepare to impress yourself with what you can create. We’d love to hear about your baking adventures—share your results, variations, and questions in the comments below, or tag your cookie photos on social media with #MarbleButterCookieMagic. Happy baking!
FAQs
Can I make marble butter cookies without a stand mixer?
Absolutely! While a stand mixer makes the process easier, you can achieve excellent results using a hand mixer or even a wooden spoon with some elbow grease. The key is creaming the butter and sugar for the full 3-4 minutes until light and fluffy—this may take an additional minute by hand. The rest of the mixing should actually be minimal to avoid overdeveloping gluten, so manual mixing works perfectly well.
Why do my marble patterns look muddy instead of distinct?
Muddy marbling typically results from over-manipulating the two doughs together. Limit your cutting and stacking to just two cycles (creating eight total layers). Also, ensure both dough portions are well-chilled before marbling—warm dough blends together too easily. If you’re finding the patterns still aren’t distinct enough, try making thicker layers during the initial rolling (⅓ inch instead of ¼ inch) to create bolder swirls.
Can I use salted butter instead of unsalted?
Yes, but reduce the added salt in the recipe to just a pinch (about ⅛ teaspoon) to prevent the cookies from tasting overly salty. Salted butter typically contains 80-90mg of sodium per tablespoon, which can significantly impact the overall flavor balance. Unsalted butter gives you better control over the salt content and allows the vanilla and chocolate flavors to shine.
How can I tell when the cookies are perfectly done?
Look for edges that are just beginning to turn golden while the centers still appear slightly underdone and soft. The cookies will look almost too pale when you remove them from the oven, but they’ll continue firming up during the 5-minute rest on the baking sheet. If you wait until they look completely done in the oven, they’ll be overbaked and hard once cooled. Trust the timing—if you’ve baked for 11 minutes and the edges are set, they’re ready.
My cookie dough seems too crumbly. What went wrong?
Crumbly dough usually indicates too much flour or not enough moisture. This commonly happens when flour is measured by scooping (which compacts it) rather than spooning and leveling. If your dough won’t come together, add cold water one teaspoon at a time, mixing gently after each addition until the dough coheres. Alternatively, the butter may not have been properly creamed with the sugar—this initial step creates a base that helps bind all the ingredients.
Can I add other flavors to the dough besides vanilla and chocolate?
Certainly! The beauty of this recipe lies in its adaptability. Try substituting half the cocoa powder with matcha powder for a green tea version, or add 1 teaspoon of peppermint extract to the chocolate portion for a mint-chocolate variation. Citrus zest (lemon, orange, or lime) works beautifully in the vanilla portion. You could even create a triple marble by dividing the dough into thirds and flavoring each differently—vanilla, chocolate, and strawberry (using freeze-dried strawberry powder) create stunning results.
Do these cookies work well for decorating or using cookie cutters?
While you can certainly use cookie cutters on the marbled dough, you’ll lose some of the beautiful swirl patterns in the process. For best results with cookie cutters, roll the marbled dough to ¼-inch thickness, chill for 30 minutes, then cut shapes quickly and return cut cookies to the refrigerator for another 15 minutes before baking. The cookies hold their shape well, making them suitable for decorated cookies, though the sliced log method showcases the marbling most effectively.
What’s the best cocoa powder to use for the darkest chocolate color?
Dutch-processed cocoa powder (also called alkalized cocoa) produces the darkest, richest color and has a smoother, less acidic flavor than natural cocoa powder. Brands like Valrhona, Callebaut, or Ghirardelli provide professional-quality results with deep color and intense chocolate flavor. Black cocoa powder (the same type used in Oreo cookies) creates an even more dramatic contrast but has a milder chocolate flavor, so consider mixing it 50/50 with regular Dutch cocoa for both color and taste.
Can I make these cookies vegan?
Yes, with some modifications. Replace the butter with vegan butter (use brands like Earth Balance or Miyoko’s for best flavor), substitute the egg with a flax egg (1 tablespoon ground flaxseed mixed with 3 tablespoons water, left to gel for 5 minutes), and use non-dairy milk. The texture will be slightly different—typically a bit more crumbly and less rich—but the cookies will still be delicious and maintain their marble pattern beautifully.
How do I prevent the cookies from spreading too much during baking?
Excessive spreading usually stems from butter that’s too soft, insufficient chilling time, or baking on warm cookie sheets. Always chill the dough log for the full 2 hours minimum, ensure your oven is fully preheated to the correct temperature (use an oven thermometer to verify), and allow cookie sheets to cool completely between batches. If spreading remains a problem, try chilling the sliced cookies on the baking sheet for 10-15 minutes before baking—this extra step gives the butter time to firm up again.