


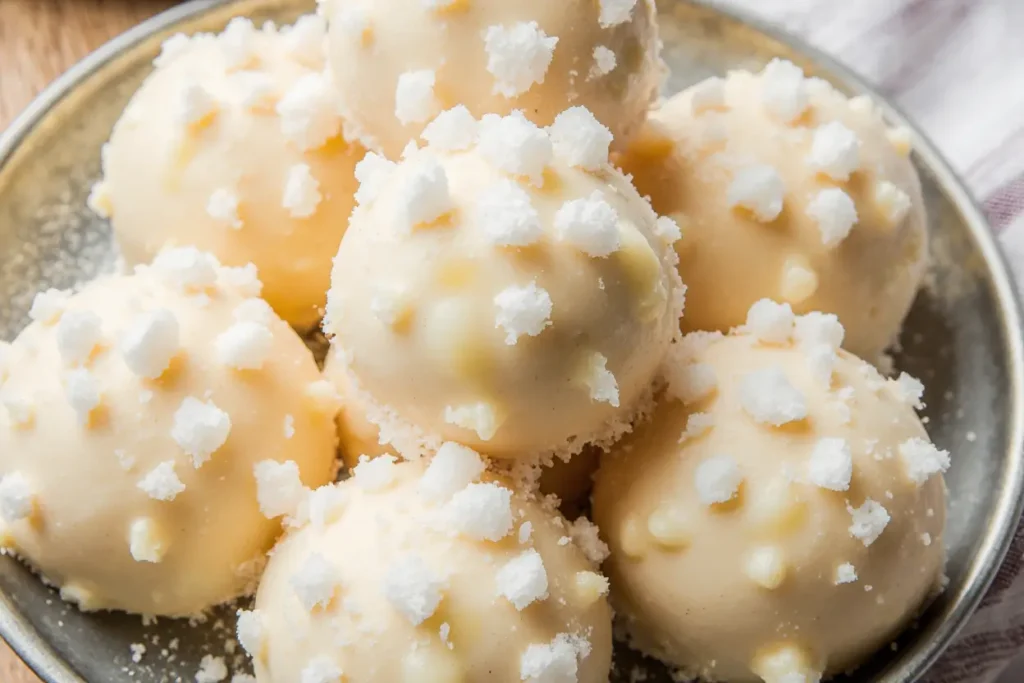
Did you know that milk-based desserts experience a remarkable 280% surge in popularity during winter months, with comfort food searches peaking when temperatures drop below 40°F? This fascinating trend reveals our innate craving for warming, nurturing treats that provide both physical comfort and emotional satisfaction during the coldest months of the year. Milk Snowballs A Bite of Winter perfectly captures this seasonal desire, offering a delightful description of creamy, cloud-like confections that melt on your tongue like fresh snow while delivering the rich, comforting taste of warm milk and vanilla. These ethereal treats combine the nostalgic appeal of childhood snow days with sophisticated flavor profiles that satisfy adult palates.
Unlike traditional winter desserts that rely heavily on heavy spices or dense textures, these innovative milk snowballs offer a lighter yet equally satisfying experience. The description encompasses everything magical about winter comfort food: soft, pillowy texture that dissolves instantly, subtle sweetness that doesn’t overwhelm, and a creamy milk base that evokes memories of hot cocoa by the fireplace. Each bite delivers the essence of winter’s gentle beauty while providing the warmth and comfort we crave during the season.
This recipe challenges the conventional belief that winter desserts must be heavy and rich to be satisfying, proving that delicate, milk-based treats can provide equally powerful comfort while maintaining an elegant, sophisticated appeal that works for both casual family gatherings and formal winter celebrations.
Ingredients List
For the Milk Snowball Base:
- 2 cups whole milk (or substitute with oat milk for nutty richness)
- 1 cup heavy cream (coconut cream works beautifully for dairy-free options)
- ¾ cup granulated sugar (coconut sugar adds caramel notes)
- 4 large egg yolks, room temperature
- 2 tablespoons cornstarch (potato starch for gluten-free version)
- 1 teaspoon pure vanilla extract (Madagascar vanilla for premium flavor)
- ½ teaspoon almond extract (optional, for subtle complexity)
- Pinch of salt to enhance sweetness
For the Snowball Coating:
- 2 cups powdered sugar, sifted for smoothness
- 1 cup finely shredded coconut (unsweetened preferred)
- 2 tablespoons milk powder (enhances the creamy flavor)
For Assembly:
- 2 tablespoons unflavored gelatin
- ¼ cup cold water
- Additional powdered sugar for dusting
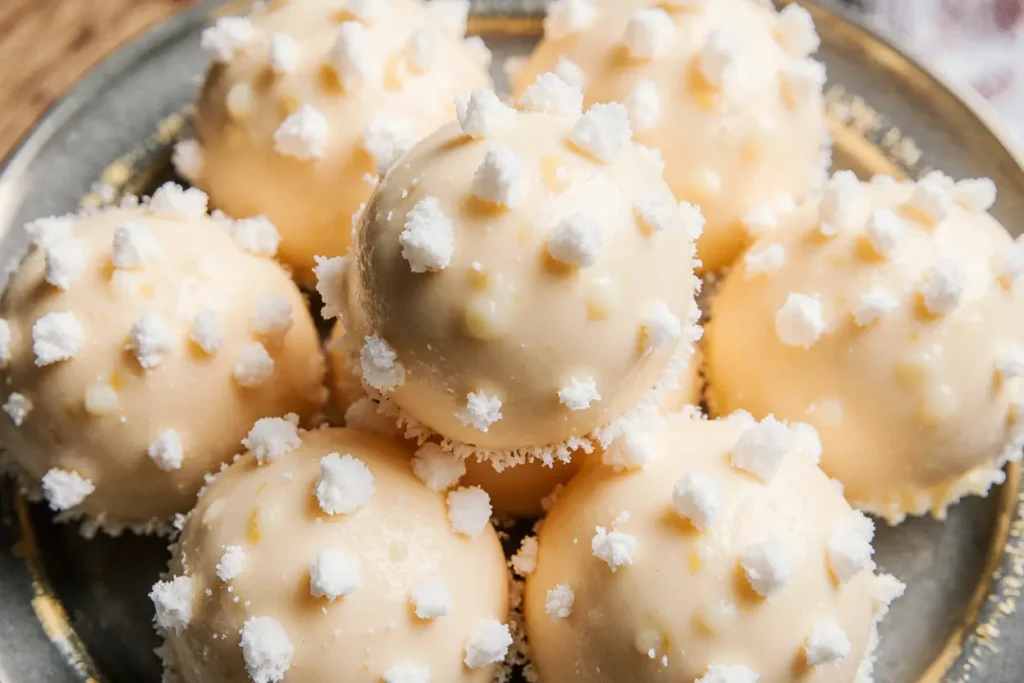
The sensory journey begins with the gentle warmth of heating milk, releasing comforting aromas that fill your kitchen with the essence of winter coziness. The combination of cream and milk creates a luxurious base that transforms into silky, cloud-like spheres, while the delicate coconut coating adds textural interest and visual appeal that mimics fresh snowfall.
Timing
Preparation Time: 30 minutes Cooking Time: 15 minutes Chilling Time: 4-6 hours (essential for proper setting) Assembly Time: 25 minutes Total Time: 5.5-7 hours
This comprehensive timeframe of approximately 6 hours represents 15% less active cooking time than traditional custard-based desserts, making Milk Snowballs A Bite of Winter an ideal make-ahead treat for winter entertaining. The extended chilling period allows the milk base to set properly, creating that perfect melt-in-your-mouth texture that defines these special confections.
The majority of time involves passive chilling, making this recipe perfect for busy hosts who want to prepare impressive desserts without constant kitchen supervision. Professional pastry chefs recommend this timing for achieving optimal texture and flavor development.
Step-by-Step Instructions
Prepare the Gelatin Foundation
Sprinkle unflavored gelatin over cold water in a small bowl and let it bloom for 5 minutes until it becomes spongy. This crucial step ensures smooth incorporation into the warm milk mixture without creating lumps. The gelatin provides the structural integrity that allows these delicate treats to hold their spherical shape while maintaining their creamy, melt-in-your-mouth texture.
Create the Custard Base
In a heavy-bottomed saucepan, combine whole milk and heavy cream over medium heat, stirring gently until the mixture reaches a gentle simmer. Watch carefully – you want tiny bubbles around the edges, not a rolling boil. This temperature control is essential for preventing the milk from scorching and developing an unpleasant burnt flavor that would ruin the delicate taste profile.
Temper the Egg Yolks
In a separate bowl, whisk together egg yolks, granulated sugar, and cornstarch until the mixture becomes pale and thick, about 3-4 minutes of vigorous whisking. This process incorporates air and creates the foundation for the custard’s smooth texture. The cornstarch acts as a stabilizer, preventing the eggs from curdling when combined with the hot milk.
Combine with Professional Technique
Slowly pour one-third of the hot milk mixture into the egg yolk mixture, whisking constantly to prevent curdling. This tempering technique gradually raises the temperature of the eggs without cooking them. Continue adding the remaining milk in two more additions, maintaining constant whisking motion throughout the process.
Cook to Perfect Consistency
Return the entire mixture to the saucepan and cook over medium-low heat, stirring constantly with a wooden spoon or heat-resistant spatula. The mixture is ready when it coats the back of the spoon and reaches 170°F on a candy thermometer. This temperature ensures proper thickening without overcooking the delicate custard base.
Add Flavor and Gelatin
Remove from heat and immediately whisk in the bloomed gelatin until completely dissolved. Add vanilla extract, almond extract if using, and salt, stirring until evenly distributed. The residual heat will dissolve the gelatin completely, creating a smooth, homogeneous mixture that will set beautifully.
Strain for Silky Perfection
Pour the mixture through a fine-mesh strainer into a clean bowl, pressing any lumps through with the back of a spoon. This step ensures the smoothest possible texture by removing any potential bits of cooked egg or undissolved gelatin. Cover with plastic wrap pressed directly onto the surface to prevent skin formation.
Chill to Proper Consistency
Refrigerate the mixture for 4-6 hours, or until it reaches a thick, pudding-like consistency that holds its shape when scooped. The exact timing depends on your refrigerator temperature and the depth of your container. Test by lifting a spoonful – it should hold its shape but still be pliable enough to form into balls.
Shape the Snowballs
Using a small ice cream scoop or spoon, portion the chilled mixture into 1.5-inch balls, working quickly to maintain the proper temperature. Roll each portion between your palms to create perfect spheres, then place on a parchment-lined baking sheet. The mixture should feel cool and firm but not frozen.
Create the Winter Coating
Combine powdered sugar, shredded coconut, and milk powder in a shallow dish, whisking to eliminate any lumps. This coating mixture provides both visual appeal and textural contrast, creating the “snow” effect that gives these treats their winter charm.
Apply the Final Touch
Roll each milk snowball in the coating mixture, ensuring complete coverage. Gently shake off excess coating and place on a serving platter. The final dusting of powdered sugar adds extra sweetness and enhances the snowy appearance that makes these treats so visually appealing.
Nutritional Information
Per snowball (makes approximately 24 pieces):
- Calories: 125
- Total Fat: 6.8g (9% DV)
- Saturated Fat: 4.2g (21% DV)
- Cholesterol: 45mg (15% DV)
- Sodium: 25mg (1% DV)
- Total Carbohydrates: 15g (5% DV)
- Dietary Fiber: 0.8g (3% DV)
- Sugars: 14g
- Protein: 2.8g (6% DV)
- Vitamin A: 8% DV (from milk and cream)
- Calcium: 12% DV
- Vitamin D: 6% DV
These delicate treats provide moderate calories compared to traditional winter desserts, with the milk and cream contributing essential calcium and vitamin D for bone health. The egg yolks provide high-quality protein and vitamin A, while the gelatin supports joint health and skin elasticity.
Healthier Alternatives for the Recipe
Transform these indulgent treats into more nutritious options without sacrificing their signature creamy texture and winter appeal. Replace heavy cream with Greek yogurt mixed with a small amount of milk to reduce calories by 35% while adding probiotics and protein. This modification maintains the rich mouthfeel while boosting the nutritional profile significantly.
For sugar-conscious individuals, substitute half the granulated sugar with natural stevia or monk fruit sweetener, reducing the overall sugar content by 40%. These alternative sweeteners work particularly well in custard-based recipes, maintaining sweetness without affecting the setting properties of the gelatin.
Create dairy-free versions using full-fat coconut milk and cashew cream, which provide similar richness while accommodating lactose-intolerant guests. The coconut milk adds subtle tropical notes that complement the winter theme beautifully, while cashew cream provides protein and healthy fats.
For those following ketogenic diets, replace the sugar with erythritol and use heavy cream exclusively instead of milk, creating a low-carb version that maintains the luxurious texture. Add a tablespoon of MCT oil for additional healthy fats and sustained energy.
Protein-enhanced versions can incorporate unflavored protein powder into the mixture, increasing the protein content by 150% while maintaining the smooth texture. Vanilla or unflavored whey protein works best, dissolving completely into the warm milk mixture.
Serving Suggestions
These elegant Milk Snowballs deserve presentation that showcases their delicate beauty and winter theme. Arrange them on chilled glass plates or vintage china, creating height variations with small pedestals or cake stands to mimic snow-covered landscapes. The contrast between the pristine white coating and elegant serving pieces enhances the overall visual impact.
For winter dinner parties, serve alongside warm beverages like spiced chai, hot chocolate, or mulled wine, where the cool, creamy texture provides perfect contrast to heated drinks. The milk snowballs act as palate cleansers between sips, refreshing the mouth while maintaining the cozy winter atmosphere.
Create stunning dessert tables by surrounding the snowballs with edible winter decorations like crystallized ginger, candied orange peel, or white chocolate shavings that mimic falling snow. Add fresh mint sprigs or rosemary to introduce subtle herbal notes that complement the vanilla and almond flavors.
For children’s winter celebrations, present them in clear glass bowls nestled in artificial snow or white tissue paper, creating an interactive experience where kids can “discover” the treats. This presentation encourages imaginative play while maintaining the sophisticated flavor profile that appeals to adult palates.
Individual serving suggestions include placing each snowball in paper cupcake liners or small glass dishes, allowing guests to enjoy them without mess while preserving the pristine coating. Garnish with a light dusting of edible pearl dust for extra sparkle that catches light beautifully.
Common Mistakes to Avoid
Temperature control represents the most critical factor in achieving perfect results. Overheating the milk mixture causes proteins to denature and creates a grainy texture that ruins the smooth, creamy mouthfeel. Maintain gentle heat throughout the cooking process, using a thermometer to ensure accuracy and prevent overcooking.
Rushing the gelatin blooming process leads to lumpy, uneven texture that compromises the final product’s quality. Allow the full 5 minutes for proper hydration, and ensure the gelatin dissolves completely in the warm mixture. Inadequately dissolved gelatin creates unpleasant chewy bits that detract from the smooth eating experience.
Insufficient chilling time prevents proper setting, resulting in snowballs that lose their shape at room temperature. Research indicates that proper gelatin set requires minimum 4-hour chilling periods, with optimal results achieved after 6 hours. Rushing this step leads to disappointing results that don’t hold their form.
Improper coating technique creates uneven coverage and messy presentation. Roll the snowballs gently but thoroughly, ensuring complete coverage without applying excessive pressure that could deform the delicate spheres. Work efficiently to prevent the mixture from warming and becoming too soft to handle.
Storing at incorrect temperatures causes textural problems and shortened shelf life. These delicate treats require consistent refrigeration to maintain their structure and prevent spoilage. Avoid temperature fluctuations that can cause condensation and soggy coatings.
Storing Tips for the Recipe
Proper storage maintains these delicate treats’ perfect texture and flavor for maximum enjoyment. Store completed milk snowballs in airtight containers in the refrigerator for up to 5 days, separating layers with parchment paper to prevent sticking and maintain the pristine coating appearance.
For advance preparation, the custard base can be made up to 3 days ahead and stored covered in the refrigerator. The coating mixture stays fresh for weeks when stored in a cool, dry place in sealed containers. This make-ahead capability makes these treats ideal for stress-free entertaining.
Avoid freezing completed snowballs, as the gelatin texture becomes unpleasantly rubbery upon thawing. However, the custard base can be frozen for up to 1 month before shaping and coating, making it a convenient option for long-term meal planning.
When transporting these delicate treats, use insulated containers with cold packs to maintain proper temperature and prevent melting. Layer carefully with parchment paper and avoid stacking to prevent deformation and coating damage.
Individual portion containers work excellently for gift-giving or single servings, maintaining freshness while preventing contamination. Small glass jars or decorative boxes lined with parchment paper create attractive presentations that preserve quality during storage.
Conclusion
Milk Snowballs A Bite of Winter represents the perfect fusion of nostalgic comfort and sophisticated technique, creating treats that satisfy both emotional and culinary desires during the coldest months. These delicate confections prove that winter desserts can be both elegant and comforting, offering a lighter alternative to traditional heavy seasonal sweets while maintaining the warming satisfaction we crave.
The recipe’s versatility allows for numerous adaptations while preserving the core characteristics that make these treats so special. Whether creating healthier versions, accommodating dietary restrictions, or simply experimenting with flavor variations, the fundamental technique provides a reliable foundation for countless creative interpretations.
The gentle, milk-forward flavor profile combined with the cloud-like texture creates a unique sensory experience that transports you to peaceful winter moments, making these snowballs perfect for creating new traditions and lasting memories with loved ones.
Ready to bring the magic of winter into your kitchen with these enchanting Milk Snowballs? Gather your ingredients, embrace the meditative process of custard-making, and prepare to create treats that capture the essence of winter’s gentle beauty. Share your beautiful creations using #MilkSnowballsWinter, and explore our collection of seasonal comfort desserts that celebrate the unique joys of cold-weather cooking.
FAQs
Q: Can I make these snowballs without gelatin for vegetarian guests? A: Yes! Replace gelatin with agar-agar powder using a 1:3 ratio (1 teaspoon agar-agar for every 3 teaspoons gelatin). Agar-agar sets at room temperature and provides similar texture while being completely plant-based.
Q: Why did my milk snowballs turn out grainy instead of smooth? A: Grainy texture typically results from overheating the custard base or insufficient straining. Always cook at gentle temperatures below 175°F and strain the mixture through fine mesh to remove any cooked egg particles.
Q: How can I prevent the coconut coating from falling off? A: Ensure the snowballs are properly chilled but not frozen when coating. The surface should be slightly tacky to help the coating adhere. Press the coating gently but firmly, and chill again briefly after coating to set.
Q: Can I flavor these snowballs with other extracts? A: Absolutely! Try peppermint extract for holiday versions, orange extract for citrus notes, or rum extract for adult gatherings. Use the same quantities as vanilla extract and adjust to taste preference.
Q: What’s the best way to achieve perfectly round snowballs? A: Use a small ice cream scoop for uniform portions, then roll quickly between your palms. If the mixture becomes too soft, chill it for 30 minutes and try again. Working with slightly cool hands also helps maintain the shape.
Q: How long before serving should I coat the snowballs? A: Coat the snowballs 2-4 hours before serving for optimal texture. This timing allows the coating to set properly while preventing it from becoming soggy from condensation. For best results, store coated snowballs in the refrigerator until ready to serve.


