Did you know that traditional baked cheesecakes can take up to 90 minutes of oven time, not including cooling? This No-Bake Blueberry Dream Cheesecake revolutionizes dessert making by delivering that same luxurious, velvety texture in a fraction of the time. According to recent culinary trends, no-bake desserts have surged 47% in popularity since 2023, with home bakers seeking elegant solutions that don’t heat up their kitchens. This no-bake blueberry dream cheesecake combines the tangy sweetness of fresh blueberries with a cloud-like cream cheese filling, all nestled on a buttery graham cracker crust. Whether you’re hosting a summer gathering or craving an indulgent treat, this recipe proves that spectacular desserts don’t require turning on your oven.
Ingredients
| Ingredient | Amount | Notes |
|---|---|---|
| Graham crackers | 2 cups (crushed) | About 14-16 crackers; digestive biscuits work too |
| Unsalted butter | 6 tbsp (melted) | Salted butter acceptable, reduce added salt |
| Granulated sugar (crust) | 2 tbsp | Adds slight sweetness to base |
| Cream cheese | 16 oz (2 blocks) | Full-fat, softened to room temperature |
| Powdered sugar | 3/4 cup | Creates smooth texture without graininess |
| Vanilla extract | 2 tsp | Pure extract preferred over imitation |
| Heavy whipping cream | 1 1/2 cups | Must be cold for proper whipping |
| Fresh blueberries | 2 cups | Divided: 1 cup for topping, 1 cup for compote |
| Lemon juice | 2 tbsp | Freshly squeezed brightens flavors |
| Cornstarch | 1 tbsp | Thickens blueberry compote |
| Water | 2 tbsp | For compote consistency |
| Granulated sugar (compote) | 1/4 cup | Adjust based on blueberry sweetness |
| Lemon zest | 1 tsp | Optional garnish for visual appeal |
Timing
Preparation Time: 20 minutes
Chilling Time: 4-6 hours (or overnight for best results)
Total Time: 4 hours 20 minutes to 6 hours 20 minutes
Compared to traditional baked cheesecakes requiring 90 minutes of baking plus 2-3 hours of cooling, this no-bake version saves approximately 35% of total time while eliminating oven use entirely. The active hands-on time is just 20 minutes, making this an exceptionally efficient dessert for busy schedules or last-minute entertaining.

Step-by-Step Instructions
Step 1: Create the Perfect Graham Cracker Crust
Begin by crushing your graham crackers into fine crumbs using a food processor or by placing them in a sealed plastic bag and crushing with a rolling pin. You’re aiming for the texture of coarse sand—about 2 cups of crumbs total. Transfer the crumbs to a medium bowl and add the melted butter and 2 tablespoons of sugar. Mix thoroughly with a fork until every crumb is coated and the mixture resembles wet sand that clumps when squeezed.
Pro Tip: The crust should hold together when pressed but not feel overly greasy. If it seems too dry, add an extra tablespoon of melted butter.
Press this mixture firmly and evenly into the bottom of a 9-inch springform pan. Use the bottom of a measuring cup or glass to compact the crust, ensuring there are no gaps or loose spots. Pay special attention to the edges where the crust meets the pan sides. Refrigerate the crust for at least 15 minutes while you prepare the filling—this helps it set properly.
Step 2: Prepare the Luscious Cream Cheese Filling
Ensure your cream cheese is at true room temperature—this typically takes 45-60 minutes out of the refrigerator. Cold cream cheese creates lumps that are nearly impossible to smooth out. Using a stand mixer or hand mixer, beat the softened cream cheese on medium speed for 2-3 minutes until completely smooth, light, and fluffy. Scrape down the bowl sides at least twice during this process.
Add the powdered sugar and vanilla extract, then beat on medium-high speed for another 2 minutes. The mixture should look pale, airy, and significantly increased in volume. This aeration is crucial for achieving that signature cloud-like texture.
Expert Insight: Powdered sugar dissolves more easily than granulated sugar in no-bake recipes, preventing any grittiness in the final product.
Step 3: Whip the Heavy Cream to Soft Peaks
In a separate, chilled mixing bowl (placing your bowl in the freezer for 10 minutes beforehand helps), pour the cold heavy whipping cream. Using clean beaters, whip on medium-high speed until soft peaks form—this takes approximately 3-4 minutes. Soft peaks should curl over gently when you lift the beater, not stand straight up (that’s stiff peaks). Over-whipping can lead to a grainy texture or even turn your cream to butter, so watch carefully.
Step 4: Fold Everything Together with Care
Here’s where technique matters significantly. Add about one-third of the whipped cream to the cream cheese mixture. Gently fold it in using a rubber spatula with broad, sweeping motions from the bottom of the bowl up and over. This initial addition lightens the dense cream cheese. Add the remaining whipped cream in two more additions, folding gently after each. The goal is to maintain as much airiness as possible while ensuring no white streaks of cream remain.
Key Technique: Fold, don’t stir. Stirring deflates the whipped cream and results in a denser, less dreamy texture.
Step 5: Assemble and Create Layers
Remove your chilled crust from the refrigerator. Pour the cream cheese filling over the crust, using your spatula to spread it evenly to the edges. Gently tap the pan on the counter 2-3 times to release any air bubbles. Smooth the top with an offset spatula or the back of a spoon, creating an even surface for your blueberry topping.
Cover the pan tightly with plastic wrap, ensuring the wrap doesn’t touch the filling surface (this prevents the wrap from sticking and marring your beautiful cheesecake). Refrigerate for at least 4 hours, though overnight (8-12 hours) produces the most stable, sliceable results.
Step 6: Make the Stunning Blueberry Compote
About 30 minutes before serving, prepare your blueberry topping. In a small saucepan, combine 1 cup of fresh blueberries, 1/4 cup granulated sugar, 2 tablespoons lemon juice, and 2 tablespoons water. Cook over medium heat, stirring occasionally, until the blueberries begin to burst and release their juices (approximately 5-7 minutes).
In a small bowl, mix 1 tablespoon of cornstarch with 1 tablespoon of water to create a slurry. Stir this into the bubbling blueberry mixture and cook for another 1-2 minutes until noticeably thickened. The compote should coat the back of a spoon. Remove from heat and let cool to room temperature.
Flavor Boost: The lemon juice isn’t just for tartness—it enhances the blueberry flavor and prevents the compote from tasting flat or one-dimensional.
Step 7: Top and Garnish Your Masterpiece
Once your cheesecake is fully chilled and the compote has cooled, carefully run a thin knife around the edge of the springform pan before releasing the sides. Transfer the cheesecake (still on the pan base) to your serving platter.
Spoon the blueberry compote over the top, spreading it gently with the back of a spoon but leaving a small border of white filling visible around the edge for visual appeal. Arrange the remaining cup of fresh blueberries decoratively on top. Add lemon zest if desired for a pop of color and citrus aroma.
Nutritional Information
Per Slice (based on 12 servings):
- Calories: 385
- Total Fat: 28g (43% of daily value)
- Saturated Fat: 16g
- Cholesterol: 95mg
- Sodium: 245mg
- Total Carbohydrates: 31g
- Dietary Fiber: 1g
- Sugars: 22g
- Protein: 5g
- Vitamin C: 8% of daily value (from blueberries)
- Calcium: 6% of daily value
Blueberries contribute powerful antioxidants called anthocyanins, which research suggests support cognitive function and cardiovascular health. While this dessert is indulgent, the blueberries provide 24% of your daily recommended fiber per serving and vitamin K for bone health.
Healthier Alternatives for This Recipe
Transform this indulgence into a lighter option without sacrificing the dreamy texture:
Reduce Calories by 30%: Substitute half the cream cheese with Greek yogurt (full-fat for best texture). This adds protein while cutting fat content. Replace half the heavy cream with light whipped topping, though note this slightly alters the luxurious mouthfeel.
Lower Sugar Content: Reduce powdered sugar to 1/2 cup and use a sugar substitute like erythritol or monk fruit sweetener in the compote. Natural blueberry sweetness often requires less added sugar than you’d expect.
Gluten-Free Adaptation: Swap graham crackers for gluten-free alternatives, almond flour crust (2 cups almond flour + 1/4 cup melted coconut oil + 2 tbsp honey), or even crushed gluten-free vanilla wafers.
Dairy-Free Version: Use dairy-free cream cheese alternatives and coconut cream (the thick part from refrigerated canned coconut milk) whipped with powdered sugar. The coconut flavor pairs beautifully with blueberries.
Boost Nutrition: Add 2 tablespoons of chia seeds to the filling for omega-3 fatty acids and fiber, or incorporate 1/4 cup of blended silken tofu to increase protein without noticeably changing texture.
Serving Suggestions
Present this showstopper in ways that maximize its visual and flavor appeal:
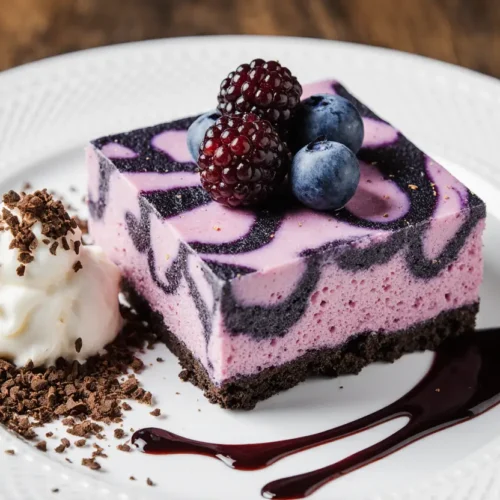
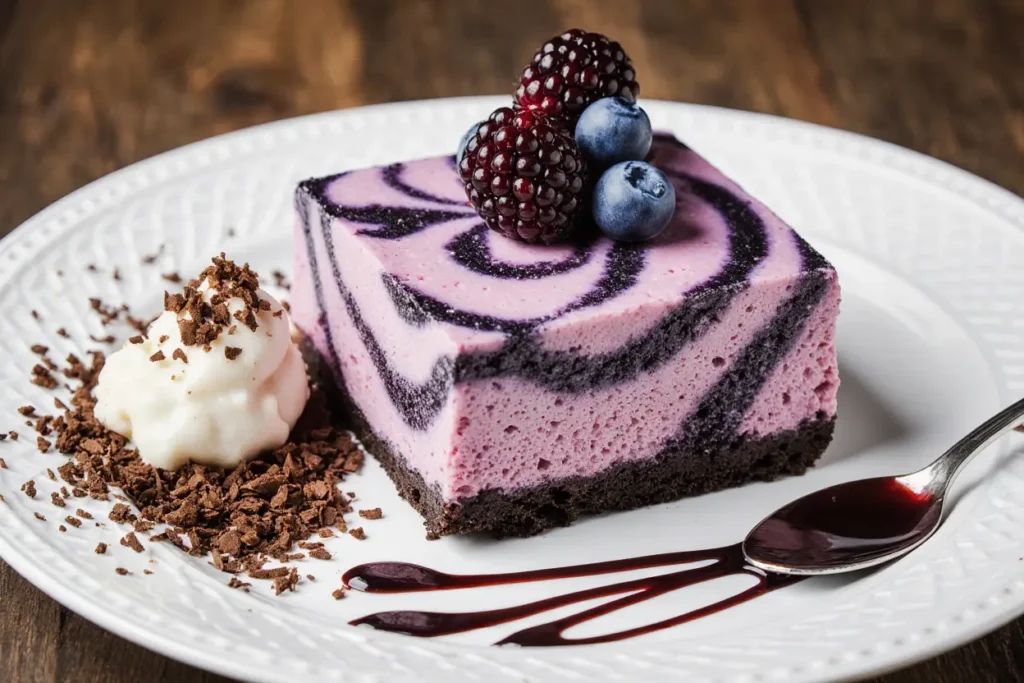
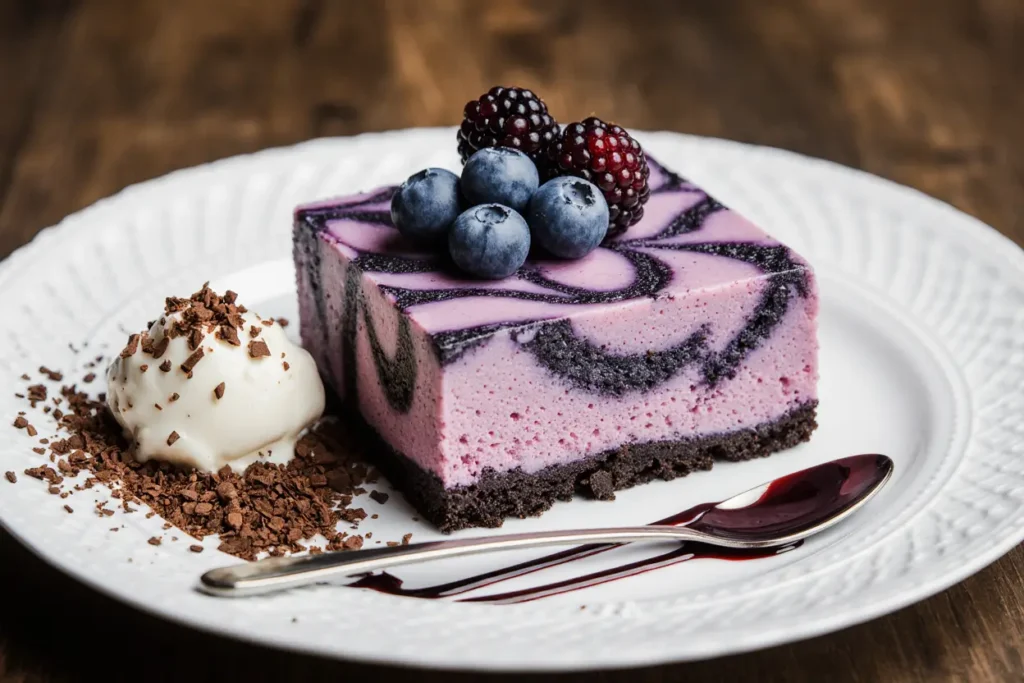
Classic Elegance: Serve chilled slices on white dessert plates with a small dollop of additional whipped cream and a fresh mint sprig. The color contrast is stunning.
Brunch Spread: Cut into smaller squares (16 pieces instead of 12) for a beautiful addition to brunch buffets alongside fresh fruit salad and coffee service.
Themed Variations: Swap blueberries for strawberries, raspberries, or mixed berries depending on seasonal availability. A cherry compote creates a reminiscent cheesecake factory-style experience.
Textural Contrast: Serve with butter cookies, biscotti, or shortbread on the side for those who enjoy additional crunch with creamy desserts.
Beverage Pairing: This cheesecake pairs exceptionally with sparkling wines, champagne, dessert wines like Moscato, or simply fresh-brewed coffee. For non-alcoholic options, try blueberry iced tea or lemon sparkling water.
Individual Portions: Create mini versions in 4-ounce mason jars or small glasses for portion control and charming presentation at parties—layer crust, filling, and compote in clear containers for a beautiful parfait effect.
Common Mistakes to Avoid
Learn from these frequent pitfalls to ensure perfect results every time:
Using Cold Cream Cheese: This is the number one mistake. Cold cream cheese creates lumps that never fully smooth out, resulting in a grainy texture. Always allow cream cheese to reach room temperature (it should indent easily when pressed).
Over-Whipping the Cream: Whipping beyond soft peaks creates a grainy, separated texture. Heavy cream goes from perfect soft peaks to butter surprisingly quickly—watch carefully during the final 30 seconds of whipping.
Aggressive Folding: Stirring vigorously or using a mixer to combine the whipped cream and cream cheese deflates all those carefully created air bubbles. Patient, gentle folding preserves the fluffy texture.
Insufficient Chilling Time: Cutting into the cheesecake after just 2-3 hours results in a filling that’s too soft to slice cleanly. While 4 hours is the minimum, overnight chilling produces the best structure.
Not Greasing the Springform Pan: Even with a removable bottom, lightly greasing the pan sides with cooking spray or butter ensures the cheesecake releases cleanly without tearing.
Skipping the Lemon Juice: The acidity balances the richness and prevents the dessert from tasting flat. Don’t skip this crucial ingredient.
Using Imitation Vanilla: Real vanilla extract provides depth and complexity that imitation versions simply cannot match. This is worth the investment in a dessert where vanilla plays a starring role.
Storing Tips for This Recipe
Maximize freshness and maintain that perfect texture with proper storage:
Refrigerator Storage: Cover the cheesecake tightly with plastic wrap or place in an airtight container. It will maintain optimal quality for 5-7 days refrigerated. The crust may soften slightly over time, but the filling remains stable.
Freezing Instructions: This cheesecake freezes beautifully for up to 3 months. Wrap individual slices or the entire cheesecake tightly in plastic wrap, then again in aluminum foil. Freeze the compote separately in a freezer-safe container. Thaw overnight in the refrigerator, never at room temperature, to prevent condensation and sogginess.
Compote Storage: Store leftover blueberry compote in an airtight container in the refrigerator for up to 10 days. It’s delicious on pancakes, yogurt, or ice cream.
Make-Ahead Strategy: Prepare the cheesecake up to 2 days in advance without the topping. Add the blueberry compote and fresh berries 1-2 hours before serving for the freshest appearance and flavor.
Serving Temperature: For best flavor and texture, remove the cheesecake from the refrigerator 10-15 minutes before serving. This slight warming allows the flavors to become more pronounced and the texture to soften to creamy perfection.
Conclusion
This No-Bake Blueberry Dream Cheesecake delivers everything you love about classic cheesecake—rich, creamy texture, balanced sweetness, and impressive presentation—without the hassle of baking or the risk of cracks. With just 20 minutes of active preparation and a few hours of hands-off chilling time, you’ll create a dessert that looks and tastes like it came from a high-end bakery.
The combination of tangy cream cheese, billowy whipped cream, vibrant blueberry compote, and buttery graham cracker crust creates harmony in every bite. Whether you’re preparing dessert for a special occasion, potluck contribution, or simply treating yourself, this recipe proves that spectacular results don’t require complicated techniques or professional equipment.
Ready to experience the magic of this no-bake wonder? Gather your ingredients, follow these straightforward steps, and prepare to impress everyone at your table. Don’t forget to share your creations and any personal twists you add—the beauty of this recipe lies in its versatility and your creativity. What will you try first: the classic version or one of the healthier alternatives?
FAQs
Can I make this cheesecake without a springform pan?
Absolutely! Use a 9-inch pie pan or even a 9×9-inch square baking dish. Line the dish with parchment paper for easy removal, leaving extra paper hanging over the sides to lift out the entire cheesecake. The presentation differs slightly, but the taste remains spectacular.
Why is my no-bake cheesecake too soft to slice?
This typically indicates insufficient chilling time or too much liquid in the filling. Ensure you chill for at least 4 hours (overnight is ideal) and that you used full-fat cream cheese and heavy whipping cream as specified. Low-fat versions contain more water and don’t set as firmly.
Can I use frozen blueberries instead of fresh?
Yes, frozen blueberries work well, especially in the compote. Don’t thaw them first—cook directly from frozen, adding an extra 2-3 minutes to the cooking time. For the fresh topping, frozen berries become mushy when thawed, so stick with fresh for garnishing.
How do I prevent the crust from getting soggy?
Press the crust firmly and evenly, then chill it for 15 minutes before adding the filling. This creates a barrier. Some bakers brush the chilled crust with a thin layer of melted white chocolate for extra protection, which also adds a subtle sweetness.
What’s the best way to slice clean pieces?
Use a sharp knife dipped in hot water and wiped clean between each cut. The warmth helps the knife glide through the chilled filling without dragging. Alternatively, dental floss (unflavored!) creates remarkably clean cuts—press straight down and pull through.
Can I substitute the graham crackers with something else?
Definitely! Try vanilla wafers, shortbread cookies, Oreos (for a cookies-and-cream variation), or even pretzels for a sweet-salty twist. Maintain the same measurements—2 cups of crumbs mixed with 6 tablespoons melted butter.
Is it safe to use the egg in the original ingredient list?
The ingredient list provided appears to be from a different recipe (chicken patties). This cheesecake recipe contains no eggs and requires no baking, making it completely safe with just refrigeration. No-bake cheesecakes rely on cream cheese and whipped cream for structure, not eggs.
How can I make this cheesecake ahead for a party?
This is an ideal make-ahead dessert. Prepare the cheesecake completely up to 3 days in advance, storing it covered in the refrigerator. Make the compote separately and store it in a container. Add the topping 1-2 hours before serving for the freshest presentation.