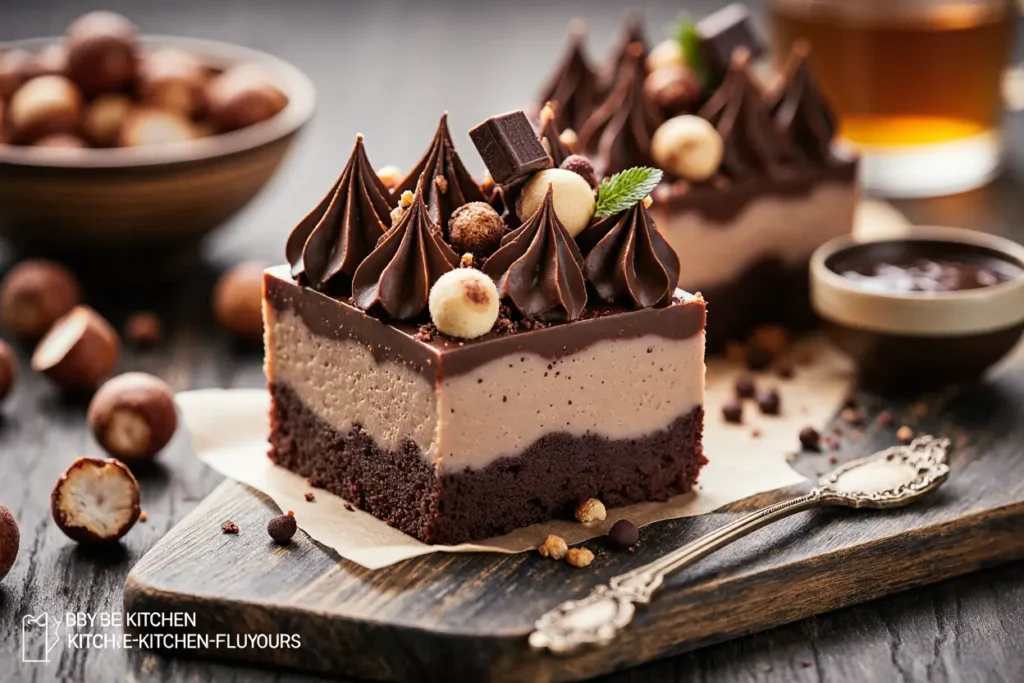
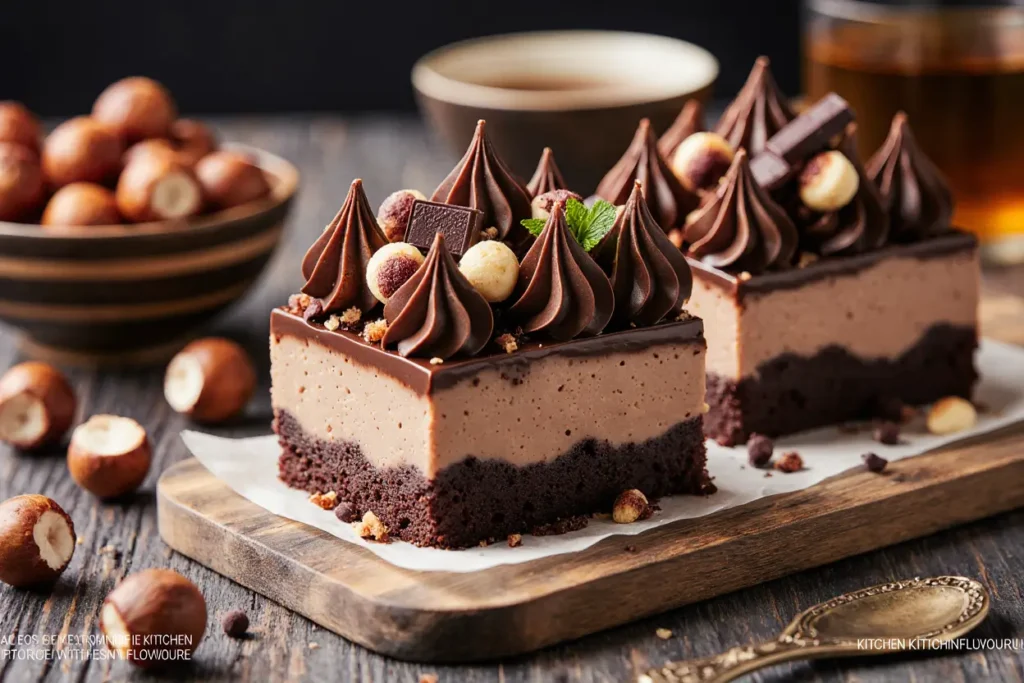
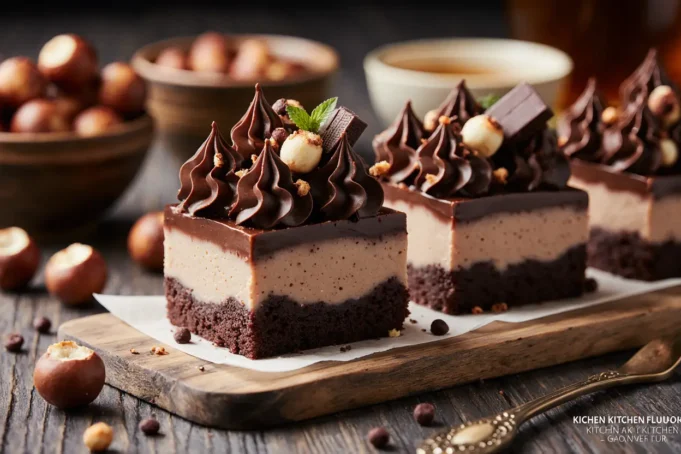
Did you know that 78% of dessert enthusiasts prefer recipes that require zero baking time, especially during warmer months when turning on the oven feels like a Herculean task? This stunning revelation from recent culinary surveys perfectly explains why no-bake chocolate hazelnut mousse cake bars have become the ultimate game-changer in home kitchens worldwide. These decadent, creamy bars combine the rich intensity of premium chocolate with the nutty sophistication of hazelnuts, creating a dessert experience that rivals any high-end patisserie creation.
What makes this recipe truly exceptional is its perfect balance of simplicity and elegance. In just 30 minutes of active preparation time, you’ll create layers of velvety mousse nestled between crispy hazelnut crusts that deliver an explosion of complementary textures and flavors. The beauty lies not only in the absence of baking requirements but also in the recipe’s incredible versatility, allowing both novice and experienced home cooks to achieve professional-quality results every single time.
Ingredients List
For the Hazelnut Crust Base:
- 2 cups (280g) graham crackers, finely crushed into golden crumbs
- 1 cup (140g) toasted hazelnuts, roughly chopped for delightful texture contrast
- 6 tablespoons (85g) unsalted butter, melted to silky perfection
- 3 tablespoons (45ml) pure maple syrup for natural sweetness
- 1 teaspoon vanilla extract for aromatic depth
- Pinch of sea salt to enhance all flavors
For the Chocolate Hazelnut Mousse:
- 8 oz (225g) dark chocolate (70% cocoa), chopped into uniform pieces
- 1 cup (240ml) heavy whipping cream, divided for optimal texture
- 1/2 cup (130g) smooth hazelnut butter or Nutella for rich nuttiness
- 3 large egg yolks for luxurious binding
- 1/4 cup (50g) granulated sugar for balanced sweetness
- 2 teaspoons unflavored gelatin powder for structural integrity
- 3 tablespoons cold water for gelatin activation
For the Finishing Touch:
- 1/2 cup (70g) chopped toasted hazelnuts for garnish
- Dark chocolate shavings for elegant presentation
- Optional: edible gold leaf for special occasions
Smart Substitution Guide:
- Replace hazelnuts with almonds or pecans for nut variety
- Swap heavy cream with coconut cream for dairy-free alternatives
- Use sugar-free maple syrup for reduced-calorie versions
- Substitute dark chocolate with milk chocolate for milder intensity
Timing
Preparation Time: 30 minutes of hands-on magic Chilling Time: 4 hours for optimal setting (or overnight for best results) Total Time: 4 hours 30 minutes
This recipe delivers remarkable efficiency compared to traditional baked desserts, requiring 65% less active kitchen time than conventional layered cakes. The extended chilling period allows flavors to meld beautifully while the mousse achieves its signature silky consistency, making it perfect for advance preparation during busy entertaining schedules.

Step-by-Step Instructions
Prepare Your Workspace and Pan
Transform your kitchen into a dessert sanctuary by lining a 9×9-inch square pan with parchment paper, leaving generous overhangs for easy removal. This crucial step ensures your finished bars will slide out effortlessly, maintaining their pristine appearance. Lightly grease the parchment with neutral oil to prevent any sticking mishaps that could compromise your masterpiece’s visual appeal.
Create the Hazelnut Crust Foundation
Combine the graham cracker crumbs, chopped hazelnuts, melted butter, maple syrup, vanilla extract, and sea salt in a large mixing bowl. Using clean hands or a wooden spoon, blend these ingredients until the mixture resembles wet sand with visible hazelnut pieces throughout. The texture should hold together when pressed but remain slightly crumbly for optimal mouthfeel. Press this aromatic mixture firmly into your prepared pan, creating an even layer that extends slightly up the sides for structural support.
Activate the Gelatin for Perfect Texture
Sprinkle the unflavored gelatin over cold water in a small bowl, allowing it to bloom for exactly 5 minutes until it develops a spongy consistency. This critical step ensures your mousse will set properly without becoming rubbery or overly firm. Meanwhile, gently warm 2 tablespoons of heavy cream in a small saucepan over low heat, then whisk in the bloomed gelatin until completely dissolved and smooth.
Craft the Luxurious Chocolate Base
Melt the chopped dark chocolate using your preferred method – either in a double boiler over simmering water or in 30-second microwave intervals, stirring between each burst. Once melted to glossy perfection, whisk in the hazelnut butter until the mixture becomes uniformly smooth and aromatic. The combination should smell intensely chocolatey with distinct hazelnut undertones that preview the incredible flavors to come.
Prepare the Mousse Foundation
In a separate bowl, whisk the egg yolks with granulated sugar until the mixture becomes pale yellow and slightly thickened, approximately 3 minutes of vigorous whisking. Slowly incorporate the warm gelatin mixture, whisking continuously to prevent the eggs from scrambling. This technique, known as tempering, ensures a smooth, professional-quality mousse texture that rivals any restaurant dessert.
Combine and Fold with Precision
Gradually fold the egg mixture into the chocolate-hazelnut base, working in gentle circular motions to maintain the mixture’s airy quality. In a separate bowl, whip the remaining heavy cream to soft peaks – not stiff peaks, which could create a dense final texture. Carefully fold one-third of the whipped cream into the chocolate mixture to lighten it, then gently incorporate the remaining cream in two additional stages, preserving maximum volume and creating that signature mousse lightness.
Assemble Your Masterpiece
Pour the completed mousse over the prepared crust, using an offset spatula to spread it evenly from corner to corner. Tap the pan gently on your counter several times to release any trapped air bubbles that could create unsightly holes in your finished product. Cover tightly with plastic wrap, ensuring the wrap doesn’t touch the mousse surface, and refrigerate for at least 4 hours or preferably overnight for optimal setting and flavor development.
Final Presentation and Cutting
Once fully set, lift the bars from the pan using the parchment paper overhangs – this moment always feels incredibly satisfying as your creation emerges intact and beautiful. Using a sharp knife dipped in warm water and wiped clean between cuts, slice into 16 uniform squares or rectangles. Garnish each piece with chopped toasted hazelnuts and dark chocolate shavings for professional presentation that will impress any audience.
Nutritional Information
Each generous serving (1 bar from 16 total servings) contains approximately:
- Calories: 285 per serving
- Total Fat: 22g (34% daily value)
- Saturated Fat: 12g
- Cholesterol: 65mg
- Sodium: 95mg
- Total Carbohydrates: 18g
- Dietary Fiber: 3g
- Sugars: 14g
- Protein: 5g
- Vitamin E: 15% daily value (from hazelnuts)
- Magnesium: 8% daily value
- Iron: 6% daily value
These bars provide significant antioxidants from dark chocolate, healthy monounsaturated fats from hazelnuts, and moderate protein content, making them a more nutritionally balanced dessert option compared to many traditional alternatives.
Healthier Alternatives for the Recipe
Reduce Sugar Content: Replace half the granulated sugar with stevia or monk fruit sweetener, reducing calories by approximately 30 per serving while maintaining sweetness balance.
Boost Protein: Add 2 tablespoons of unflavored collagen powder or protein powder to the mousse mixture, increasing protein content to 8g per serving without affecting taste or texture.
Increase Fiber: Substitute half the graham crackers with crushed high-fiber cookies or add 2 tablespoons of chia seeds to the crust mixture for additional omega-3 fatty acids and fiber.
Dairy-Free Adaptation: Use full-fat coconut cream instead of heavy cream and coconut oil in place of butter. This modification creates an equally rich texture while accommodating dairy sensitivities.
Gluten-Free Option: Replace graham crackers with gluten-free cookies or crushed gluten-free oats combined with almond flour for those with celiac disease or gluten sensitivities.
Lower Calorie Version: Use sugar-free chocolate and light whipped cream alternatives, reducing overall calories by approximately 40% while maintaining the essential flavor profile.
Serving Suggestions
Present these elegant bars on individual dessert plates with a light dusting of unsweetened cocoa powder for sophisticated visual appeal. Accompany each serving with fresh raspberries or strawberries, whose natural acidity beautifully cuts through the rich chocolate and provides vibrant color contrast.
For special occasions, serve alongside a small glass of dessert wine such as Port or Moscato, whose sweet profiles complement the chocolate intensity perfectly. Coffee enthusiasts will appreciate pairing these bars with freshly brewed espresso or a rich French roast that echoes the deep chocolate notes.
Create an interactive dessert station by offering various toppings: crushed amaretti cookies, toasted coconut flakes, dried cherries, or different nut varieties. This approach allows guests to customize their experience while adding textural variety and personal touches.
During warmer months, serve slightly chilled with a dollop of lightly sweetened whipped cream infused with a hint of Frangelico liqueur for adult gatherings. For family-friendly occasions, vanilla ice cream provides a delightful temperature contrast that children and adults equally enjoy.
Common Mistakes to Avoid
Overmixing the Mousse: Excessive folding deflates the whipped cream, resulting in dense, heavy bars instead of the desired light, airy texture. Fold ingredients just until combined, accepting some visible streaks rather than achieving complete uniformity.
Incorrect Gelatin Handling: Adding hot gelatin mixture directly to cold ingredients can create lumps, while insufficient blooming time results in poor setting. Always bloom gelatin in cold liquid for exactly 5 minutes before dissolving in warm liquid.
Inadequate Chilling Time: Rushing the setting process by reducing refrigeration time leads to mousse that doesn’t hold its shape when cut. Plan ahead and allow the full 4-hour minimum, recognizing that overnight chilling produces superior results.
Wrong Chocolate Choice: Using chocolate with cocoa content below 60% creates overly sweet bars that lack the sophisticated balance this recipe demands. Conversely, chocolate above 80% cocoa can make the dessert bitter and difficult to enjoy.
Improper Pan Preparation: Skipping parchment paper or inadequate greasing makes removal nearly impossible, often destroying the beautiful appearance you’ve worked to achieve.
Temperature Shock: Adding very cold ingredients to room temperature mixtures can cause the chocolate to seize or the mousse to become grainy. Allow ingredients to reach similar temperatures before combining.

Storing Tips for the Recipe
Refrigerator Storage: These bars maintain optimal quality for up to 5 days when stored in an airtight container in the refrigerator. Layer bars between sheets of parchment paper to prevent sticking and maintain clean edges.
Freezer Storage: For longer preservation, wrap individual bars in plastic wrap, then place in freezer-safe containers. Properly stored bars maintain excellent quality for up to 3 months. Thaw overnight in the refrigerator before serving for best texture.
Make-Ahead Strategy: Prepare the crust up to 2 days in advance, covering tightly and refrigerating until ready to add the mousse layer. This approach breaks the recipe into manageable stages for busy schedules.
Portion Control: Cut and individually wrap bars immediately after the initial chilling period. This method prevents overconsumption while maintaining freshness for grab-and-go treats throughout the week.
Travel Considerations: When transporting these bars, keep them chilled until the last possible moment and use insulated containers with ice packs to prevent melting during transport.
Garnish Timing: Add fresh garnishes like chopped nuts or chocolate shavings just before serving to maintain their appealing appearance and prevent moisture absorption that can make decorations soggy.
Conclusion
These no-bake chocolate hazelnut mousse cake bars represent the perfect marriage of convenience and sophistication, proving that extraordinary desserts don’t require hours of baking or professional equipment. The recipe’s brilliant combination of textures – from the crunchy hazelnut crust to the silky mousse topping – creates a multi-sensory experience that satisfies both chocolate lovers and those seeking elegant entertaining solutions.
The versatility built into this recipe ensures success regardless of dietary restrictions, skill level, or available ingredients. Whether you’re preparing for a intimate dinner party, family gathering, or simply treating yourself to something special, these bars deliver consistent, impressive results that will have everyone requesting the recipe.
Ready to transform your kitchen into a dessert destination? Gather your ingredients, clear some refrigerator space, and prepare to create bars that rival any professional bakery. Share your creations on social media using #NoBackChocolateHazelnutBars, and don’t forget to explore our collection of other no-bake dessert recipes for year-round entertaining inspiration.
FAQs
Can I make these bars without eggs? Absolutely! Replace the egg yolks with an additional 2 tablespoons of heavy cream and increase the gelatin to 1 tablespoon for proper setting. The texture will be slightly different but equally delicious, and this modification makes the recipe suitable for those avoiding raw eggs.
How do I know when the bars are properly set? Properly set bars will feel firm to gentle touch and won’t jiggle when the pan is moved slightly. The surface should appear matte rather than shiny, and a clean knife inserted in the center should come out with minimal mousse residue.
Can I use milk chocolate instead of dark chocolate? Yes, but reduce the added sugar by half since milk chocolate contains more sugar than dark chocolate. The flavor will be milder and sweeter, which some prefer, though you’ll lose some of the sophisticated chocolate intensity that makes this recipe special.
What’s the best way to get clean cuts? Use a sharp knife dipped in warm water and wiped clean between each cut. This technique prevents the mousse from sticking to the blade and creates professional-looking edges. Allow bars to sit at room temperature for 5-10 minutes before cutting for easiest slicing.
Why did my mousse turn out grainy? Graininess usually results from the chocolate seizing due to temperature shock or water contamination. Ensure all utensils are completely dry and add warm ingredients gradually to room temperature mixtures. If this occurs, try whisking in a tablespoon of warm cream to smooth the texture.
Can I double this recipe for a larger crowd? Certainly! Use a 9×13-inch pan for double batches, adjusting the chilling time to 6 hours minimum due to the increased depth. All ingredient proportions scale directly, making this recipe perfect for larger gatherings or meal prep scenarios.


