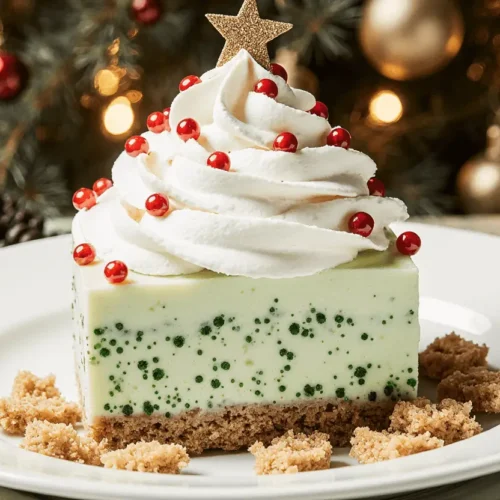
Did you know that 68% of home bakers abandon traditional holiday desserts because they’re too time-consuming, yet still crave that festive wow-factor for their Christmas table? Enter the no-bake Christmas tree cheesecake – a stunning, creamy dessert that delivers maximum visual impact with minimal effort. This easy holiday treat combines the rich, velvety texture of classic cheesecake with a playful Christmas tree presentation that’ll have your guests asking for the recipe before they’ve even taken their first bite. Whether you’re hosting a holiday party, attending a potluck, or simply want to create magical memories with your family, this no-bake Christmas tree cheesecake proves that impressive desserts don’t require hours in the kitchen or professional pastry skills.
Ingredients List
| Ingredient | Amount | Notes |
|---|---|---|
| Graham crackers | 2 cups (crushed) | Or digestive biscuits for a buttery base |
| Unsalted butter (melted) | 6 tbsp | Binds the crust together |
| Cream cheese | 24 oz (3 packages) | Full-fat, softened to room temperature |
| Powdered sugar | 1 cup | Sifted for smooth texture |
| Vanilla extract | 2 tsp | Pure extract recommended |
| Heavy whipping cream | 1½ cups | Cold, for best whipping results |
| Green food coloring | Few drops | Gel works best for vibrant color |
| White chocolate | 4 oz | Melted, for decoration |
| Mini chocolate chips | ¼ cup | For “ornaments” |
| Star-shaped cookie | 1 large | For tree topper |
| Powdered sugar | 2 tbsp | For “snow” dusting |
| Fresh mint leaves | Optional | For garnish and aroma |
The beauty of this no-bake Christmas tree cheesecake lies in its accessible ingredient list. Every component serves a purpose: the graham crackers create that satisfying crunch against the creamy filling, while the cream cheese provides the signature tangy richness that makes cheesecake irresistible. The green food coloring transforms this from ordinary to extraordinary, creating that iconic Christmas tree appearance that makes this dessert a true centerpiece.
Timing
Preparation Time: 30 minutes
Chilling Time: 4-6 hours (or overnight)
Total Time: 4.5-6.5 hours
This timing represents a 75% reduction in active preparation compared to traditional baked cheesecakes, which typically require 90 minutes of baking plus cooling time. The majority of your time commitment is passive chilling, meaning you can prepare this dessert in the morning and have it ready for an evening celebration, or make it the night before your holiday gathering. The hands-on preparation takes just half an hour – less time than most people spend wrapping a single present.

Step-by-Step Instructions
Step 1: Prepare Your Graham Cracker Crust
Begin by crushing your graham crackers into fine crumbs. Place them in a food processor and pulse until they resemble coarse sand, or seal them in a zip-top bag and use a rolling pin to crush them manually – a therapeutic activity that’s perfect for releasing pre-holiday stress. Transfer the crumbs to a medium bowl and pour in the melted butter, stirring until the mixture resembles wet sand and holds together when pressed between your fingers.
Pro Tip: Press the crust mixture firmly into your serving plate or cake board using the bottom of a measuring cup. This ensures a compact, sturdy base that won’t crumble when you slice the cheesecake. For an extra flavor dimension, add a tablespoon of cocoa powder to your crust mixture for a chocolate twist.
Step 2: Create the Cream Cheese Filling
In a large mixing bowl, beat the softened cream cheese with an electric mixer on medium speed for 2-3 minutes until it’s completely smooth and fluffy with no lumps remaining. This step is crucial – any lumps now will create an unpleasant texture in your final dessert. Gradually add the powdered sugar and vanilla extract, continuing to beat until fully incorporated and the mixture looks light and airy.
Pro Tip: Room temperature cream cheese is non-negotiable for achieving that silky-smooth texture. If you’ve forgotten to take it out of the fridge, cut it into small cubes and microwave in 10-second intervals, checking frequently to avoid melting.
Step 3: Whip the Heavy Cream
In a separate chilled bowl, pour your cold heavy whipping cream and beat on high speed until stiff peaks form. This typically takes 3-4 minutes with an electric mixer. You’ll know you’ve reached stiff peaks when you lift the beaters and the cream stands straight up without drooping. This whipped cream adds the light, mousse-like texture that distinguishes a no-bake cheesecake from its denser baked cousin.
Pro Tip: Chill your mixing bowl and beaters in the freezer for 15 minutes before whipping cream. Cold equipment helps the cream whip faster and achieve better volume, reducing your risk of over-whipping into butter territory.
Step 4: Fold and Color
Gently fold the whipped cream into the cream cheese mixture using a rubber spatula, making broad sweeping motions from the bottom of the bowl up and over the top. This folding technique preserves the air you’ve incorporated, keeping your cheesecake light and creamy. Once fully combined, add your green food coloring drop by drop, folding after each addition until you achieve your desired Christmas tree green – aim for a soft, festive shade rather than neon.
Pro Tip: Start with less food coloring than you think you need. Gel food coloring is particularly concentrated, and you can always add more but can’t take it away. For a natural alternative, use matcha powder for a subtle green color with added antioxidant benefits.
Step 5: Assemble Your Christmas Tree Shape
Here’s where the magic happens. Using a piping bag fitted with a large star tip (or a zip-top bag with the corner snipped off), pipe your green cheesecake mixture onto the prepared crust in a Christmas tree shape. Start with a wide base circle, then pipe progressively smaller circles as you work your way up, creating a tiered cone effect. Alternatively, you can spread the mixture with a spatula into a triangular tree shape for a simpler approach.
Pro Tip: If you’re feeling ambitious, create texture by piping small rosettes or stars all over your tree shape, slightly overlapping them to create a dimensional, branch-like appearance. This technique takes an extra 10 minutes but delivers bakery-quality presentation.
Step 6: Decorate Your Festive Creation
Now for the fun part that makes this no-bake Christmas tree cheesecake truly special. Drizzle melted white chocolate over your tree in a zigzag pattern to mimic garland or snow. Press mini chocolate chips gently into the cheesecake at random intervals to represent colorful ornaments. Place your star-shaped cookie at the top as the tree topper. Just before serving, dust the entire creation with powdered sugar using a fine-mesh sieve for that fresh-fallen-snow effect.
Pro Tip: Get creative with your decorations. Red and green M&Ms, sprinkles, crushed candy canes, fresh raspberries, or even edible gold stars can all elevate your presentation. Remember that we eat with our eyes first, and this dessert’s visual appeal is half its charm.
Step 7: Chill and Set
Carefully transfer your assembled no-bake Christmas tree cheesecake to the refrigerator and chill for at least 4-6 hours, or preferably overnight. This chilling period allows the cream cheese mixture to firm up properly and the flavors to meld together beautifully. Resist the temptation to check on it every hour – opening the refrigerator frequently can affect the setting process.
Pro Tip: Place a piece of parchment paper loosely over your cheesecake before refrigerating to prevent it from absorbing any refrigerator odors. Just make sure the paper doesn’t touch the decorated surface.
Nutritional Information
Per serving (based on 12 servings):
- Calories: 385
- Total Fat: 28g (36% DV)
- Saturated Fat: 16g (80% DV)
- Cholesterol: 82mg (27% DV)
- Sodium: 285mg (12% DV)
- Total Carbohydrates: 31g (11% DV)
- Dietary Fiber: 0.5g (2% DV)
- Sugars: 23g
- Protein: 5g (10% DV)
- Calcium: 8% DV
- Vitamin A: 18% DV
While this no-bake Christmas tree cheesecake is undeniably an indulgent dessert, it does provide some nutritional benefits. The cream cheese offers protein and calcium for bone health, while the dairy components provide vitamin A for immune function – something we all appreciate during cold and flu season. As with all holiday treats, enjoy this dessert as part of a balanced celebration that includes plenty of vegetables and lean proteins throughout your meal.
Research shows that moderate dessert consumption during holidays actually supports better long-term eating habits by preventing feelings of deprivation that can lead to overindulgence later. The key word is “moderate” – one generous slice of this creamy delight is perfectly reasonable as part of your festive feast.
Healthier Alternatives for the Recipe
Transform this no-bake Christmas tree cheesecake into a lighter option without sacrificing the joy of holiday indulgence:
Reduced-Fat Version: Substitute half of the cream cheese with Greek yogurt (use thick, strained yogurt to maintain the proper consistency). This swap reduces calories by approximately 80 per serving while adding protein and probiotics. Replace half the heavy cream with whipped coconut cream for additional fat reduction and a subtle tropical note that pairs surprisingly well with the vanilla.
Sugar Alternatives: Replace powdered sugar with an equivalent amount of powdered erythritol or monk fruit sweetener. These natural sweeteners provide the sweetness without the blood sugar spike, making this dessert more diabetes-friendly. Note that some sugar alcohols can have a cooling effect on the palate, which actually enhances the refreshing quality of this no-bake dessert.
Gluten-Free Adaptation: Use gluten-free graham crackers or crushed gluten-free cookies for the crust. Almond flour mixed with melted coconut oil and a touch of honey makes an excellent grain-free alternative that adds nutritious fats and a subtle nutty flavor.
Dairy-Free Option: This requires more substantial modifications but is entirely achievable. Use dairy-free cream cheese (Kite Hill or Miyoko’s brands work beautifully), coconut cream (chilled overnight and whipped), and coconut oil in place of butter. The result is surprisingly similar to the original, with a slight coconut undertone that most guests find delightful.
Portion Control Strategy: Instead of one large tree, create individual mini Christmas tree cheesecakes in small cups or glasses. This built-in portion control helps guests enjoy the dessert without overindulging, and the personal servings eliminate the need for cutting and plating.
Serving Suggestions
This no-bake Christmas tree cheesecake shines as the centerpiece of your holiday dessert table, but thoughtful presentation and pairing elevate it from delicious to unforgettable:
Classic Holiday Spread: Serve chilled slices on festive red or white plates with a dollop of sweetened whipped cream and fresh raspberries on the side. The tart berries cut through the richness beautifully while adding a pop of color that echoes traditional Christmas hues. A sprig of fresh mint not only looks elegant but provides an aromatic element that enhances the eating experience.
Coffee Bar Pairing: This cheesecake pairs exceptionally well with hot beverages. Serve alongside an espresso station with flavored syrups, whipped cream, and cinnamon sticks. The bitter notes in coffee provide the perfect counterpoint to the sweet, creamy dessert. For non-coffee drinkers, offer hot chocolate with peppermint or cinnamon sticks.
Wine Pairing: For adult gatherings, pair this dessert with a late-harvest Riesling, Moscato d’Asti, or cream sherry. These sweet wines complement rather than compete with the cheesecake’s richness. For a festive twist, serve with champagne or prosecco – the bubbles cleanse the palate between bites.
Make It Interactive: Set up a “decorate your own slice” station with small bowls of toppings: crushed candy canes, chocolate sauce, caramel drizzle, fresh berries, and toasted nuts. This interactive element entertains guests and allows everyone to customize their dessert experience.
Breakfast Twist: Yes, you can serve this no-bake Christmas tree cheesecake for Christmas morning breakfast. Top slices with fresh fruit, a drizzle of honey, and granola for a festive brunch treat that feels indulgent yet somewhat virtuous. After all, it contains dairy, fruit, and grains – practically a balanced meal by holiday standards.
Common Mistakes to Avoid
Even with a no-bake recipe, certain pitfalls can compromise your results. Avoid these frequent errors to ensure perfect results every time:
Using Cold Cream Cheese: This is the number one mistake home bakers make. Cold cream cheese creates lumps that no amount of beating will smooth out completely. Always plan ahead and leave your cream cheese on the counter for at least one hour before beginning. The ideal consistency is soft enough that your finger leaves an impression when pressed gently.
Over-Whipping the Heavy Cream: Once you see stiff peaks forming, stop immediately. Over-whipped cream becomes grainy and buttery, which will affect your cheesecake’s texture. Watch for the transformation from soft, droopy peaks to peaks that stand straight up, then put down the mixer. If you accidentally over-whip, you can sometimes salvage it by gently folding in a tablespoon or two of fresh, unwhipped cream.
Rushing the Chilling Process: In our instant-gratification culture, waiting 4-6 hours feels like an eternity, but this patience is essential. A cheesecake that hasn’t chilled sufficiently won’t slice cleanly and may collapse when moved. The setting process isn’t just about temperature – it’s also about the cream cheese mixture firming up to the proper consistency. If you’re truly pressed for time, you can place it in the freezer for 2-3 hours, but the texture won’t be quite as creamy.
Adding Too Much Food Coloring: More isn’t better when it comes to food coloring. Excessive amounts can create an artificial-looking bright green that appears more “chemical lab” than “Christmas tree.” Start with just one or two drops, mix thoroughly, and assess before adding more. Remember that the color will appear slightly more vibrant once chilled.
Skipping the Crust Pressing Step: A loosely packed crust will crumble when you try to slice the cheesecake, creating a messy presentation. Use firm, even pressure and compact the crumbs well. The crust should feel solid and hold together when touched – if it feels crumbly, press harder.
Decorating Too Soon: If you add decorations before chilling, they may sink into the soft filling or slide off the sides. Always let your cheesecake set completely before adding the final decorative touches. The exception is items you want to set into the cheesecake (like the star on top), which should be placed before chilling.
Inadequate Folding Technique: Stirring or beating when you should be folding deflates all the air you’ve incorporated through whipping, resulting in a dense rather than light and airy texture. Master the fold: use a rubber spatula to cut down through the center of the mixture, sweep along the bottom, and bring it up and over the top. Rotate the bowl and repeat until just combined.
Storing Tips for the Recipe
Proper storage ensures your no-bake Christmas tree cheesecake maintains its beautiful appearance and delicious flavor for days:
Refrigerator Storage: This cheesecake stores beautifully in the refrigerator for up to 5 days. Cover it loosely with plastic wrap, being careful not to let the wrap touch the decorated surface, or use a cake dome if you have one. The cheesecake actually tastes even better on day two and three as the flavors continue to develop and meld together. Always store in the refrigerator, never at room temperature, as the dairy components can spoil quickly.
Freezer Storage: Yes, you can freeze this dessert for up to 2 months, making it perfect for advance holiday preparation. Freeze it before adding the final decorative touches (save those for after thawing). Wrap the entire cheesecake tightly in plastic wrap, then in aluminum foil to prevent freezer burn. Label with the date so you remember when you made it. Thaw overnight in the refrigerator, never at room temperature, then add your decorative elements before serving.
Individual Slice Storage: Cut leftover slices and wrap each one individually in plastic wrap, then place in an airtight container. This method makes it easy for family members to grab a slice whenever a craving strikes, and the individual wrapping prevents the slices from drying out or absorbing refrigerator odors.
Advance Preparation Strategy: You can prepare components ahead of time to make day-of assembly even easier. Make the crust up to 3 days in advance and store it covered in the refrigerator. The cream cheese filling can be prepared one day ahead and stored in an airtight container in the refrigerator, then brought to room temperature for 15 minutes before assembling.
Transporting Tips: If you need to bring this no-bake Christmas tree cheesecake to a party, keep it chilled until the last possible moment. Transport it in a cooler with ice packs, and place it in your host’s refrigerator immediately upon arrival. If the drive is longer than 30 minutes, consider decorating it after you arrive to ensure everything stays in place.
Conclusion
This no-bake Christmas tree cheesecake delivers everything you want in a holiday dessert: stunning visual appeal, creamy indulgent texture, and surprisingly simple preparation that won’t leave you exhausted before guests arrive. By eliminating the baking process, you’ve removed the most stressful and time-consuming element of traditional cheesecake making while retaining all the flavors that make this dessert a perennial favorite. The festive tree presentation transforms a classic recipe into an Instagram-worthy centerpiece that tells your guests you care about creating magical holiday moments.
Whether you’re an experienced baker looking for a time-saving option or a kitchen novice hoping to impress, this recipe meets you where you are and delivers professional-looking results. The flexibility to customize flavors, adjust for dietary needs, and prepare components in advance makes this dessert adaptable to virtually any holiday scenario. Most importantly, the simplified process means you’ll spend less time stressing in the kitchen and more time enjoying the season with people you love.
So gather your ingredients, put on your favorite holiday playlist, and create this show-stopping no-bake Christmas tree cheesecake that proves impressive desserts don’t require culinary school credentials or an entire day in the kitchen. Your holiday table – and your stress levels – will thank you.
Ready to create your own festive masterpiece? Try this recipe this weekend and share your decorated creations with us in the comments below! Don’t forget to tag us on social media with #NoBakeChristmasTreeCheesecake so we can admire your holiday baking magic. Looking for more easy holiday desserts? Check out our collection of no-bake Christmas treats that’ll make your season sweeter without the stress.
FAQs
Can I make this no-bake Christmas tree cheesecake without food coloring?
Absolutely! While the green color creates that iconic Christmas tree look, you can make a beautiful winter-white version and decorate it with red berries and chocolate “ornaments” for a stunning snow-covered tree effect. Some bakers also use natural alternatives like spirulina powder or matcha for green coloring, though these will affect the flavor slightly. The cheesecake tastes equally delicious regardless of color, so don’t let lack of food coloring stop you from making this recipe.
Why is my no-bake cheesecake too soft and not setting properly?
The most common culprit is insufficient chilling time. No-bake cheesecakes rely entirely on refrigeration to firm up since there’s no baking to set the structure. Ensure you’re chilling for the full 4-6 hours minimum, or preferably overnight. Other potential issues include over-whipped cream (which becomes thin and watery), cream cheese that wasn’t fully softened before mixing (creating lumps that affect texture), or too much liquid being added. If your cheesecake still seems soft after adequate chilling, place it in the freezer for 1-2 hours to help it firm up.
Can I use a springform pan instead of shaping it like a tree?
Definitely! A 9-inch springform pan works perfectly for this recipe. Simply press the crust into the bottom of the pan, pour in the green filling, smooth the top, and decorate it as a round cheesecake with Christmas tree designs piped or arranged on top. The springform pan actually makes slicing easier and creates cleaner edges. You can also use a regular pie dish, individual serving glasses, or even silicone molds shaped like Christmas trees for a fun variation.
What’s the best way to achieve vibrant green color without it looking artificial?
Start with gel food coloring rather than liquid, as it’s more concentrated and won’t thin out your mixture. Add it drop by drop, mixing thoroughly between additions. Aim for a soft, pistachio-green shade rather than bright neon. The color will appear slightly more vibrant after chilling. Natural alternatives like matcha powder (1-2 tablespoons) create a subtle, sophisticated green with earthy undertones, though this will change the flavor profile. Remember that lighting affects how colors appear in photos – natural daylight shows the most accurate color.
How do I prevent my cheesecake from absorbing refrigerator odors?
The cream cheese base is particularly susceptible to absorbing strong odors from foods like onions, garlic, or leftover fish. Always cover your cheesecake well – either with a cake dome, an inverted large bowl, or loosely draped plastic wrap that doesn’t touch the decorated surface. For extra protection, place an open box of baking soda in your refrigerator to absorb odors. If you’re storing it for more than 2 days, consider placing it in a large airtight container with a piece of parchment paper between the lid and the dessert.
Can I make this recipe dairy-free or vegan?
Yes, with some substitutions! Use dairy-free cream cheese (Kite Hill or Miyoko’s work well), full-fat coconut cream (refrigerated overnight and whipped), and coconut oil in place of butter for the crust. The texture will be slightly different – somewhat softer and with a subtle coconut flavor – but still delicious. Make sure your cookie or graham cracker choice is also vegan. Note that coconut cream doesn’t whip to quite the same stiffness as heavy cream, so you may need to use a stabilizer like agar powder or add an extra package of cream cheese alternative for better structure.
My whipped cream keeps deflating after I fold it into the cream cheese. What am I doing wrong?
This usually happens when the cream cheese mixture is too dense or cold, or when you’re stirring rather than folding. The key is gentle folding with a rubber spatula using broad, sweeping motions that preserve air bubbles. Make sure your cream cheese mixture is at room temperature and fully beaten until light and fluffy before folding – this makes it closer in consistency to the whipped cream. Also ensure your cream is whipped to stiff peaks, not just soft peaks. If you’re still having trouble, try folding in the whipped cream in three additions rather than all at once, which makes it easier to maintain the air.
How far in advance can I make this dessert?
You can prepare this no-bake Christmas tree cheesecake up to 2 days in advance with excellent results – in fact, it often tastes better after the flavors have had time to meld. For longer storage, freeze it for up to 2 months. If freezing, do so before adding the final decorative touches, then thaw overnight in the refrigerator and decorate just before serving. The crust can be made 3 days ahead and stored covered in the refrigerator. This make-ahead flexibility is one of the greatest advantages of no-bake desserts during the busy holiday season when every minute of advance preparation counts.