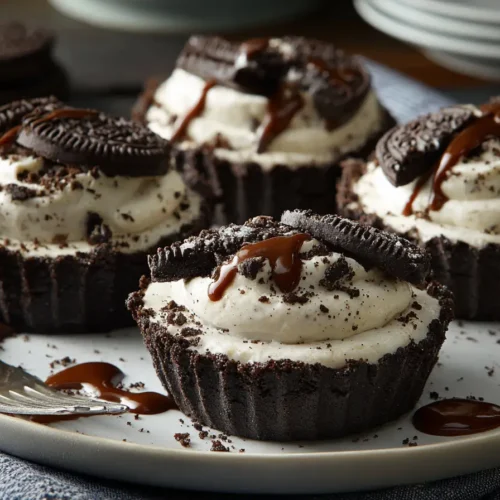
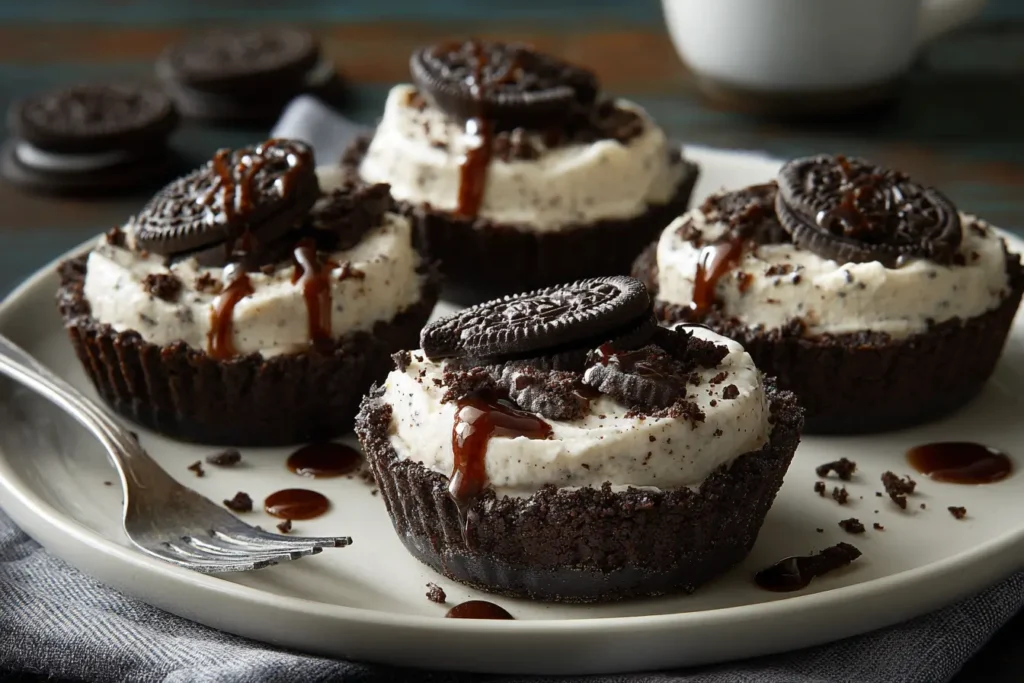
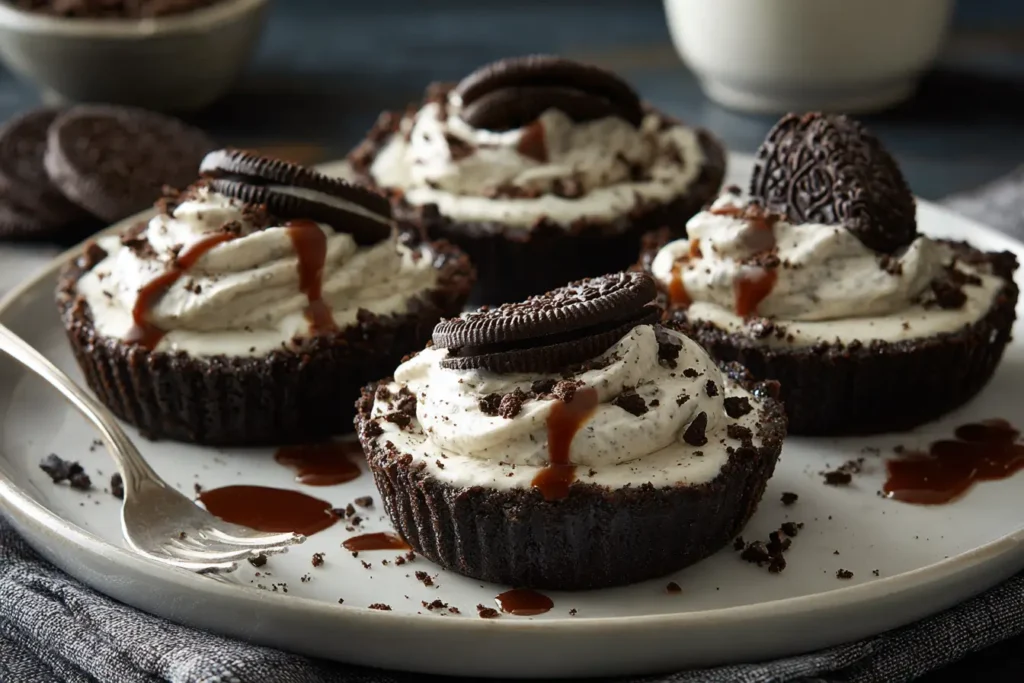
If you’re searching for a quick, crowd-pleasing dessert that looks impressive but requires minimal effort, these No-Bake Oreo Cheesecake Cups are about to become your go-to recipe. Creamy, fluffy cheesecake filling layered with rich chocolate cookie crumbs creates the perfect balance of texture and flavor. Best of all, there’s no oven required—making this an ideal dessert for warm days, busy holidays, or last-minute gatherings.
Made with classic Oreo cookies, smooth cream cheese, and freshly whipped cream, these cheesecake cups deliver bakery-level indulgence in a simple, foolproof format. Served in individual cups, they are as elegant as they are convenient.
Whether you’re hosting a dinner party, planning a birthday celebration, or just craving something sweet and satisfying, this no-bake Oreo cheesecake recipe checks every box.
Why You’ll Love These No-Bake Oreo Cheesecake Cups
There’s something magical about the combination of chocolate cookies and creamy cheesecake. This dessert is perfect for:
- Beginner bakers who want guaranteed success
- Busy parents needing a quick treat
- Entertainers who love make-ahead desserts
- Anyone who wants a rich dessert without turning on the oven
The layered presentation makes these cups visually stunning. When served in clear glasses or jars, you get beautiful stripes of dark cookie crumbs and fluffy white cheesecake filling—a dessert that looks as good as it tastes.

Ingredients You’ll Need
This recipe uses just a handful of simple ingredients:
- 20 Oreo cookies (plus extra for topping)
- 8 oz (225 g) cream cheese, softened
- 1 cup heavy whipping cream
- 1/2 cup powdered sugar
- 1 teaspoon vanilla extract
Each ingredient plays an important role in creating the perfect texture and flavor.
Ingredient Breakdown
Oreo Cookies
These create both the crust and the layered crunch. Their deep chocolate flavor pairs perfectly with the sweet cheesecake filling.
Cream Cheese
The base of any good cheesecake. Make sure it’s fully softened for a smooth, lump-free filling.
Heavy Whipping Cream
Whipped to stiff peaks, this gives the cheesecake its light, airy texture.
Powdered Sugar
Provides sweetness while dissolving seamlessly into the filling.
Vanilla Extract
Enhances the flavor and rounds out the richness.
Kitchen Equipment Needed
To make these no-bake Oreo cheesecake cups, you’ll need:
- Food processor (or zip-top bag and rolling pin)
- Large mixing bowl
- Medium mixing bowl
- Electric hand mixer or stand mixer
- Rubber spatula
- Measuring cups and spoons
- Serving cups or glasses
- Refrigerator space for chilling
If you don’t have a food processor, don’t worry. A sealed plastic bag and rolling pin work just as well for crushing the cookies.
Step-by-Step Instructions
1. Prepare the Oreo Crumbs
Place the Oreo cookies into a food processor and pulse until fine crumbs form. You want a sandy texture with no large chunks.
No processor? Simply place the cookies in a sealed bag and crush them using a rolling pin. This method works beautifully and requires minimal cleanup.
Set aside a small amount of crumbs for topping.
2. Make the Cheesecake Filling
In a large mixing bowl, beat the softened cream cheese until completely smooth and creamy. This step is crucial—any lumps now will stay in the final dessert.
Add powdered sugar and vanilla extract. Mix until fully incorporated.
In a separate bowl, whip the heavy cream until stiff peaks form. This means when you lift the beaters, the cream holds its shape firmly.
Gently fold the whipped cream into the cream cheese mixture using a spatula. Take your time here—folding keeps the mixture light and airy.
The result should be smooth, fluffy, and irresistibly creamy.
3. Assemble the Cups
Spoon a layer of crushed Oreos into the bottom of each serving cup. Add a layer of cheesecake filling on top.
Repeat the layers until the cups are filled, finishing with cheesecake filling as the top layer.
For a clean look, use a piping bag (or zip-top bag with the corner snipped off) to pipe the cheesecake filling neatly into each cup.
4. Chill
Refrigerate the assembled cups for at least 2 hours. This allows the filling to set and the flavors to meld beautifully.
For best results, chill for 4 hours or even overnight if you have the time.
5. Garnish & Serve
Just before serving, top with:
- Extra crushed Oreos
- Mini Oreo cookies
- Whipped cream
- Chocolate drizzle
Serve chilled and enjoy every creamy, crunchy bite.
Tips for the Best Results
Soften the Cream Cheese Properly
Leave it at room temperature for at least 30–45 minutes. Cold cream cheese leads to lumps.
Don’t Overmix
Once the whipped cream is folded in, stop mixing. Overworking the mixture can deflate the airiness.
Use Clear Cups
Presentation matters! Clear cups show off those beautiful layers and make this dessert look bakery-quality.
Chill Thoroughly
Patience pays off. Proper chilling ensures the cheesecake sets to a luxurious texture.
Flavor Variations & Swaps
One of the best things about these no-bake Oreo cheesecake cups is how adaptable they are.
Chocolate Lovers Version
Add 2 tablespoons of cocoa powder to the cheesecake filling for a double-chocolate effect.
Peanut Butter Twist
Mix 1/4 cup creamy peanut butter into the filling for a rich, nutty upgrade.
Mint Oreo Cheesecake Cups
Use Mint Oreos instead of classic Oreos for a refreshing spin.
Strawberries & Cream
Layer fresh sliced strawberries between the cheesecake layers for a fruity touch.
Gluten-Free Option
Use gluten-free chocolate sandwich cookies to make this dessert suitable for gluten-sensitive guests.
Make-Ahead and Storage Tips
These cheesecake cups are perfect for preparing in advance.
Refrigerator Storage
Store covered in the refrigerator for up to 3 days. Keep them tightly wrapped or sealed to prevent them from absorbing fridge odors.
Freezing
Freezing is not recommended. The texture of the whipped filling can change and become grainy once thawed.
If making ahead for an event, prepare them the night before and garnish just before serving for the freshest look.
Perfect Pairings
Because these cups are rich and creamy, pairing them with something refreshing works beautifully.
Beverage Pairings
- Freshly brewed coffee
- Espresso
- Cold milk
- Iced vanilla latte
- Sparkling water with lemon
Dessert Table Pairings
- Fresh fruit platter
- Chocolate-dipped strawberries
- Mini brownies
- Vanilla cupcakes
For dinner parties, these cheesecake cups make a perfect finale after a light pasta dish or grilled chicken entrée.
Why This Recipe Works
This recipe succeeds because it balances texture and flavor:
- Crunchy cookie crumbs
- Silky cream cheese base
- Light whipped cream
- Just the right amount of sweetness
Unlike traditional baked cheesecake, there’s no risk of cracking, overbaking, or water baths. The whipped cream stabilizes the filling naturally, giving it structure without gelatin.
It’s simplicity at its finest.
Frequently Asked Questions
Can I use store-bought whipped topping instead of whipping cream?
Yes, you can substitute whipped topping for the whipped cream. However, freshly whipped cream provides a lighter, more natural flavor.
How long do these need to chill?
At least 2 hours, but 4 hours is better for a firmer texture.
Can I make this in one large dish instead of cups?
Absolutely. Layer everything in an 8×8-inch dish and slice into squares to serve.
Can I reduce the sugar?
You can reduce powdered sugar slightly, but keep in mind Oreos are already sweet, so taste as you go.
How do I get clean, defined layers?
Use a piping bag for the cheesecake filling and gently tap the cups on the counter to settle each layer evenly.
Serving Ideas for Special Occasions
These no-bake Oreo cheesecake cups are perfect for:
- Birthday parties
- Baby showers
- Holiday gatherings
- Valentine’s Day
- Potlucks
- Summer barbecues
For a more elegant presentation, serve in small glass dessert jars with lids for a portable, Instagram-worthy treat.
Pro-Level Presentation Tips
- Use tall, narrow glasses for dramatic layers.
- Add chocolate curls on top.
- Pipe decorative swirls of whipped cream.
- Insert a mini Oreo vertically into the top layer.
Small touches elevate this simple dessert into something that looks straight from a pastry shop.
Final Thoughts
These No-Bake Oreo Cheesecake Cups prove that decadent desserts don’t have to be complicated. With minimal ingredients, no oven, and simple techniques, you can create a stunning layered dessert that tastes luxurious and feels special.
Whether you’re making them for guests or treating yourself after a long week, this recipe delivers every single time. Creamy, crunchy, sweet, and satisfying—it’s everything you want in a dessert cup.
If you try this recipe, I’d love to hear how it turned out! Share it with friends and family, snap a photo for social media, and don’t forget to subscribe to the blog for more easy, elegant dessert recipes delivered straight to your inbox. Happy baking (or in this case, happy no-baking)!