


Imagine this: It’s a warm summer evening, and you’re preparing to host a small gathering. You’re looking for a dessert that’s easy to make, doesn’t require an oven, and will be loved by all. Enter No-Bake Oreo Cheesecake Bites—a sweet, creamy, and irresistible treat that brings the classic Oreo cookie together with the rich flavors of cheesecake. These no-bake cheesecake bites are the perfect dessert for every occasion, whether it’s a casual movie night or a special celebration. Keep reading to discover how you can make these bite-sized wonders and impress your friends and family with minimal effort!
What Are No-Bake Oreo Cheesecake Bites?
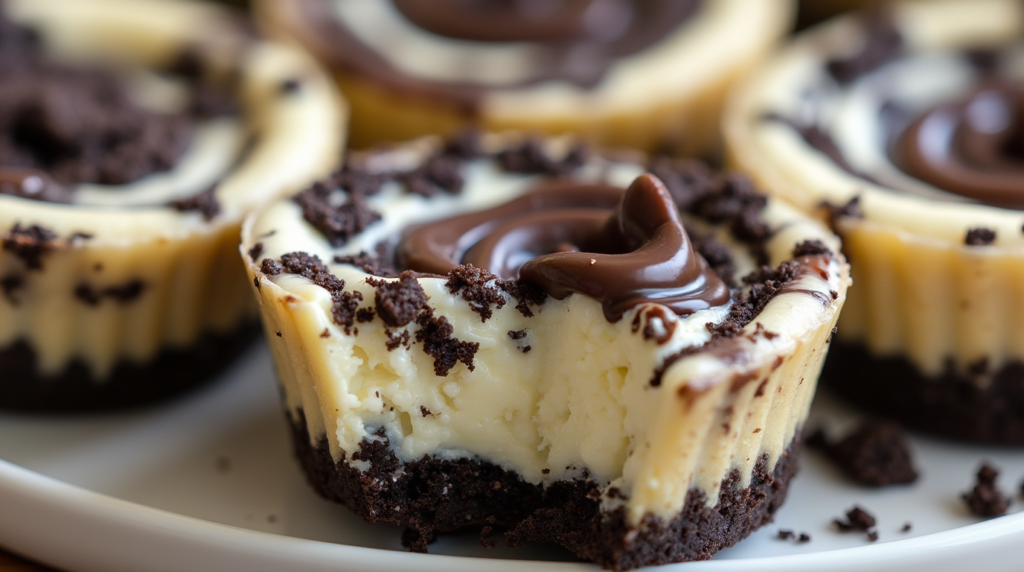
No-Bake Oreo Cheesecake Bites are a quick, delicious, and hassle-free way to enjoy cheesecake without turning on the oven. These delightful bites feature a smooth and creamy cheesecake filling that is combined with crushed Oreos for a decadent flavor and texture. Rolled into small balls and chilled until firm, these treats are a fun, bite-sized twist on traditional cheesecake that everyone will love.
Why Choose No-Bake Oreo Cheesecake Bites?
If you’re wondering why you should make these No-Bake Oreo Cheesecake Bites, here are a few reasons that will surely convince you:
- Quick and Easy: With minimal prep time and no need for an oven, you can whip up these cheesecake bites in no time.
- Perfect for Any Occasion: Whether it’s a birthday party, holiday gathering, or just a mid-week treat, these bites fit the bill. They’re also great for potlucks and dessert tables.
- Customizable: You can personalize these bites with your favorite toppings, drizzles, or mix-ins. Chocolate syrup, fresh berries, or even a sprinkle of crushed nuts—there are endless possibilities to make them your own.
Ingredients for No-Bake Oreo Cheesecake Bites
Before you start making these delectable bites, here’s a list of ingredients you’ll need. The beauty of this recipe is that it’s simple and doesn’t require any complicated ingredients.
Here’s a quick breakdown of what you’ll need:
| Ingredient | Quantity |
|---|---|
| Oreo cookies | 24 cookies |
| Cream cheese (softened) | 8 oz |
| Powdered sugar | 1 cup |
| Butter (melted) | 1/4 cup |
| Vanilla extract | 1 tsp |
| Heavy cream (optional) | 2 tbsp |
Ingredient Notes:
- Cream cheese: Be sure to let it soften at room temperature before mixing for the smoothest texture.
- Heavy cream: This is optional, but it adds a light, airy texture to the cheesecake filling. If you prefer a firmer filling, you can skip it.
- Oreos: You’ll be crushing these into crumbs for both the crust and to coat the bites, giving them that signature Oreo flavor.
How to Make No-Bake Oreo Cheesecake Bites
Making these No-Bake Oreo Cheesecake Bites is as simple as it sounds. The process involves three main steps: preparing the Oreo crust, making the cheesecake filling, and assembling the bites. Follow these easy instructions, and you’ll have a dessert that will have everyone coming back for more!
Step 1: Prepare the Oreo Crust
- Crush the Oreos: Start by crushing the Oreos into fine crumbs. You can do this in a food processor for an even texture, or place them in a plastic bag and crush them with a rolling pin. The goal is to have small, uniform crumbs.
- Mix with Butter: Combine the crushed Oreos with melted butter. Stir until the crumbs are evenly coated with the butter.
- Form the Crust: Press the mixture into a baking dish or tray, making a firm crust layer. This crust will give the cheesecake bites a nice crunch.
Step 2: Make the Cheesecake Filling
- Beat the Cream Cheese: In a bowl, beat the softened cream cheese with an electric mixer until it becomes smooth and creamy.
- Add Powdered Sugar and Vanilla: Gradually add the powdered sugar and vanilla extract, continuing to beat until the mixture is thick and smooth.
- Add Heavy Cream (Optional): If you’re using heavy cream, add it now, mixing until the filling reaches a lighter texture.
Step 3: Assemble the Bites
- Roll the Cheesecake Filling into Balls: Take spoonfuls of the cheesecake filling and roll them into bite-sized balls. The size is up to you, but small, bite-sized portions are ideal for easy eating.
- Coat the Bites with Crushed Oreos: Roll each cheesecake ball in the Oreo crust mixture to coat it completely. This gives the cheesecake bites extra Oreo flavor and texture.
- Chill: Place the cheesecake bites on a tray and refrigerate for at least 1 hour. The chilling time will help the bites firm up and hold their shape.
Tips for the Best No-Bake Oreo Cheesecake Bites
To ensure your No-Bake Oreo Cheesecake Bites turn out perfectly, here are some helpful tips:
- Chill Long Enough: Don’t rush the chilling process. The bites need enough time to firm up properly. If you’re short on time, try placing them in the freezer for about 30 minutes.
- Perfect Texture: Make sure your cream cheese is softened before mixing. This prevents lumps and ensures a smooth filling.
- Customize the Toppings: Don’t hesitate to get creative with toppings. You can drizzle the bites with chocolate syrup, sprinkle with mini chocolate chips, or top with fresh fruit like raspberries or strawberries for an extra burst of flavor.
- Storage Tips: If you have leftovers (which is unlikely!), store the cheesecake bites in an airtight container in the fridge for up to 4 days. They can also be frozen for later use.
Serving Suggestions for No-Bake Oreo Cheesecake Bites
These No-Bake Oreo Cheesecake Bites are as versatile as they are delicious. Here are a few serving ideas:
- With Drinks: Pair these cheesecake bites with a refreshing iced tea, coffee, or milk for a perfect dessert experience.
- At Parties: Serve them on a platter with other desserts or finger foods at your next gathering. They’re perfect for potlucks, birthday parties, or a holiday get-together.
- As a Snack: Enjoy these bites as a sweet snack after a long day or a light dessert after dinner.
- For the Kids: These bite-sized treats are kid-friendly and sure to be a hit with younger guests. Just be prepared for them to ask for more!
FAQ About No-Bake Oreo Cheesecake Bites
Can I make No-Bake Oreo Cheesecake Bites ahead of time?
Yes! These bites are perfect for prepping in advance. Make them up to two days ahead of time, store them in the fridge, and they’ll be ready to serve whenever you need them.
Can I use a different type of cookie instead of Oreos?
Absolutely! While Oreos are the classic choice for this recipe, you can easily substitute them with other cookies like chocolate chip cookies, graham crackers, or even vanilla wafers.
How do I store No-Bake Oreo Cheesecake Bites?
Store the cheesecake bites in an airtight container in the refrigerator for up to 4 days. You can also freeze them for longer storage, making them a great make-ahead option for events.
Conclusion: Enjoy the Sweet Simplicity of No-Bake Oreo Cheesecake Bites
There you have it—a quick, easy, and delicious dessert that will have everyone talking. Whether you’re hosting a party or simply craving something sweet, No-Bake Oreo Cheesecake Bites are the perfect solution. With minimal effort and just a few simple ingredients, you can create a dessert that’s sure to please. So why not give them a try today? Trust us, your taste buds will thank you!
Ready to Make Your Own No-Bake Oreo Cheesecake Bites?
Get started with this easy recipe and let us know how your bites turned out! Share your favorite variations in the comments below, or tag us in your Instagram photos—we love seeing how you put your spin on this classic treat!