

")
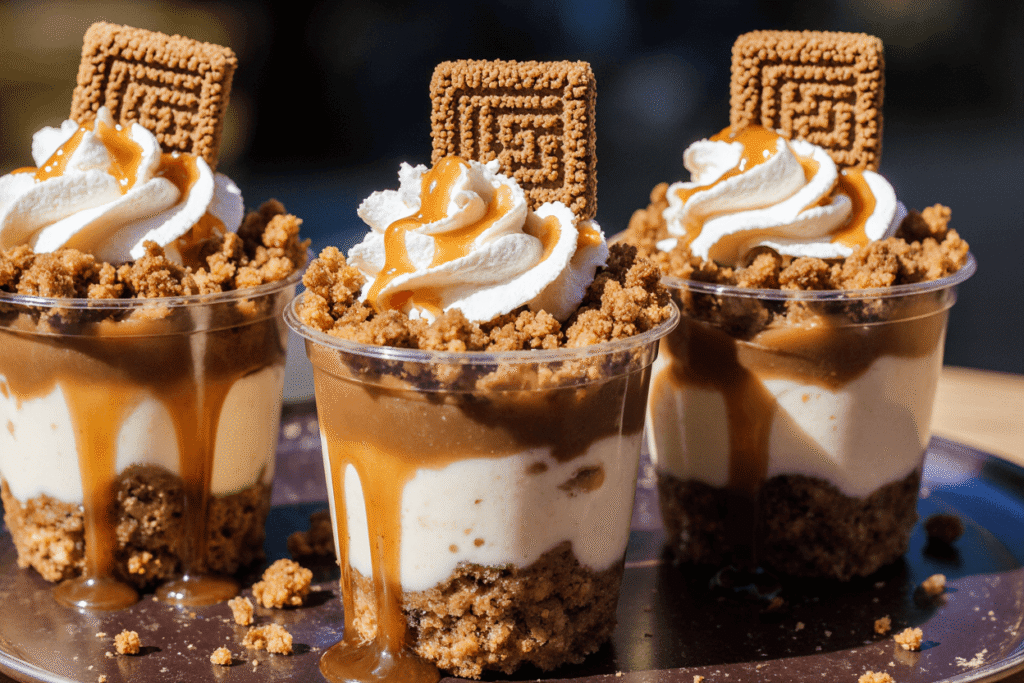
When summer heats up, the last thing most of us want is to turn on the oven. That’s where these No-Bake Biscoff Cheesecake Cups come in—layered with the rich, spiced flavor of Lotus Biscoff cookies, a creamy cheesecake filling, and topped with even more cookie goodness, these cups are cool, indulgent, and effortless. Whether you’re hosting a summer barbecue, planning a picnic, or just want to treat yourself, this easy, crowd-pleasing dessert hits all the right notes.
This recipe is made for those who love the deep caramelized flavor of Biscoff cookies and are looking for a fun, portable, and decadent no-bake treat. The individual servings make it perfect for parties, and it’s versatile enough to prepare in advance, store in the fridge, and dress up with creative toppings.
Why You’ll Fall in Love with These Biscoff Cheesecake Cups
Let’s break it down: buttery cookie crust, luscious no-bake cheesecake infused with cookie butter, and a dreamy topping of whipped cream and drizzled Biscoff spread. What’s not to love?
Here’s what makes this dessert a new summer staple:
- No Oven Required: Perfect for hot days when baking is off the table.
- Super Easy to Make: With only a few steps and basic ingredients.
- Make-Ahead Friendly: Ideal for prepping the night before.
- Customizable: Add fruits, switch up the toppings, or make it gluten-free.
- Elegant Presentation: Serve in mini glasses, jars, or dessert cups for a picture-perfect finish.
Ingredients List
Let’s talk about what you’ll need to bring this dreamy dessert to life:
For the Crust:
- 1 cup Biscoff cookie crumbs (about 10–12 cookies, finely crushed)
- 4 tablespoons unsalted butter, melted
For the Cheesecake Filling:
- 8 oz (225g) cream cheese, softened to room temperature
- 1/4 cup granulated sugar
- 1/4 cup Biscoff cookie spread
- 1/2 cup whipped topping (like Cool Whip or homemade whipped cream)
For the Topping:
- Whipped cream (for piping or spooning)
- Melted Biscoff spread or caramel sauce (for drizzling)
- Extra crushed Biscoff cookies (for sprinkling)
- Whole Biscoff cookie (for garnish)
Equipment Needed
You don’t need a fully stocked kitchen for this one—just a few essentials:
- Electric hand mixer or stand mixer
- Mixing bowls (2–3 sizes)
- Silicone spatula
- Measuring cups and spoons
- Food processor or plastic bag + rolling pin (to crush cookies)
- Dessert cups, jars, or small glasses (for individual servings)
- Piping bag or spoon (for neat layers)
- Small saucepan or microwave (for melting Biscoff spread)
Step-by-Step Instructions
Step 1: Make the Crust
In a medium bowl, mix the finely crushed Biscoff cookie crumbs with melted butter until the texture resembles wet sand. Spoon about 1–2 tablespoons into the bottom of each dessert cup or glass. Press down lightly to form a base. Set aside or chill while you make the filling.
Step 2: Make the Cheesecake Filling
In a large bowl, beat the softened cream cheese and sugar together using an electric mixer until smooth and creamy (about 2–3 minutes). Scrape down the sides of the bowl as needed.
Add the Biscoff spread and mix until fully incorporated.
Using a spatula, gently fold in the whipped topping until just combined. Be careful not to deflate it—it should remain light and fluffy.
Step 3: Assemble the Cups
Spoon or pipe the cheesecake filling on top of the crust layer in each dessert cup. Smooth out the tops with a spoon. Cover and refrigerate for at least 2 hours, preferably overnight, so the filling sets and flavors meld.
Step 4: Add the Toppings
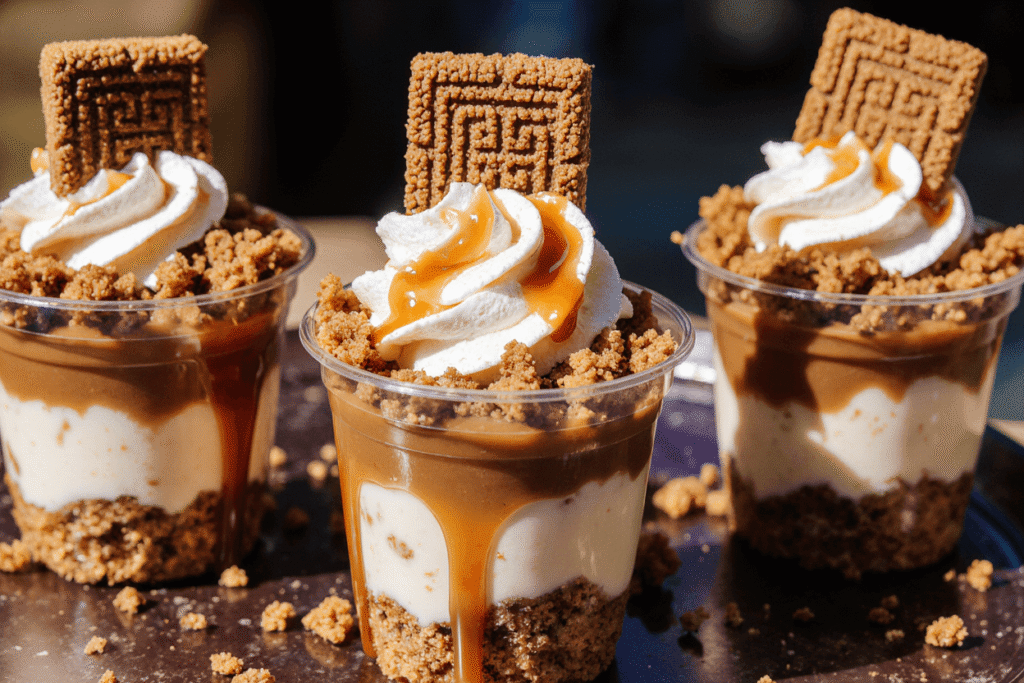
Before serving, top each cup with a swirl or dollop of whipped cream. Drizzle with melted Biscoff spread or caramel sauce. Sprinkle crushed cookies on top and garnish with a whole Biscoff cookie for that signature finish.
Tips for Success
- Softened Cream Cheese Is Key: Cold cream cheese can result in a lumpy filling. Let it sit at room temp for about 30 minutes before using.
- Don’t Overmix the Whipped Topping: Gently folding helps retain airiness and keeps the texture mousse-like.
- Chill Time Matters: At least 2 hours is recommended for a firm, scoopable filling.
- Crust Alternatives: Try crushed graham crackers, chocolate cookies, or digestive biscuits for a twist.
- For a Lighter Option: Use low-fat cream cheese and a light whipped topping.
Creative Variations
Want to put your own spin on these cheesecake cups? Try these ideas:
- Biscoff + Banana: Add a layer of banana slices between the crust and filling.
- Berry Swirl: Mix in a few tablespoons of raspberry or strawberry puree into the filling.
- Mocha Twist: Add 1 teaspoon of instant espresso powder to the filling for a coffee kick.
- Nutty Crunch: Add chopped pecans or almonds for texture.
- Frozen Version: Freeze the cups for a frozen cheesecake-like treat—perfect on extra hot days.
How to Store and Make Ahead
These cheesecake cups store beautifully:
- Fridge: Cover with plastic wrap or airtight lids and store in the fridge for up to 4–5 days.
- Freezer: Freeze without the whipped cream and toppings for up to 1 month. Thaw in the fridge before serving and add toppings fresh.
Make these cups the night before your event or dinner party and simply garnish right before serving for maximum freshness and visual appeal.
Serving Suggestions & Pairings
These Biscoff cheesecake cups are perfectly sweet and satisfying on their own, but if you want to elevate your dessert spread, consider pairing with:
- Fresh Berries: Strawberries, raspberries, or blueberries balance the sweetness.
- Coffee or Espresso: The rich caramel flavor pairs beautifully with coffee.
- Sparkling Rosé or Dessert Wine: For an elegant after-dinner treat.
- Milkshakes or Iced Lattes: For a sweet and creamy combo.
Serve in clear glasses for a stunning layered look or in mason jars for a rustic picnic-style presentation.
Frequently Asked Questions (FAQ)
Can I make this recipe in a large dish instead of individual cups?
Yes! Use an 8×8 or 9×9-inch pan to create a single no-bake cheesecake. Just double the crust layer and press into the base, then spread the filling over it. Chill and top as usual.
Is this recipe gluten-free?
No, but you can make it gluten-free by using certified gluten-free cookie alternatives.
What if I don’t have Biscoff spread?
You can substitute with cookie butter (often labeled “speculoos spread”) from other brands or use Nutella for a chocolate-hazelnut variation.
Can I use homemade whipped cream instead of Cool Whip?
Absolutely! Whip 1/2 cup of cold heavy cream with 1 tablespoon of powdered sugar and 1/2 teaspoon vanilla extract until soft peaks form. Use in place of Cool Whip.
How do I melt the Biscoff spread for drizzling?
Microwave 2 tablespoons of Biscoff spread in a small bowl for 10–15 seconds, then stir until smooth. Add a splash of cream if needed to thin it out.
Final Thoughts
These Summer Biscoff Cheesecake Cups are the dessert you didn’t know you needed. Easy, elegant, and bursting with flavor, they offer a refreshing and creamy escape from the heat—no oven required. With a balance of crunch, creaminess, and cookie bliss, they’re bound to become a new favorite in your no-bake dessert lineup.
Whether you’re planning a party or looking for a sweet way to end your next family dinner, these cheesecake cups deliver every time. Plus, with endless ways to customize them, you’ll never get bored of making (or eating) them.
Did You Love This Recipe?
If this dessert made your summer a little sweeter, share it with your friends on Pinterest, Instagram, or Facebook. Don’t forget to subscribe to the blog for more seasonal treats, baking inspiration, and crowd-pleasing recipes delivered straight to your inbox!


