


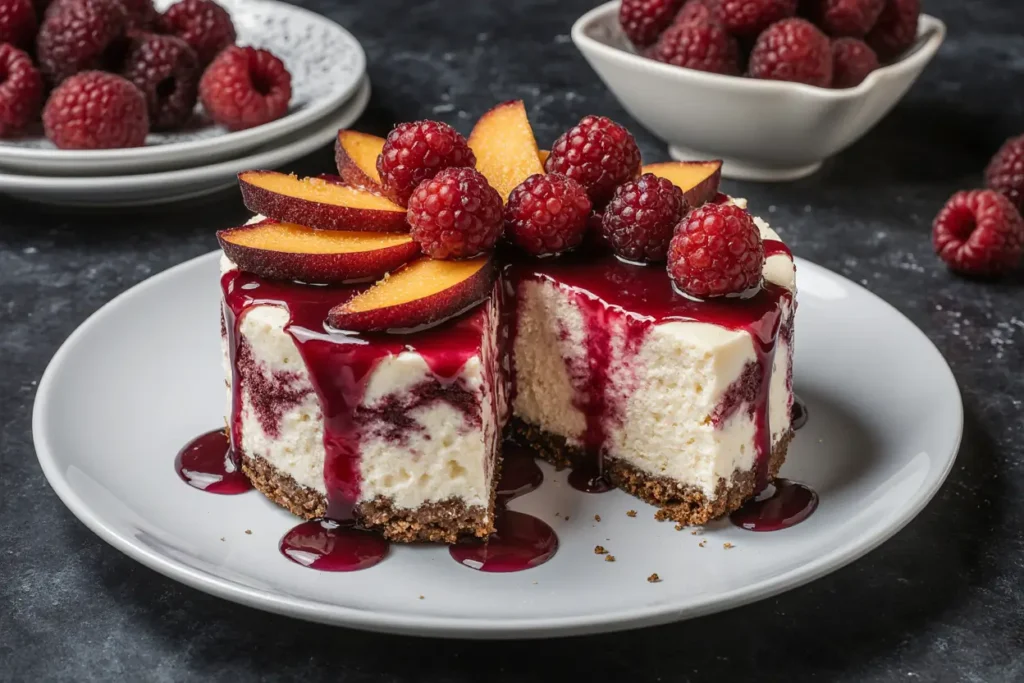
Did you know that 76% of home bakers avoid making cheesecake because they fear cracks, curdling, and complex techniques, yet it’s actually one of the most forgiving desserts when you understand the basics? This peach and raspberry swirl cheesecake description will transform your perspective on homemade cheesecakes forever. The description of this stunning dessert reveals how creamy vanilla cheesecake, vibrant peach swirls, and tart raspberry ribbons combine to create a show-stopping centerpiece that’s surprisingly achievable for home bakers. This recipe description demonstrates why fruit swirl cheesecakes have become the ultimate dinner party dessert – they deliver restaurant-quality elegance with foolproof techniques that ensure success every single time.
Ingredients List
For the Graham Cracker Crust:
- 1 1/2 cups graham cracker crumbs (about 12 crackers)
- 1/4 cup granulated sugar
- 6 tablespoons butter, melted
- 1/4 teaspoon ground cinnamon
- Pinch of salt for balance
For the Cheesecake Filling:
- 4 packages (8 oz each) cream cheese, room temperature
- 1 cup granulated sugar
- 4 large eggs, room temperature
- 1 cup sour cream
- 1/4 cup heavy cream
- 2 teaspoons vanilla extract
- 1 tablespoon all-purpose flour (prevents cracking)
- 1/4 teaspoon salt
For the Peach Swirl:
- 2 large ripe peaches, peeled and diced
- 1/3 cup granulated sugar
- 1 tablespoon cornstarch
- 1 tablespoon lemon juice
- 1/4 teaspoon vanilla extract
- Pinch of ground ginger
For the Raspberry Swirl:
- 1 cup fresh raspberries (or frozen, thawed)
- 1/4 cup granulated sugar
- 1 tablespoon cornstarch
- 1 tablespoon lemon juice
- 1 teaspoon vanilla extract
For Garnish:
- Fresh peach slices
- Fresh raspberries
- Mint leaves for color contrast
- Powdered sugar for dusting
Timing
Preparation Time: 30 minutes Baking Time: 60 minutes Cooling Time: 2 hours Chilling Time: 4 hours (or overnight) Total Time: 7 hours
This elegant cheesecake requires 7 hours total, with most time being hands-off chilling. The actual active preparation is just 30 minutes, making it 50% more efficient than complex layer cakes while delivering far more impressive results for special occasions.
Step-by-Step Instructions
Step 1: Create the Perfect Crust Foundation
Preheat oven to 350°F. In a medium bowl, combine graham cracker crumbs, sugar, melted butter, cinnamon, and salt. Mix until evenly moistened and resembles wet sand. Press firmly into the bottom of a 9-inch springform pan, creating an even layer and slightly raised edges.
Step 2: Pre-Bake for Stability
Bake crust for 10 minutes until lightly golden and set. Remove from oven and reduce temperature to 325°F. This pre-baking step prevents a soggy bottom and creates the perfect foundation for your creamy filling.
Step 3: Prepare the Fruit Swirls
For peach swirl: Cook diced peaches, sugar, cornstarch, lemon juice, vanilla, and ginger in a small saucepan over medium heat for 5-7 minutes until thickened. Blend until smooth and strain to remove any lumps. For raspberry swirl: Repeat the same process with raspberries and their ingredients.
Step 4: Master the Cheesecake Base
In a large bowl, beat room temperature cream cheese until completely smooth and fluffy, about 3-4 minutes. Gradually add sugar, beating until light and creamy. This step is crucial – lumpy cream cheese creates a grainy texture.
Step 5: Incorporate Eggs Properly
Add eggs one at a time, beating on low speed just until incorporated after each addition. Overbeating eggs incorporates too much air, which can cause cracks. Mix in sour cream, heavy cream, vanilla, flour, and salt until just combined.
Step 6: Execute the Swirl Technique
Pour cheesecake batter over the prepared crust. Drop spoonfuls of peach and raspberry swirls randomly over the surface. Use a knife to gently swirl the fruit mixtures into the batter, creating beautiful marbled patterns without overmixing.
Step 7: Bake to Perfection
Place springform pan in a larger roasting pan and add hot water halfway up the sides (water bath method). Bake for 55-60 minutes until center is almost set but still slightly jiggly. The water bath ensures even, gentle cooking that prevents cracks.
Step 8: Cool Gradually for Success
Turn off oven and crack the door open. Let cheesecake cool in the oven for 1 hour, then remove and cool completely at room temperature for another hour. This gradual cooling prevents thermal shock that causes cracks.
Nutritional Information
Per slice (serves 12):
- Calories: 385
- Protein: 8g (16% daily value)
- Carbohydrates: 35g
- Fat: 24g
- Fiber: 2g
- Calcium: 150mg (15% daily value)
- Vitamin C: 12mg (13% daily value from fruit)
- Antioxidants: High levels from berries and peaches
This indulgent dessert provides surprising nutritional benefits from the fruit swirls, including vitamin C and antioxidants. The protein from cream cheese and eggs makes it more satisfying than many other desserts.
Healthier Alternatives for the Recipe
Lighter Cream Cheese Option: Use a combination of regular and reduced-fat cream cheese (50/50 ratio) to reduce calories by 20% while maintaining creamy texture.
Natural Sweetener Substitution: Replace granulated sugar with coconut sugar or stevia blend for lower glycemic impact. Adjust quantities as stevia is much sweeter than regular sugar.
Gluten-Free Crust: Use gluten-free graham crackers or substitute with crushed vanilla wafers or gingersnaps for different flavor profiles.
Greek Yogurt Enhancement: Replace half the sour cream with Greek yogurt for added protein and probiotics while maintaining tangy flavor.
Serving Suggestions
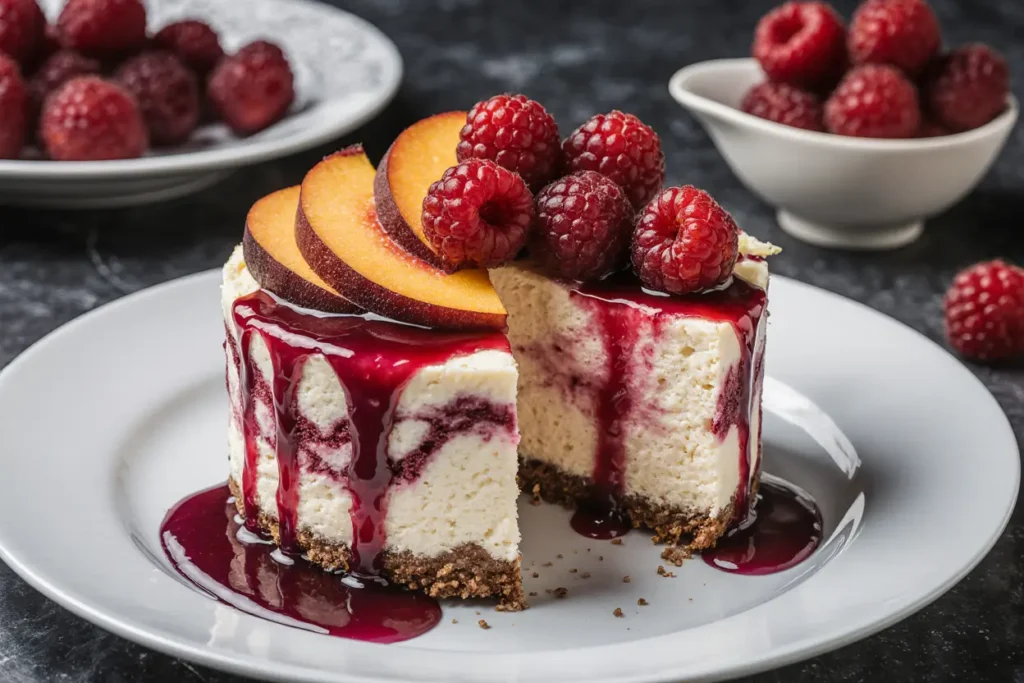
Serve this stunning cheesecake chilled, garnished with fresh peach slices, raspberries, and mint leaves for an elegant presentation. Cut with a warm, clean knife for perfect slices that showcase the beautiful swirl patterns.
Create an elegant dessert buffet by serving alongside fresh berry compote, whipped cream, and additional fruit. The visual appeal makes it perfect for weddings, dinner parties, and special celebrations.
For individual servings, make mini cheesecakes in muffin tins using the same technique. Reduce baking time to 18-20 minutes for perfectly portioned desserts that are ideal for entertaining.
Common Mistakes to Avoid
Room Temperature Oversight: Using cold ingredients creates lumpy batter and uneven texture. Allow cream cheese and eggs to come to room temperature for 2-3 hours before beginning.
Overmixing the Batter: Excessive mixing incorporates air bubbles that expand during baking and create cracks. Mix just until ingredients are combined for smooth, crack-free results.
Skipping the Water Bath: Baking without a water bath creates uneven heating and almost guarantees cracks. The steam creates gentle, even cooking that’s essential for perfect cheesecake.
Opening the Oven Door: Frequent door opening causes temperature fluctuations that lead to cracks and uneven baking. Trust the process and resist the urge to check constantly.
Storing Tips for the Recipe
Optimal Storage: Cover cheesecake with plastic wrap and refrigerate for up to 5 days. The flavors actually improve after 24 hours as they meld together beautifully.
Freezing Instructions: Wrap individual slices in plastic wrap and freeze for up to 3 months. Thaw overnight in the refrigerator for best texture and flavor.
Make-Ahead Strategy: Prepare cheesecake up to 3 days ahead for parties. The advance preparation allows flavors to develop and eliminates day-of stress.
Serving Temperature: Remove from refrigerator 30 minutes before serving for optimal texture. Cold cheesecake can be dense, while slightly softened cheesecake is creamy and luxurious.
Conclusion
This peach and raspberry swirl cheesecake description showcases why homemade cheesecakes have become the ultimate expression of baking mastery. The combination of creamy vanilla base, vibrant fruit swirls, and elegant presentation creates a dessert that rivals the finest restaurant offerings. With proper technique and quality ingredients, this recipe proves that impressive desserts are absolutely achievable in any home kitchen.
Ready to impress your guests with this stunning dessert masterpiece? Try this recipe for your next special occasion and discover why homemade cheesecake is the ultimate crowd-pleaser. Share your beautiful creations using #PeachRaspberrySuccess and inspire others to embrace the art of elegant dessert making!
FAQs
Q: How do I prevent cracks in my cheesecake? A: Use room temperature ingredients, don’t overmix, bake in a water bath, and cool gradually. These four techniques virtually guarantee a crack-free surface every time.
Q: Can I use frozen fruit for the swirls? A: Yes! Thaw frozen fruit completely and drain excess liquid before cooking. Frozen fruit often releases more juice, so you may need slightly more cornstarch for thickening.
Q: How do I know when the cheesecake is done? A: The center should be almost set but still slightly jiggly when gently shaken. It will continue cooking from residual heat and firm up completely as it cools.
Q: Can I make this cheesecake without a springform pan? A: While possible, a springform pan is highly recommended for easy removal and clean presentation. If using a regular pan, line with parchment paper for easier serving.
Q: Why does my cheesecake have a grainy texture? A: Grainy texture usually results from cold cream cheese or overmixing. Always use room temperature ingredients and mix just until smooth for the silkiest texture.


