


Nothing screams summertime and open-flame cooking quite like Shashlik—a traditional Eastern European and Central Asian skewered meat dish that’s as bold in flavor as it is elegant in presentation. Whether you’re hosting a weekend BBQ, planning a dinner party, or just indulging in your grilling obsession, this Stylishly Grilled Shashlik recipe will elevate your outdoor cooking game to a whole new level.
With a flavorful marinade, a sizzling char, and stylish presentation on sleek metal skewers, this dish isn’t just a meal—it’s an experience.
Who Is This Recipe For?
This Shashlik recipe is ideal for:
- Grill masters looking to perfect their skewer game
- Food lovers who crave international flavors with minimal prep
- Home entertainers who want to serve something both rustic and refined
- Weeknight warriors seeking a flavorful make-ahead meal
- Keto and paleo followers—it’s high in protein, low in carbs, and endlessly satisfying
Whether you’re serving a backyard crowd or just want something special for a midweek dinner, this recipe ticks all the right boxes.
Why You’ll Love This Grilled Shashlik
- Incredibly flavorful thanks to an aromatic, spice-rich marinade
- Versatile – works with lamb, pork, beef, or chicken
- Make-ahead friendly – marinate overnight for best results
- Grill perfection – juicy interior with caramelized, smoky edges
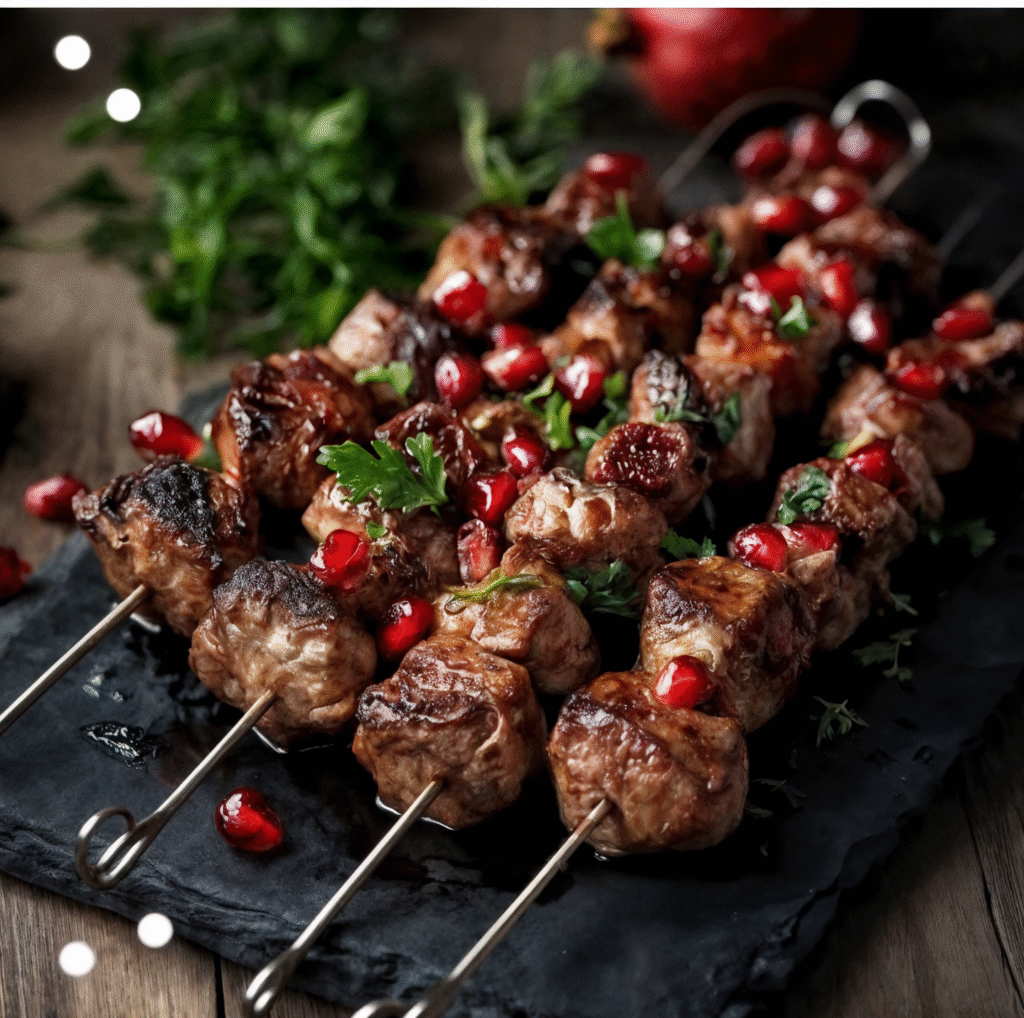
- Visually impressive – served on elegant metal skewers with a modern plating style
Ingredients You’ll Need
For the Marinade & Meat:
- 2 lbs lamb shoulder (or pork, beef, or chicken), cut into 1½-inch chunks
- 2 medium onions, sliced into rings
- 3 tablespoons olive oil
- 1 tablespoon white vinegar or fresh lemon juice
- 1 teaspoon ground coriander
- 1 teaspoon smoked paprika
- 1 teaspoon ground cumin
- ½ teaspoon black pepper
- 1½ teaspoons kosher salt
- Optional: ½ teaspoon chili flakes for heat
For Garnishing:
- Chopped fresh parsley or dill
- Optional: Lemon wedges for serving
Equipment Needed
- Metal skewers (or high-quality bamboo skewers soaked in water)
- Sharp chef’s knife
- Cutting board
- Mixing bowl
- Grill or grill pan
- Tongs
- Basting brush (optional)
Step-by-Step Instructions
Step 1: Prepare the Marinade
In a large mixing bowl, combine the onion rings, olive oil, vinegar or lemon juice, and all spices. Use your hands to massage the onions until they soften and begin to release their juices. This step is key—it tenderizes the onions and intensifies their flavor.
Step 2: Marinate the Meat
Add the meat chunks to the bowl and toss thoroughly to coat. Cover the bowl with plastic wrap or transfer to a zip-top bag. Refrigerate for at least 4 hours, preferably overnight. The longer it marinates, the richer the flavor.
Step 3: Assemble the Skewers
Remove the marinated meat from the fridge. Thread the meat onto metal skewers, alternating with slices of the marinated onion for extra flavor and presentation.
Step 4: Grill to Perfection
Preheat your grill to medium-high heat. Lightly oil the grates to prevent sticking. Place the skewers on the grill and cook for 12–15 minutes, turning every few minutes to ensure even charring. The meat should have beautiful grill marks and be just cooked through but still juicy.
Step 5: Rest and Serve
Let the skewers rest for about 5 minutes before serving to allow the juices to redistribute. Sprinkle with fresh herbs and serve with a squeeze of lemon.
Serving Suggestions
Traditional Style
- Warm lavash or flatbread
- Grilled vegetables (eggplant, peppers, zucchini)
- Pickled red onions for brightness and crunch
Modern Twist
- Serve over herbed couscous with a drizzle of pomegranate molasses
- Pair with a peppery arugula salad tossed with olive oil and lemon
- Plate with charred cherry tomatoes and fresh mint for color contrast
Flavor Variations & Recipe Swaps
- Protein Options: Swap lamb for beef sirloin, boneless chicken thighs, or pork shoulder
- Spice It Up: Add garam masala, ground turmeric, or a pinch of cayenne
- Citrus Kick: Replace vinegar with orange juice or lime juice for a zesty twist
- Herbal Touch: Stir in chopped fresh thyme, oregano, or rosemary into the marinade
- Vegetarian Option: Use halloumi cheese, portobello mushrooms, or paneer as a meat-free alternative
Wine & Drink Pairings
Pair this stylishly grilled Shashlik with drinks that complement its smoky richness and spice:
- Red Wines: Syrah, Zinfandel, or Cabernet Sauvignon
- White Wines: Oaked Chardonnay or dry Riesling
- Beer: Pale Ale, Amber Ale, or a crisp Lager
- Non-Alcoholic: Mint lemonade or iced hibiscus tea
Storage & Leftover Tips
- Refrigeration: Store any leftover Shashlik in an airtight container in the fridge for up to 3 days.
- Reheating: Reheat gently in a skillet or wrap in foil and warm in the oven at 300°F. Avoid the microwave to keep the meat juicy and tender.
- Repurpose Leftovers: Use chopped Shashlik in wraps, salads, or grain bowls for a flavorful next-day meal.
FAQs
Can I bake Shashlik in the oven?
Yes! Preheat the oven to 425°F (220°C). Line a baking tray with foil, place the skewers on a rack or tray, and roast for 20–25 minutes, flipping halfway.
Do I need to use metal skewers?
Metal skewers are ideal for even cooking and presentation, but you can use soaked wooden skewers in a pinch—just be sure to soak them in water for at least 30 minutes beforehand to prevent burning.
How long should I marinate the meat?
A minimum of 4 hours is recommended, but overnight yields the best flavor.
Can I freeze the marinated meat?
Yes! Marinate the meat and freeze it in a sealed bag. Thaw in the fridge overnight before grilling.
Is this dish spicy?
The chili flakes add mild heat. You can adjust the spice level up or down depending on your preference.
Final Thoughts & Call to Action
Stylishly Grilled Shashlik is a timeless recipe that brings rustic charm and gourmet flair to your table. It’s ideal for grill enthusiasts and food lovers who want something bold, beautiful, and full of flavor. With a marinade that does the heavy lifting and a presentation that wows, this recipe is guaranteed to impress.
If you enjoyed this Shashlik recipe, share it with your fellow foodies and let them in on the flavor! Don’t forget to subscribe to the blog for more chef-tested, flavor-packed recipes that are designed to inspire and satisfy.
Happy grilling and bon appétit!