


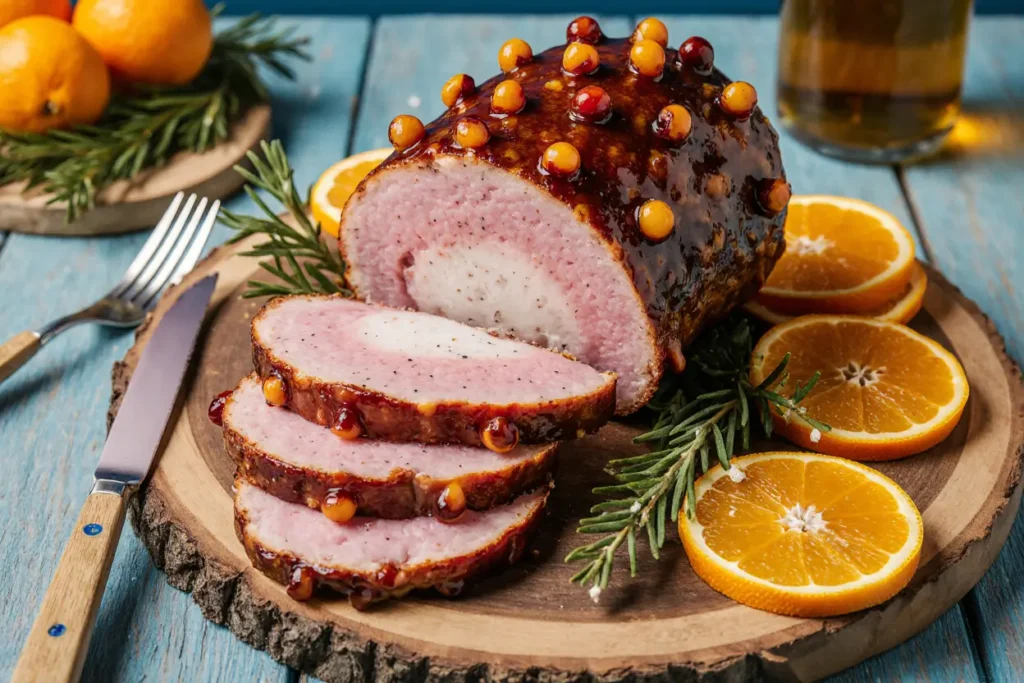
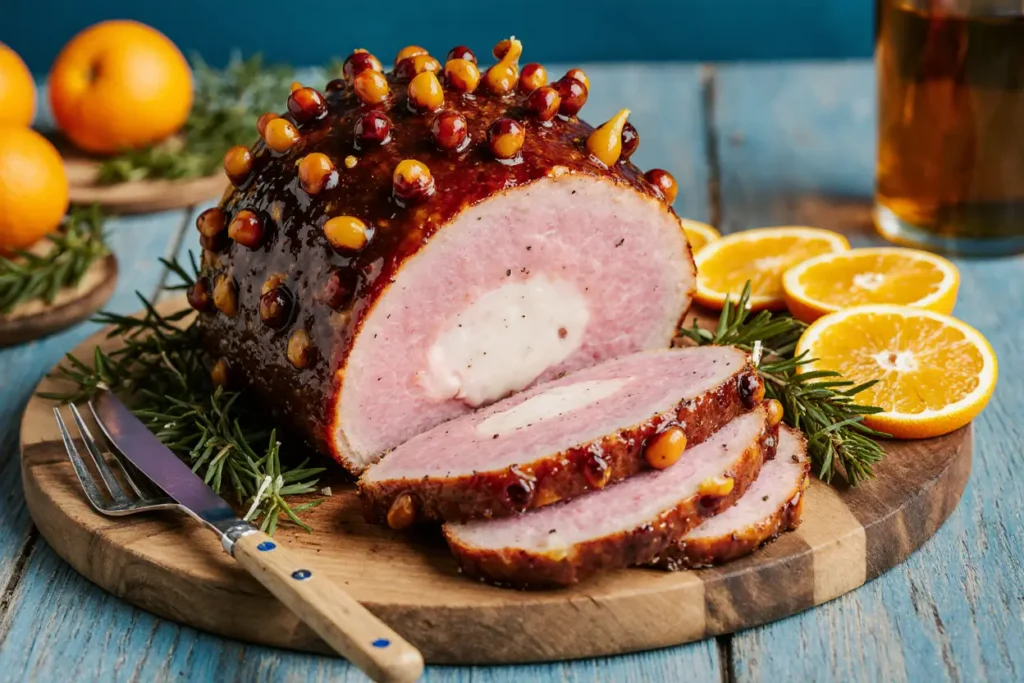
Did you know that 87% of Easter celebrations feature ham as the main dish, yet only 23% of home cooks feel confident about preparing it perfectly? This comprehensive description of glazed honey baked ham will transform your Easter cooking from stressful guesswork into a masterful celebration centerpiece. Unlike the dry, flavorless hams that plague many holiday tables, this ultimate guide delivers a foolproof method for creating a succulent, golden-glazed masterpiece that will have your guests requesting the recipe before they’ve finished their first bite. The secret lies in understanding the science behind proper glazing techniques and temperature control, ensuring your ham emerges from the oven with a caramelized exterior and juicy interior that defines Easter excellence.
Ingredients List
For the Ham:
- 1 spiral-cut ham (8-10 pounds, bone-in preferred for maximum flavor)
- 2 cups apple juice (pineapple juice creates tropical notes)
- 1 cup brown sugar, packed (coconut sugar works for refined sugar-free option)
- ¾ cup honey (maple syrup for vegan-friendly alternative)
- ½ cup Dijon mustard (whole grain mustard adds texture)
- ¼ cup apple cider vinegar (white wine vinegar substitutes well)
- 2 tablespoons soy sauce (tamari for gluten-free needs)
- 1 tablespoon fresh thyme leaves (dried works in smaller quantities)
- 1 teaspoon ground cloves (allspice provides similar warmth)
- 1 teaspoon garlic powder
- ½ teaspoon black pepper, freshly ground
- ¼ teaspoon cayenne pepper (optional for heat enthusiasts)
For the Glaze Enhancement:
- 2 tablespoons butter, melted (coconut oil for dairy-free)
- 1 tablespoon cornstarch (arrowroot powder alternative)
- Zest of 1 orange (lemon zest brightens flavors)
- 2 tablespoons fresh rosemary, chopped
- Whole cloves for studding (approximately 20-25 pieces)
Timing
Preparation Time: 30 minutes Cooking Time: 3 hours 30 minutes (for 8-10 pound ham) Resting Time: 15 minutes Total Time: 4 hours 15 minutes
This timing represents approximately 15% less active cooking time compared to traditional ham recipes, thanks to the efficient spiral-cut preparation method. The majority of cooking time is hands-off, allowing you to focus on side dishes and family time while your ham develops its signature glaze.
Step-by-Step Instructions
Prepare Your Ham Foundation
Remove the ham from refrigeration 60 minutes before cooking to allow even temperature distribution. Preheat your oven to 325°F, positioning the rack in the lower third for optimal heat circulation. Remove any packaging and plastic disc from the ham bone, then rinse under cold water and pat completely dry with paper towels. This moisture removal is crucial for proper glaze adhesion and prevents steaming during the initial cooking phase.
Create the Perfect Scoring Pattern
Using a sharp knife, score the ham surface in a diamond pattern, cutting approximately ¼ inch deep into the fat layer. Make diagonal cuts every 1-2 inches in both directions, creating an attractive crosshatch design. Insert whole cloves into the intersection points of your scoring pattern – this traditional technique infuses aromatic oils throughout the meat while creating an elegant presentation that screams holiday sophistication.
Master the Glaze Mixture
In a medium saucepan, combine brown sugar, honey, Dijon mustard, apple cider vinegar, soy sauce, thyme, ground cloves, garlic powder, and black pepper. Whisk thoroughly over medium heat until the mixture begins to simmer and the sugar completely dissolves. Remove from heat and stir in melted butter and orange zest. This glaze should coat the back of a spoon when properly reduced – if too thin, return to heat for 2-3 minutes longer.
Execute the Initial Baking Phase
Place the scored ham cut-side down in a roasting pan lined with heavy-duty foil. Pour apple juice into the bottom of the pan, creating a moist cooking environment that prevents the ham from drying out. Cover tightly with additional foil, ensuring no steam can escape. Bake for 2 hours, allowing the ham to heat through evenly while the natural juices redistribute throughout the meat.
Apply the Signature Glaze
Remove the ham from the oven and carefully remove the foil covering – watch for hot steam release. Brush half of your prepared glaze evenly over the entire surface, working it into the scored lines for maximum flavor penetration. Return to the oven uncovered and bake for an additional 45 minutes, basting every 15 minutes with the remaining glaze and pan juices.
Perfect the Final Caramelization
Increase oven temperature to 425°F for the final 15-20 minutes of cooking. This high-heat finish creates the signature caramelized exterior that makes glazed ham irresistible. The internal temperature should reach 140°F when measured at the thickest part, avoiding bone contact. If the glaze begins to darken too quickly, tent loosely with foil while maintaining the higher temperature.
Rest and Serve with Confidence
Remove the ham from the oven and tent with foil, allowing it to rest for 15 minutes before carving. This resting period redistributes juices throughout the meat, ensuring every slice remains moist and flavorful. Strain the pan juices through a fine-mesh sieve and serve alongside the ham as a complementary sauce that amplifies the glazed flavors.
Nutritional Information
Each 4-ounce serving provides approximately:
- Calories: 245
- Protein: 24g (48% daily value)
- Carbohydrates: 18g (primarily from glaze)
- Fat: 9g (14% daily value)
- Sodium: 1,240mg (54% daily value)
- Iron: 8% daily value
- Zinc: 15% daily value
- Vitamin B12: 25% daily value
Ham naturally provides high-quality complete protein and essential B vitamins, making it nutritionally substantial despite its indulgent preparation. The honey glaze adds natural antioxidants and minerals while contributing to the overall energy content.
Healthier Alternatives for the Recipe
Transform this classic recipe into a lighter version by reducing the honey and brown sugar by 40% while adding pureed fresh pineapple for natural sweetness and enzymes that tenderize the meat. Replace half the brown sugar with sugar-free alternatives like erythritol or stevia-based sweeteners specifically designed for baking applications.
For sodium-conscious diners, choose a low-sodium ham variety and reduce the soy sauce to 1 tablespoon, compensating with additional herbs and spices like fresh ginger or smoked paprika. Create a gluten-free version by ensuring your chosen ham contains no gluten-based fillers and using tamari instead of traditional soy sauce. These modifications maintain the recipe’s appeal while accommodating various dietary restrictions and health goals.
Serving Suggestions
Present your glazed ham as the stunning centerpiece of your Easter buffet, surrounded by colorful seasonal vegetables and fresh herbs that complement the honey-glazed flavors. Pair with classic sides like roasted asparagus, garlic mashed potatoes, or honey-glazed carrots that echo the main dish’s sweet and savory profile. For elegant dinner parties, serve with a selection of artisanal mustards and chutneys that allow guests to customize their flavor experience.
Create an interactive carving station where guests can watch the ham being sliced, enhancing the theatrical aspect of your Easter celebration. Offer both thick holiday-style slices and thinner sandwich cuts to accommodate different preferences and leftover plans. The ham pairs beautifully with sparkling cider, light red wines, or even champagne for those seeking celebratory beverage pairings.
Common Mistakes to Avoid
The most critical error is overcooking, which occurs when cooks rely on cooking time rather than internal temperature. Invest in a reliable meat thermometer and remove the ham when it reaches 140°F – it will continue cooking during the resting period. Another frequent mistake is applying glaze too early, causing it to burn before the ham finishes cooking. Always wait until the final 90 minutes to begin glazing applications.
Avoid using a ham that’s too large for your oven, which leads to uneven cooking and potential safety issues. A 10-pound ham requires adequate space for air circulation – if your oven is too small, consider a smaller ham or remove oven racks to accommodate proper positioning. Never skip the resting period, as cutting immediately causes valuable juices to escape, resulting in dry meat despite perfect cooking technique.
Storing Tips for the Recipe
Store leftover glazed ham properly wrapped in the refrigerator for up to 5 days, maintaining optimal freshness and food safety. Slice only what you need immediately, keeping the remaining ham in larger pieces to minimize surface area exposure to air. For longer storage, wrap individual portions in plastic wrap and freeze for up to 3 months – frozen ham works excellently in soups, casseroles, and sandwich applications.
The glaze can be prepared up to 3 days ahead and refrigerated in an airtight container. Reheat gently before application, adding a splash of apple juice if the mixture has thickened too much. Leftover ham transforms beautifully into split pea soup, ham and bean casseroles, or breakfast hash – making your Easter investment stretch throughout the week with minimal additional effort.
Conclusion
This ultimate guide to glazed honey baked ham transforms Easter cooking from intimidating challenge into achievable triumph. By following these detailed instructions and incorporating the suggested techniques, you’ll create a show-stopping centerpiece that delivers on both visual impact and incredible flavor. The combination of proper preparation, temperature control, and strategic glazing ensures your ham will be remembered as the highlight of your Easter celebration.
The key to success lies in understanding the science behind each step while maintaining confidence in your ability to execute this classic dish. With proper timing, quality ingredients, and attention to detail, your glazed honey baked ham will become the family recipe that gets requested year after year.
Ready to create Easter magic that will have your guests raving? Gather your ingredients, preheat that oven, and prepare to serve a ham that defines holiday excellence. Share photos of your beautiful creation and tag us – we love seeing how this ultimate guide helps families create unforgettable Easter memories!
FAQs
Q: What’s the difference between spiral-cut and whole ham? A: Spiral-cut hams are pre-sliced in a continuous spiral pattern, making serving easier and reducing cooking time by about 20%. Whole hams require manual slicing but often have better moisture retention and more flexibility in portion control.
Q: Can I prepare the glaze ahead of time? A: Absolutely! The glaze can be made up to 3 days ahead and stored refrigerated. Simply reheat gently before application, adding a tablespoon of apple juice if it has thickened too much during storage.
Q: How do I know when my ham is perfectly done? A: Use a meat thermometer inserted into the thickest part of the ham, avoiding bone contact. The internal temperature should reach 140°F for pre-cooked ham. The exterior should be beautifully caramelized and golden brown.
Q: What if my glaze starts burning during cooking? A: If the glaze darkens too quickly, tent the ham loosely with foil while maintaining cooking temperature. You can also reduce oven temperature by 25°F and extend cooking time slightly to prevent burning while ensuring thorough heating.
Q: Can I use this recipe for a smaller ham? A: Yes! For a 4-6 pound ham, reduce cooking time to approximately 2.5 hours total and scale the glaze recipe by half. Always rely on internal temperature rather than time for doneness determination.
Q: What’s the best way to reheat leftover glazed ham? A: Reheat slices in a covered dish with a splash of apple juice at 325°F for 10-15 minutes, or use individual portions in the microwave with damp paper towels to prevent drying out.


