


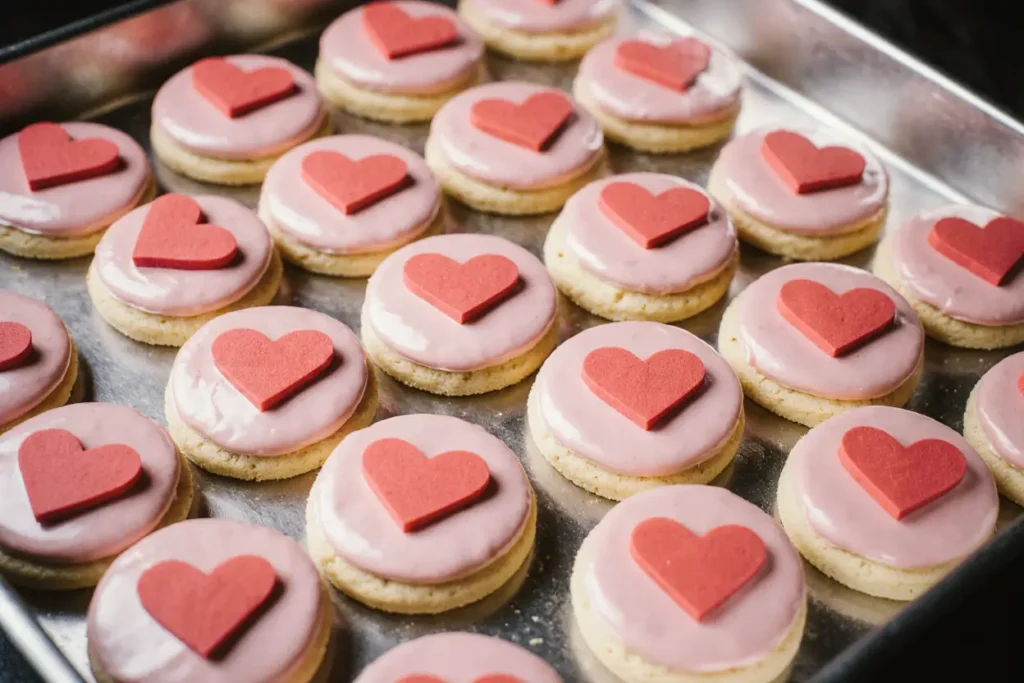
Did you know that 58% of couples believe homemade gifts are more meaningful than store-bought ones, and that decorated sugar cookies rank as the third most popular Valentine’s Day treat after chocolate and flowers? Valentine heart decoration sugar cookies represent the perfect canvas for expressing love through edible artistry, combining the classic comfort of buttery sugar cookies with the creative joy of decorative icing techniques. This recipe description will guide you through creating stunning heart-shaped cookies that are as beautiful as they are delicious, featuring tender, vanilla-scented dough that holds crisp edges and smooth surfaces ideal for decorating. These cookies deliver the perfect balance of sweet vanilla flavor with a satisfying snap that makes them ideal for both eating and gifting. The combination of traditional sugar cookie techniques with modern decorating methods creates treats that capture hearts and create lasting memories for Valentine’s Day and beyond.
Ingredients List
For the Sugar Cookie Dough:
- 3 cups all-purpose flour
- 1 teaspoon baking powder
- 1/2 teaspoon salt
- 1 cup unsalted butter, softened
- 1 cup granulated sugar
- 1 large egg
- 1 large egg yolk
- 2 teaspoons pure vanilla extract
- 1 tablespoon whole milk
For Royal Icing:
- 4 cups powdered sugar, sifted
- 3 large egg whites (or 3 tablespoons meringue powder + 1/4 cup water)
- 1 teaspoon vanilla extract
- 1/4 teaspoon almond extract (optional)
For Decorating:
- Red food coloring (gel preferred)
- Pink food coloring (gel preferred)
- White food coloring (for brightening)
- Edible glitter or sanding sugar
- Small heart-shaped sprinkles
- Edible pearls or dragées
- Red and pink decorating sugars
Essential Tools:
- Heart-shaped cookie cutters (various sizes)
- Piping bags or squeeze bottles
- Round decorating tips (#2, #3, #4)
- Toothpicks for detail work
Substitution Notes: Butter can be replaced with vegetable shortening for firmer cookies. For egg-free royal icing, use meringue powder. Gluten-free flour blend works well as a 1:1 substitute.
Timing
Total Time: 4 hours 30 minutes Prep Time: 30 minutes Chilling Time: 2 hours Baking Time: 45 minutes (for 3 dozen cookies) Decorating Time: 1 hour 15 minutes
This recipe requires patience for optimal results, with chilling time being crucial for clean edges and shape retention. The decorating process is meditative and rewarding, taking approximately 60% longer than basic cookies but creating professional-quality results that last for weeks.
Step-by-Step Instructions
Step 1: Create the Cookie Dough Foundation
In a medium bowl, whisk together flour, baking powder, and salt. In a large bowl, cream the softened butter and granulated sugar with an electric mixer on medium speed for 3-4 minutes until light and fluffy. This creaming process incorporates air for tender cookies.
Step 2: Add Wet Ingredients
Beat in the whole egg, egg yolk, vanilla extract, and milk until fully combined. The extra egg yolk creates richness and helps bind the dough, while the milk adds just enough moisture for easy rolling.
Step 3: Combine Wet and Dry Ingredients
Gradually add the flour mixture to the butter mixture, mixing on low speed until just combined. Avoid overmixing, which can lead to tough cookies. The dough should be smooth and slightly firm.
Step 4: Chill the Dough
Divide the dough in half and wrap each portion in plastic wrap. Flatten into disks and refrigerate for at least 2 hours or overnight. Proper chilling prevents spreading and ensures clean, sharp edges when cut.
Step 5: Prepare for Rolling
Remove dough from refrigerator 10 minutes before rolling. Preheat oven to 350°F (175°C). Line baking sheets with parchment paper. Lightly flour your work surface and rolling pin.
Step 6: Roll and Cut the Cookies
Roll dough to 1/4-inch thickness, working with one disk at a time. Use heart-shaped cutters to create cookies, re-rolling scraps as needed. Place cookies 1 inch apart on prepared baking sheets.
Step 7: Bake to Perfection
Bake for 10-12 minutes until edges are set but centers still look slightly underdone. The cookies should not brown significantly. Cool on baking sheets for 5 minutes before transferring to wire racks.
Step 8: Prepare Royal Icing
In a large bowl, whisk together powdered sugar, egg whites (or meringue powder mixture), vanilla, and almond extract. Beat with an electric mixer on high speed for 5-7 minutes until stiff peaks form. The icing should be bright white and glossy.
Step 9: Create Colored Icing
Divide royal icing into separate bowls for each color desired. Add gel food coloring gradually until you achieve the perfect shades of red, pink, and white. Gel coloring maintains proper consistency better than liquid coloring.
Step 10: Adjust Icing Consistency
For outlining, use thick consistency icing (holds its shape). For flooding, thin the icing with water, one teaspoon at a time, until it flows smoothly but isn’t too thin. The “ribbon test” – icing should disappear into itself within 10 seconds when drizzled.
Step 11: Outline the Hearts
Using thick icing in piping bags fitted with round tips, carefully outline each heart cookie. Start at the top center and work your way around the shape. Allow outlines to set for 15-20 minutes before flooding.
Step 12: Flood and Decorate
Using thinned icing, fill in the outlined areas completely. Use a toothpick to guide icing into corners and eliminate air bubbles. While icing is still wet, add sprinkles, edible glitter, or create marbled effects with contrasting colors.
Step 13: Final Decorative Touches
Once base icing is set (about 1 hour), add detailed decorations like dots, lines, or messages using thick icing. Attach edible pearls or dragées while icing is still slightly wet for best adhesion.
Nutritional Information
Per decorated cookie (makes 36):
- Calories: 145
- Protein: 2g
- Carbohydrates: 28g
- Fat: 6g
- Fiber: 0g
- Sodium: 45mg
- Sugar: 22g
These cookies provide quick energy from carbohydrates and moderate calories per serving. The royal icing adds minimal nutritional value but creates the artistic canvas that makes these cookies special occasion treats rather than everyday snacks.
Healthier Alternatives for the Recipe
Reduce Sugar: Replace 1/4 cup of granulated sugar with unsweetened applesauce to reduce calories by approximately 15% while maintaining moisture.
Increase Fiber: Substitute 1/2 cup all-purpose flour with white whole wheat flour for added fiber without significantly changing taste or texture.
Lower Fat Option: Use light butter or a butter substitute to reduce fat content by 25% while maintaining the essential creamy texture needed for decorating.
Natural Sweeteners: Replace powdered sugar in royal icing with powdered coconut sugar for a lower glycemic index option, though color may be slightly different.
Gluten-Free Version: Use a 1:1 gluten-free flour blend specifically designed for baking to accommodate gluten sensitivities without compromising cookie structure.
Serving Suggestions
These artistic cookies are perfect centerpieces for Valentine’s Day celebrations, romantic dinners, or anniversary parties. Arrange them on elegant serving platters with fresh roses or romantic lighting for maximum impact.
For gift-giving, package individual cookies in clear cellophane bags tied with satin ribbons, or create beautiful cookie bouquets using wooden sticks and floral foam. They make thoughtful teacher gifts, friend surprises, or romantic gestures.
Consider serving them alongside champagne, coffee, or tea for an elegant dessert course. They also work beautifully as edible place cards for Valentine’s dinner parties when personalized with names or messages.
Common Mistakes to Avoid
Skipping the Chilling Step: Warm dough spreads during baking, resulting in distorted heart shapes and blurred edges. Always chill dough for at least 2 hours for clean, professional results.
Using Liquid Food Coloring: Liquid coloring can thin royal icing too much, making it difficult to control. Gel food coloring provides vibrant colors without compromising consistency.
Decorating Too Soon: Rushing the decorating process leads to colors bleeding into each other. Allow each layer to set completely before adding additional decorations.
Overworking the Dough: Excessive mixing or re-rolling creates tough cookies. Work quickly and handle dough minimally for tender results.
Incorrect Icing Consistency: Too thick icing won’t flow smoothly, while too thin icing runs off the cookie. Test consistency before decorating entire batches.
Storing Tips for the Recipe
Undecorated Cookies: Store baked cookies in airtight containers at room temperature for up to 1 week, or freeze for up to 3 months. Layer between parchment paper to prevent sticking.
Decorated Cookies: Once royal icing is completely set (24 hours), store decorated cookies in single layers in airtight containers for up to 2 weeks. Avoid stacking to prevent damage.
Dough Storage: Cookie dough can be refrigerated for up to 3 days or frozen for up to 3 months. Thaw frozen dough in refrigerator overnight before rolling.
Royal Icing Storage: Cover royal icing with damp towels and plastic wrap to prevent crusting. It can be stored in refrigerator for up to 1 week and re-whipped before use.
Conclusion

Valentine heart decoration sugar cookies represent the perfect fusion of culinary skill and artistic expression, creating edible masterpieces that speak the language of love through every carefully crafted detail. These beautiful treats transform simple ingredients into stunning works of art that capture hearts and create lasting memories for Valentine’s Day and special occasions throughout the year. The combination of buttery cookie perfection and decorative artistry makes these cookies as rewarding to create as they are delightful to receive.
Ready to create your own edible love letters? This recipe provides the foundation for endless creativity, allowing you to express your feelings through beautiful, delicious art. Whether you’re surprising a loved one, hosting a Valentine’s party, or simply enjoying the meditative process of cookie decorating, these heart-shaped treasures will bring joy to both the maker and the recipient. Start your sweet Valentine tradition today and discover the magic of homemade love!
FAQs
Q: Can I make these cookies without royal icing? A: Yes, you can use buttercream frosting, but royal icing provides the smooth, professional finish and durability that makes these cookies special. Royal icing also hardens completely, making decorated cookies easier to handle and gift.
Q: How far in advance can I make decorated cookies? A: Decorated cookies can be made up to 2 weeks in advance when stored properly. The royal icing actually improves in texture over the first few days, becoming smoother and more polished.
Q: What’s the best way to achieve smooth royal icing? A: Sift powdered sugar before mixing, beat on high speed for adequate time, and use the proper consistency for each technique. The “ribbon test” helps determine if flooding consistency is correct.
Q: Can I use cookie cutters other than hearts? A: Absolutely! This sugar cookie recipe works with any shape. Adjust decorating techniques based on the shape’s complexity, but the basic principles remain the same.
Q: How do I fix mistakes in royal icing decoration? A: If the icing is still wet, use a toothpick to gently guide it back into place. For set icing, you can carefully scrape it off with a knife and re-decorate, though this may affect the cookie’s appearance.
Q: Why is my royal icing not hardening properly? A: High humidity can prevent royal icing from setting properly. Ensure your kitchen isn’t too humid, and consider using a dehumidifier or fan to help the icing set faster and more completely.


