


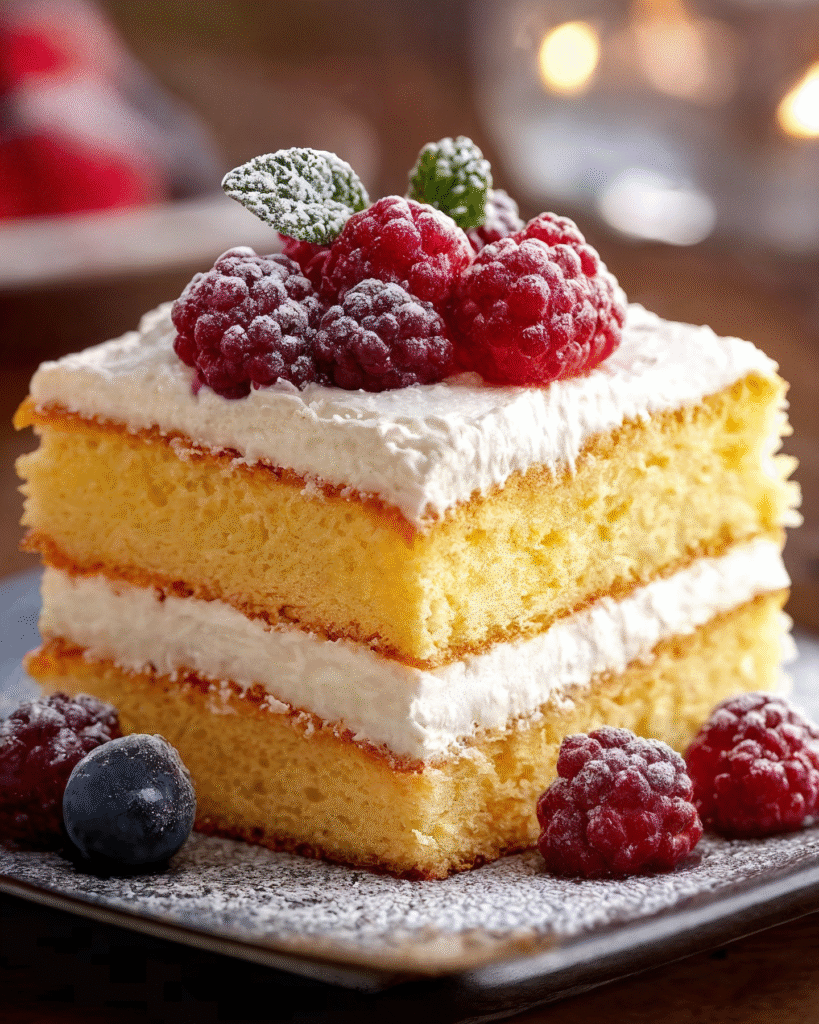
If you’re searching for a dessert that feels as light as air but still delivers that satisfying sweetness we all crave, this Vanilla Sponge Cake with Whipped Cream and Berries is the answer. With its fluffy sponge layers, silky whipped cream, and bursts of juicy fresh berries, this cake is a celebration of simplicity and flavor. Whether you’re hosting a brunch, baby shower, or afternoon tea, or just want to treat yourself to a delicate dessert, this recipe is a guaranteed crowd-pleaser.
In this blog post, I’ll guide you through every step of making this gorgeous cake, provide helpful tips for success, offer storage suggestions, and even suggest some delightful pairings. Let’s turn basic ingredients into a showstopper!
Why This Recipe Is So Special
This vanilla sponge cake recipe is a classic for good reason:
- Feather-light texture from whipped eggs and minimal fat.
- Simple ingredients that come together quickly with the right technique.
- Customizable—swap in your favorite fruits or flavor the whipped cream.
- Visually stunning with vibrant berries and billowy cream.
- Perfect for warm weather when you want a dessert that isn’t heavy.
It’s the kind of cake that tastes like sunshine on a plate—perfect for spring and summer gatherings or even a light finish to a cozy dinner.
Ingredients Breakdown
For the Vanilla Sponge Cake:
- 1 cup all-purpose flour
- 1 tsp baking powder
- Pinch of salt
- 4 large eggs, separated
- ¾ cup sugar (divided)
- ¼ cup milk
- 2 tbsp unsalted butter, melted
- 1 tsp vanilla extract
For the Whipped Cream:
- 1 cup heavy cream
- 2 tbsp powdered sugar
- 1 tsp vanilla extract
For the Berry Topping:
- 1 cup mixed fresh berries
(Strawberries, blueberries, raspberries work beautifully)
Kitchen Equipment Needed
To make this elegant dessert, gather the following:
- 8-inch round cake pan
- Electric mixer (hand or stand)
- Mixing bowls (at least 2 large)
- Sifter or fine mesh sieve
- Rubber spatula
- Whisk
- Cooling rack
- Offset spatula (for spreading cream)
- Serrated knife (if slicing cake into layers)
Step-by-Step Instructions
Step 1: Prep the Pan and Oven
Preheat your oven to 350°F (175°C). Grease and flour an 8-inch round cake pan, or line with parchment for easier release.
Step 2: Sift Dry Ingredients
In a bowl, sift together the flour, baking powder, and salt. This helps ensure a light, even crumb.
Step 3: Beat the Egg Yolks
In another bowl, beat the egg yolks with ½ cup sugar until the mixture becomes pale, thick, and fluffy—this should take about 3–5 minutes.
Then, stir in the milk, melted butter, and vanilla extract.
Step 4: Beat Egg Whites
In a separate, clean bowl, beat the egg whites until soft peaks form. Gradually add the remaining ¼ cup sugar, continuing to beat until you get stiff peaks that hold their shape.
📝 Tip: Make sure your beaters and bowl are completely grease-free when whipping egg whites—any fat can prevent them from forming peaks.
Step 5: Combine and Fold
Gently fold the flour mixture into the egg yolk mixture in batches, being careful not to deflate the batter.
Then fold in the stiff egg whites in three parts. Use slow, deliberate strokes with a rubber spatula, working from the bottom of the bowl to the top to keep the batter airy.
Step 6: Bake
Pour the batter into the prepared cake pan and smooth the top. Bake for 25–30 minutes, or until the top is golden and a toothpick inserted in the center comes out clean.
Allow the cake to cool in the pan for 10 minutes, then turn it out onto a cooling rack to cool completely.
Step 7: Make Whipped Cream
In a chilled bowl, whip the heavy cream, powdered sugar, and vanilla extract until stiff peaks form. Keep refrigerated until ready to use.
Step 8: Assemble and Decorate
Once the cake is completely cooled, you can either leave it whole or slice it horizontally into two layers using a serrated knife.
Layer the bottom half with whipped cream and fresh berries, then place the top half on and cover with more cream and additional berries.
🎨 Decoration Ideas:
- Dust the top with powdered sugar for a soft, snowy effect.
- Add fresh mint leaves for a burst of color.
- Use only strawberries for a bold red-and-white aesthetic, or go for a rainbow of berries.
- Add edible flowers for a garden party look.
Make-Ahead & Storage Tips
- Refrigerator: Store any leftover cake in an airtight container in the refrigerator for up to 3 days. The whipped cream may start to lose its shape after the first day, but the flavor will still be delightful.
- Freezing: You can freeze the plain sponge cake (without cream or berries) tightly wrapped for up to 2 months. Thaw overnight in the refrigerator and decorate just before serving.
Optional Variations & Substitutions
- Lemon zest: Add zest of 1 lemon to the yolk mixture for a bright citrusy note.
- Coconut cream: Substitute whipped cream with coconut whipped cream for a dairy-free option.
- Chocolate sponge: Replace ¼ cup of flour with unsweetened cocoa powder for a light chocolate variation.
- Jam layer: Spread a thin layer of raspberry or strawberry jam between the cake layers for extra flavor.
- Boozy berries: Soak your berries in a splash of Grand Marnier or limoncello for an adult twist.
Serving Suggestions & Pairings
This cake pairs beautifully with:
- A cup of Earl Grey or chamomile tea
- A glass of sparkling wine or rosé
- A berry coulis drizzle on the plate for restaurant-style plating
- Lemon sorbet as a refreshing side scoop
Frequently Asked Questions
Q: Can I use frozen berries?
A: Fresh is best for texture and presentation, but if using frozen, thaw and drain well before layering to avoid excess moisture.
Q: What’s the difference between a sponge cake and a regular cake?
A: Sponge cake relies on whipped eggs for volume, containing little to no fat like oil or butter, resulting in a lighter, airier texture.
Q: How do I know if my sponge cake is done?
A: The cake will be golden, slightly springy to the touch, and a toothpick inserted in the center will come out clean.
Q: Can I double the recipe for a larger crowd?
A: Yes! Simply double the ingredients and bake in two 9-inch round pans. Watch your baking time—start checking around 25 minutes.
Q: Is it okay to make this cake a day in advance?
A: Absolutely. The sponge holds up well. Assemble the cake the day of serving for the freshest whipped cream texture.
Final Thoughts
This Vanilla Sponge Cake with Whipped Cream and Berries is proof that the simplest ingredients can yield the most elegant results. With its cloud-like layers, natural sweetness, and vibrant fruit topping, it’s a perfect dessert for warm-weather occasions or whenever you need something light, pretty, and pleasing.
If you try this recipe, I’d love to hear how it turned out for you! 📸 Don’t forget to snap a photo of your beautiful creation and tag it on social media.
🌟 Share this recipe with your friends and family, and be sure to subscribe to the blog for more delightful desserts and baking inspiration delivered straight to your inbox.
Happy baking! 🍰🍓💛