Strawberry tartlets are a timeless dessert that perfectly balances elegance and comfort. With their crisp shortcrust pastry, silky vanilla pastry cream, and fresh, juicy strawberries, these miniature tarts are as beautiful as they are delicious. Whether served at a family gathering, afternoon tea, or a special celebration, strawberry tartlets always manage to impress without feeling heavy or overly complicated.
This recipe focuses on classic techniques that form the foundation of many French and European pastries. While the ingredient list is simple, attention to detail is what transforms these components into a refined dessert. From properly blind baking the pastry shells to achieving a smooth, lump-free pastry cream, each step contributes to the final result.
In this guide, you’ll not only learn how to make strawberry tartlets from start to finish, but also understand the “why” behind each stage. This knowledge will help you troubleshoot problems, adapt the recipe to your taste, and gain confidence in pastry-making overall.
Ingredients
For the Tartlet Shells
- Shortcrust pastry (homemade or store-bought)
For the Pastry Cream
- 300 ml milk
- 2 egg yolks
- 60 g sugar
- 30 g cornflour
- 1 teaspoon vanilla extract
For the Topping
- 250 g fresh strawberries
Equipment Needed
- Tartlet tins or molds
- Rolling pin
- Baking paper
- Baking beans or dry rice (for blind baking)
- Saucepan
- Whisk
- Mixing bowls
- Fine sieve (optional but helpful)
- Cooling rack


Step-by-Step Instructions
1. Preheating the Oven
Begin by preheating your oven to 180°C (350°F). This step is crucial because pastry requires a fully heated oven to bake evenly. An oven that hasn’t reached the correct temperature can result in soggy or underbaked tart shells, which will not hold the filling properly.
While the oven is heating, you can prepare your tartlet tins and pastry dough.
2. Preparing the Shortcrust Pastry
If you’re using homemade shortcrust pastry, make sure it has rested in the refrigerator for at least 30 minutes before rolling it out. Resting allows the gluten in the flour to relax, which prevents the pastry from shrinking during baking.
Lightly flour your work surface and roll out the dough to a thickness of about 3 mm. Carefully cut circles slightly larger than your tartlet tins. Gently press the pastry into the molds, making sure it fits snugly into the corners without stretching. Trim off any excess dough from the edges.
Place the lined tartlet tins into the refrigerator for 10–15 minutes. Chilling the pastry again helps it maintain its shape during baking.
3. Blind Baking the Tartlet Shells
Blind baking ensures that the tartlet shells are fully cooked and crisp before adding the filling.
Line each pastry shell with baking paper and fill it with baking beans or dry rice. This weight prevents the pastry from puffing up or shrinking.
Bake the tartlet shells in the preheated oven for 15 minutes. After this time, remove the baking paper and weights, then return the shells to the oven for an additional 5 minutes if needed, until the pastry looks lightly golden and dry.
Once baked, remove the tartlet shells from the oven and allow them to cool completely on a wire rack.
Making the Pastry Cream
Pastry cream, also known as crème pâtissière, is a thick custard that forms the creamy heart of these tartlets. When done correctly, it should be smooth, glossy, and rich with vanilla flavor.
4. Preparing the Custard Base
In a mixing bowl, whisk together the egg yolks and sugar until the mixture becomes pale and slightly thickened. This step dissolves the sugar and incorporates air into the yolks, contributing to a smoother texture.
Add the cornflour to the egg mixture and whisk until fully combined and free of lumps.
5. Heating the Milk
Pour the milk into a saucepan and gently heat it over medium heat. Do not allow the milk to boil; instead, heat it until it is just steaming. Remove it from the heat as soon as small bubbles appear around the edges.
Gradually pour the warm milk into the egg mixture while whisking continuously. This process, called tempering, prevents the eggs from scrambling.
6. Cooking the Pastry Cream
Return the combined mixture to the saucepan and place it over medium heat. Whisk constantly, making sure to reach the corners of the pan where the custard can thicken faster.
As the mixture heats, it will gradually thicken. Once it reaches a custard-like consistency, continue cooking for 1–2 minutes to remove any starchy taste from the cornflour.
Remove the saucepan from the heat and stir in the vanilla extract.
If desired, pass the pastry cream through a fine sieve to ensure an extra-smooth texture.
7. Cooling the Pastry Cream
Transfer the pastry cream to a clean bowl and cover the surface directly with plastic wrap. This prevents a skin from forming on top.
Allow the cream to cool to room temperature, then refrigerate until completely chilled.
Assembling the Strawberry Tartlets
8. Filling the Tartlet Shells
Once the tartlet shells and pastry cream are fully cooled, spoon or pipe the pastry cream into each shell. Fill them generously, smoothing the surface with the back of a spoon or an offset spatula.
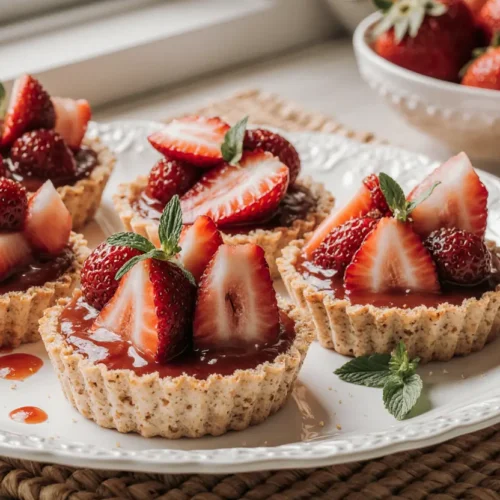
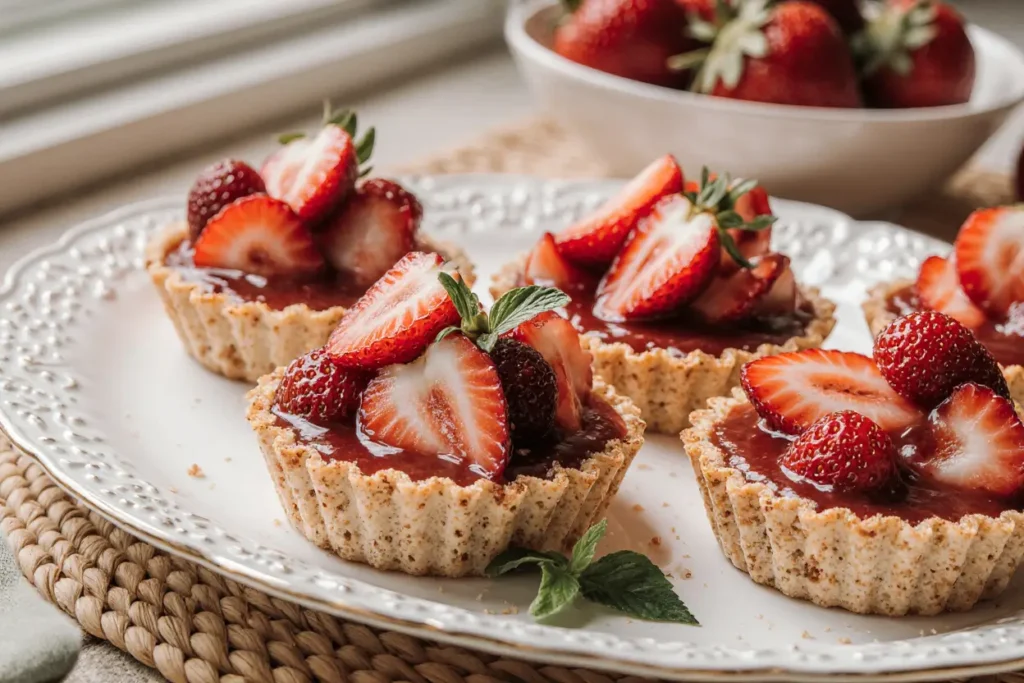
9. Preparing the StrawberriesWash the strawberries thoroughly and pat them dry. Remove the green tops and slice the strawberries as desired. You can halve them, slice them thinly, or leave smaller strawberries whole for a more rustic look.
10. Decorating the Tartlets
Arrange the strawberries on top of the pastry cream in a decorative pattern. You can create a spiral design, a fan shape, or a simple layered look depending on your preference.
Once assembled, place the tartlets in the refrigerator to chill for at least 30 minutes. Chilling allows the flavors to meld and helps the pastry cream set firmly.
Serving Suggestions
Strawberry tartlets are best served chilled but not ice-cold. Remove them from the refrigerator about 10 minutes before serving for the best flavor and texture.
These tartlets pair beautifully with:
- A dusting of powdered sugar
- A light apricot glaze for shine
- Fresh mint leaves
- Whipped cream on the side
Tips for Perfect Strawberry Tartlets
- Use fresh, ripe strawberries for the best flavor and appearance.
- Do not overcook the pastry cream, as it can become grainy.
- Cool all components completely before assembling to prevent soggy pastry.
- Assemble close to serving time for the freshest look and texture.
Variations and Adaptations
While strawberry tartlets are classic, this recipe can easily be adapted:
- Replace strawberries with raspberries, blueberries, or peaches.
- Add lemon zest to the pastry cream for a citrus note.
- Brush the fruit with warmed jam for a professional bakery finish.
Conclusion
Strawberry tartlets are a wonderful example of how simple ingredients can create an elegant dessert when handled with care. The contrast between crisp pastry, smooth vanilla cream, and fresh fruit makes each bite satisfying and balanced.
By following these detailed steps and understanding the techniques involved, you can confidently prepare strawberry tartlets that look beautiful and taste exceptional. Whether you’re baking for guests or treating yourself, this recipe is one you’ll return to again and again.